April 26

Lab 14 (04/25/19): Revising

Print Friendly, PDF & Email

Objective:

The objective of this lab was to be able to review the information. This lab was also useful to be able to collect all the information into one spread so all the information can be compared to each other. This lab was also used to have one more review over abstracts and posters.

Procedure:

In order to be able to do this we had to use the information that we had previously recorded and add that to a group excel sheet. In order to revise the documents that we had to submit we had to open them and revise them as a group in order to be able to make as many correction as we could.

Conclusion:

In conclusion this lab was useful to put all of our metadata in one place so that it may be easily accessible. Editing our abstract and poster, was useful because it ensures that our information is reliable and well written.

Future Observations:

Having this lab to revise and edit our information is helpful because it remind us that revision is something that needs to be done constantly. Therefore, this lab is something that will keep us in the habit of revising and editing constantly


Metadata

Name: Jessica Mann

Section: 25

Group: 1

Soil ID: JGM25_1Sp19

GPS location: -97.1200, 31.5500

Tree species: unknown

BDH: 11.43 cm

pH: 7

Soil texture: silt

Extraction method: Chelex

DNA concentration: 78.0

Volume ul: 100

PCR: –

Soil Label: JGM25S19


Abstract and Title


Soil eDNA and Ciliate Culture DNA Extraction and PCR Amplification

Abstract

Not much research has been done on the topic of soil ciliates. Therefore, a thorough research experiment on the study of soil ciliates’ DNA is necessary. This experiment was conducted to determine the diversity of ciliates from soil samples collected from the rhizosphere of different trees on the Baylor campus. We collected the metadata of the samples, such as tree and soil type, location, soil pH and percent water content. The silica bead eDNA extraction protocol and the Chelex DNA extraction from Ciliate culture were run on separate samples. We then ran gel electrophoresis, quantified the extracted DNA using Nanodrop and attempted to amplify the 18sV4 region using PCR. Gel electrophoresis yielded DNA bands for both extraction methods, however the gel run from the PCR reaction failed to produce results for either sample. Nanodrop showed that there were higher DNA concentrations for the silica bead extraction sample compared to the Chelex extraction samples. Due to the negative results for PCR amplification, DNA sequencing will not be performed on these samples.

April 19

Lab 13 (4/18/19): Qiime2

Print Friendly, PDF & Email

Objective:

The objective of todays lab was to be able to use Qiime2 better and become more familiar with the program so that we could use it in the future when more experiments will be conducted.

Purpose:

The purpose of this experiment was to be able to find different that were in our data base, then to later interpret the documents and be able to compare the composition of the different samples.

Procedure:

In order to be able to access these documents we had to activate Qiime2 on our computers then we had to use different commands so that documents were downloaded. Once the documents were downloaded they had to be dropped into Qiime2. Then we were able to use the websites different features to view the different charts and data analysis that we needed. We used the different documents to compare the makeup composition of the samples and what type of organisms they had. Once we knew the organisms we had o analysize what other things made up the sample and how concentrated it was.

Data & Observations:

I observed that many of the samples were not ciliates. Only 45 samples belonged to Ciliophora, but not all of them went beyond being identified as a ciliate. Once the makeup composition of the samples were further analyzed, very little of the sample was actually ciliate DNA.

Future Experiments:

Being able to use Qiime2, and understand how to use it we will be able to analyze data better as well as to be able use data from a larger database.

April 12

Lab 12 (4/11/19): Qiime2

Print Friendly, PDF & Email

Objectives:

The purpose of this experiment was to be able to use the finder on our computer to download programs to access a large database. Then be able to use the larger data base in order to be able to read different sample of DNA.

Purpose:

The objective of this lab was to be able to download Qiime2 and to be able to use Conda in order to be able to use finder to tell the computer what to do. This was also to be able to use the program and direct it in the direction that we need. Then once we were able to master these skills we had to download differ documents that would later be imputed in Qiime2.

Procedure:

  1. Test qiime2
  2. Download the different documents
  3. Create folders to store the documents
  4. Paste those documents in Qiime2
  5. Read the charts
  6. Translate the charts


Future observations:

This will be useful in the future when wanting to access large databases. Although this is not a massive data base it is big enough that it will be enough for the research experiments that we will be conducting. Being able to download the different documents was useful because it allowed us to be able to visualize them in Qiime2 and be able to understand them better because I allowed the computer to decipher them rather than having to do it ourselves.

April 5

lab 11 (04/04/19): Qiime2

Print Friendly, PDF & Email

Objectives:

The purpose of this experiment was to be able to use the finder on our computer to download programs to access a large database.

Purpose:

The objective of this lab was to be able to download Qiime2 and to be able to use Conda in order to be able to use finder to tell the computer what to do. This was also to be able to use the program and direct it in the direction that we need.

Procedure:

  1. Open qiime2
  2. Download conda
  3. Give direction to conda to download qiime2
  4. Test qiime2


Future observations:

This will be useful in the future when wanting to access large databases. Although this is not a massive data base it is big enough that it will be enough for the research experiments that we will be conducting.

March 22

Lab 9 (3/21/19): Presentations

Print Friendly, PDF & Email

Objectives:

The objective of Lab 9 was to be able to present and convey the experiment that was conduced on ciliates.

Purpose:

The purpose was to be able to present our PowerPoint mimicking our poster presentation. This will allow us to get feedback on thongs that can be improved. This will also help to get more practice on the ability to summarize and explain a very complex topic in a short period of time.

Data and Observations:

The only observations that were made were the things that we can improve on as well as things that can be changed from our presentation in order to have a very well put together poster that will be presented at the symposium.

Conclusion:

In conclusion the suggested changes that were made to my group will be taken into consideration and fulfilled. As well as more information and ideas will beaded to make the poser more cohesive and easy followed.

Future observations:

As future observations we will make the changes that were suggested that we make as well as add more things to improve and make our poster more easily understood.

March 8

Lab 8 (03/07/2019): PRC Reaction and DNA sequencing

Print Friendly, PDF & Email

Objectives:

The objective of this lab was to be able to have large sequences of DNA from the samples that we had from a previous week. The other object was to talk about the poster that will be made in order to present the results of the experiment we conducted.

Purpose:

The purpose of this experiment was to be able to pipet our sample and the ladder into the different wells. Then to be able to conduct electricity through in in order to be able to activate the DNA sequences that exist within our DNA samples.

Procedure:

  1. Take you agrose gel and set it up
  2. Remove from cast
  3. Place it in the electrophoresis box
  4. Take the previously created sample and ladder
  5. Pipette 5ul of the ladder
  6. Place in one of your wells
  7. Pipet 10ul of your sample
  8. Place it into a separate well
  9. Record the order in which the samples and ladder are places
  10. Connect to the remaining pieces of the electrophoresis ox
  11. Let electricity run through it at 100 for 20 minutes
  12. Record and picture the results


Data and Observations:

What was observed from running new gels was that two of the samples that were taken from the soil procedure and one of the samples that was taken from the Chelex procedure were able to produce large sequencing. This could be due to how the following procedures were preformed. Most samples di not create a large enough sequence.

Storage:

Given that not much was done for our experiment, there was not much to store. The only things that had to be stored were the things that related to the agrose gel. We turned in the cast that was used to make out gel. The other thing that was stores were the test tubes which contained our samples and the ladder. In order to store them they were simply returned to the racks.

Conclusion:

In conclusion after observing the different gels and how big of a DNA sequence it contained. The three samples that were able to have enough to sequence were 2 that were done y soil and one that was done by Chelex. My sample did not contain a big enough strand. This could be due to the different procedures and the concentration of ciliates that were found in the original sample.

Future observations:

For future observations we can see tat the best results were gotten through following the soil procedure. This can tell us in which procedure most DNA is able to be extracted. Given how big a DNA sequence is can also tell us the different type od environment the ciliates lived in, this will give us information to assume the environment in which they thrive. This can be useful in the furture to continue experimenting on ciliated and testing out the places where we believe ciliated are more likely to thrive, therefore giving us the largest DNA sequence.

March 1

Lab 7 (2/28/2019): PCR Reaction

Print Friendly, PDF & Email

Objectives:

The objective of this lab was to be able to for a PCR reaction using the solutions that we have. Solutions such as DNA samples, primers, master mix, H2O and We also had to figure out on our own how to calculate the different components which would make the solution in order to create and actual reaction.

Purpose:

The purpose of this lab was to be able to create the PRC reaction by keeping the area as aseptic as possible so that our reaction does not become contaminated. Making this reaction happen means that we will be given more information about whether or not out DNA samples are good enough to be sequenced. Calculating the different components in the reaction is useful because it is more practice for calculations of solutions, which will be useful as we conduct further experiments.

Procedure:

  1. Place gloves
  2. Remove all items from the table
  3. Using bleach and paper wipe down the table
  4. Using more bleach and paper clean all the pipets by wiping it down
  5. Take the test tubes which contain the mater mix, H2O, primers, and DNA sample.
  6. Place them on ice
  7. Calculate how much is needed of the different substances
  8. Dilute the DNA sample if needed
  9. Place 1ul of the primer to the master mix
  10. Then add 1ul of the sample to the master mix
  11. Place 10.5 ul of H2O to the master mix
  12. Label the new test tube
  13. Place on the rack
  14. Label on the paper next to the rack the position at which the test tube is at

Data and Observations:

There was not much that could be observed from this lab given that all we worked on was setting up the solution for a PCR reaction. The only real data collected was the calculation that were made in order to know how much of each solution should be added to make the reaction possible.

Storage:

In order to store the materials that were used we threw away the pipet tips that were used as well as the test tube n which the DNA sample was dilutes. The test tubes which contained the H20, primers, and DNA sample individually were set back on the rack. The test tube which contains the mater mix with all the  other solutions was labeled and set on a rack so that the PCR reaction can occur. The box which contained the ice, where the test tubes rested, was put back on the table after the ice was disposed of.

Conclusion:

In conclusion making a PCR reaction is a useful skill to learn because when conducting experiments in the future which contain DNA this will be essential. Conducting a PCR reaction this week will just set up the base for the rest of our DNA sequencing.

Future Observations:

This will help us in future experiments by allowing us to calculate the different quantities that were needed to have a balanced PCR reaction. This will be useful in the future when we are trying to sequence our DNA samples because it will tell us which DNA samples are good enough to have its DNA sequenced.

February 22

Lab 6 (2/21/2019): DNA sequences

Print Friendly, PDF & Email

Objectives:

The object of the lab was to be able to place the DNA into wells and use the electrophoresis in order to isolate he DNA and sequence it in later labs.

Purpose:

The purpose of the lab was to be able to use voltage against the gel so that the gel would create DNA strand that could later be easily seen. In order to see the different sequence of DNA it had to undergo UV light and this needed to be done in order to be able to determine and classify the ciliates that have been found.

Procedure:

  1. Place gloves
  2. Remove gel from the cast
  3. Place gel into the gel electrophoresis box
  4. Add buffer
  5. In a small test tube add 1ul of dye and 9ul of the DNA sample using a pipettor
  6. Mix well
  7. Using a pipettor pipet the 10ul of solution into one of the wells within the gel
  8. Let sit in a voltage of 100 for 20 minutes
  9. Using gloves remove the gel from he gel electrophoresis
  10. Place in a plastic box
  11. Place gel under a UV light to see the DNA sequences strands
  12. Collect data
  13. Then using a nanodrop of your sample calculate the nucleic acid in the sample
  14. Collect data

Data and Observations:

As I observed the different wells from the ciliates that were cultures, DNA was able to be seen. This could be due to multiple factors such as the soil sample, the place the soil was collected from, the technique used in order to isolate the DNA and the time that it was in the gel electrophoresis. Although DNA was seen between 125 to 500 it is a possibility that more can be seen, the longer it remains under the gel electrophoresis.

Storage:

To store the materials tat were used we had to throw away the gel used as well as dispense the different pipette tips. The other think that had to be stored was the was the Gel Electrophoresis, that was simply picked up and the area around it was cleaned.

Conclusion:

In conclusion DNA was found in the different wells of our culture. Some wells did have a higher density of DNA in them depending on whether the Chelex was used or the soil. This could be a determining factor to what makes a ciliate thrive.

Future Observations:

In future observations we will get to observe things such as the DNA that the different ciliates contained in order to be able to classify them adequately. The abililty to know how to get DNA samples from the ciliates will be a useful tool when conducting further experiments. Th ability of knowing that ciliate is being found is use full because it makes it easier to describe what type of ciliates survive in different environments.

February 15

Lab 5 (2/14/19): Agrose Gel

Print Friendly, PDF & Email

Objectives:

The objective of the lab was to be able to add the chelex to out ciliate pellets which contain the DNA sequences. As well as to learn how to build a cast and be able to make the gel like solution for our DNA strands.

Purpose:

The purpose of the experiment was to be able to finish the chelex procedure on the pellets that continued part of the ciliate culture, which had been cultivated two weeks prior. Then we have to make the gel which will contain different plates that ill contain the DNA of our sample. This will be useful because it will isolate the DNA of the sample so it can easily be arranged into a sequence, in order for our ciliates to be described.

Procedure:

-Chelex

  1. Use test tubes with the chelex balls
  2. Incubate for 30 minutes in 56 degrees Celsius water bath
  3. Boil for 8minutes
  4. Vortex for 1 minute
  5. Centrifuge @16,000 for 3 minutes
  6. Pipet the supernatant into a new tube
  7. label

-Agrose Gel

  1. Place gloves
  2. Make gel cast
  3. Using a test tube place 36ml of buffer, 4ml DIH2O, .4g of power
  4. Stir
  5. microwave for 1 minute
  6. stir
  7. microwave for 1 minute
  8. stir
  9. add ethidium bromide
  10. place in cast
  11. once soil ass more buffer
  12. place in a zip lock bag
  13. label
  14. refrigerate

Data and Observations:

During this weeks lab there were not many observations that could be made given that we were only preparing the materials that will help us extract the DNA.

Storage:

In order to store the materials that we used we turned in the materials such as the flask, metal plate, test tube with the supernatant and test tube. The pipet tips and  tubes tube with the chelex pebbles were disposed. The cast for the gel was put in a zip lock bag and put in the fridge.

Conclusion:

In conclusion the work that we did was useful because it will help in future labs to be able to extract and decode the DNA. The procedures that we preformed will help us in the future when we are actually extracting the DNA from out samples.

Future observations:

The procedures that were preformed during lab will help us next week by having pure and easily visible DNA strands.

February 8

Lab 4 (2/7/19): DNA Extraction

Print Friendly, PDF & Email

Objectives:

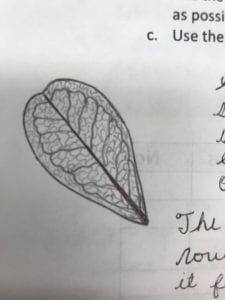
The objective of our lab was to be able to find ciliates in our samples and begin the extraction of DNA from the sample that contained living ciliates. Also to calculate the % water in the soil as well as the soil components and determine the tree I used by looking at its leaves.

Purpose:

The purpose of the experiment was to be able to find living ciliates in the sample that we had cultured during the previous lab. Then using the solution in which ciliates were found in order to be able to find DNA to barcode in the future. The soil concentration and % water of my soil will help determine the living conditions of ciliates. The leaf that I took from the tree helped me know what type of tree I was observing.

Procedure:

  1. Make sure work area is aseptic
  2. Weigh the soil sample
  3. Calculate the % water
  4. Record data
  5. Measure test tube with a ruler to determine the components of the soil
  6. Record data
  7. Take notes of the features that describe the leaf
  8. Use Texas Tree ID to identify the tree species
  9. Place leaf in a zip lock bag
  10. Label the bag
  11. Take 15ul of the cultured ciliates using a micropipette
  12. Place on a concave slide
  13. Place under compound microscope
  14. Observe
  15. Determine whether ciliates were found
  16. Use 300-500ul of the dense ciliate culture
  17. Place in a test tube
  18. Label the tube
  19. Centrifuge it at 6000xg for 5 minutes
  20. Discard the supernatant
  21. Place the remaining ciliate culture in the tube
  22. Centrifuge it at 6000xg for 5 minutes
  23. Discard the supernatant
  24. Add 200ul of 5% Chelex to the pellet
  25. Vortex for 1 minute
  26. Add 15ul of proteinase K
  27. Place in tube rack

Data and Observations:

The observations that I made was that after I cultured my ciliates there was actually a high population of them. They grew very rapidly in the culture. Once I tried to make a pellet it was very small which means there was not a high concentration of ciliates. The soil components were just 10% sand, 60% silt and 30%clay. And the % water was very high at 19.44%. After analyzing my leaf I realized it was a Texas Mountain Tree.

Storage:

In order to store the materials that were being used, I turned in my soil sample as well the leaves that I observes. The compound microscope was unplugged and covered. The slides were washed, bleached and set to dry. Lastly the tubes with the pellets were also turned in.

Conclusion:

In conclusion although my cultures sample had a lot of ciliates, my pellet was relatively small. The tree that I found did not seem to be a very common tree type among the class. The percent water concentration of my soil was very high, and my soil content was sand, silt, and clay.

Future Observations:

The soil content and % water will help us analyze the living conditions of ciliates and what environment they are more likely to thrive in. The pellets that we made will be useful in the following class periods in order to determine the DNA of ciliates in order to find out what ciliate we are observing.