April 25

Lab 13

Print Friendly, PDF & Email

Aynsley Gaspard

4-18-19

BIO 1106

Lab 13

Purpose:

 The purpose of this lab was to learn how to perform metabarcoding analysis well. We did this by using sample data from an eDNA sample from soil of Bermuda grass from the Blackland Prairie Soil. We ran the data through Qiime2 to get the taxonomic qzv. files to visualize and analyze it.

Procedure:

  1. Open terminal
  2. Activate qiime2 [source activate qiime2-2019.]
  3. Download box files
  4. Make the directory for the files [cd /Users/aynsleygaspard/Documents/CILICURE_2018]
  5. Import the sequences as a qiime2 artifact [qiime tools import \–type EMPPairedEndSequences \–input-path emp-paired-end-sequences \–output-path emp-paired-end-sequences.qza]
  6. Demultiplex the sequences to align the data [qiime demux emp-paired \–m-barcodes-file sample-metadata.tsv \–m-barcodes-column BarcodeSequence \–i-seqs emp-paired-end-sequences.qza \–o-per-sample-sequences demux.qza \qiime demux summarize \–i-data demux.qza \–o-visualization demux.qzv]
  7. Denoise the data with DADA2 to get rid of low quality sequences and create a feature table with representative sequences  [qiime dada2 denoise-paired \–i-demultiplexed-seqs demux.qza \–p-trunc-len-f 220 \–p-trunc-len-r 220 \–o-table table.qza \–o-representative-sequences rep-seqs.qza \–o-denoising-stats denoising-stats.qzaqiime feature-table summarize \–i-table table.qza \–o-visualization table.qzv \–m-sample-metadata-file sample-metadata.tsvqiime feature-table tabulate-seqs \–i-data rep-seqs.qza \–o-visualization rep-seqs.qzvqiime metadata tabulate \–m-input-file denoising-stats.qza \–o-visualization denoising-stats.qzv]
  8. Create a phylogenetic tree [qiime phylogeny align-to-tree-mafft-fasttree \–i-sequences rep-seqs.qza \–o-alignment aligned-rep-seqs.qza \–o-masked-alignment masked-aligned-rep-seqs.qza \–o-tree unrooted-tree.qza \–o-rooted-tree rooted-tree.qza]
  9. Get the taxonomic classification [qiime feature-classifier classify-sklearn –i-classifier silva-132-99-515-806-nb-classifier.qza –i-reads rep-seqs.qza –o-classification taxonomy.qzaqiime metadata tabulate \–m-input-file taxonomy.qza \–o-visualization taxonomy.qzvqiime taxa barplot \–i-table table.qza \–i-taxonomy taxonomy.qza \–m-metadata-file sample-metadata.tsv \–o-visualization taxa-bar-plots.qzv]
  10. Drag the taxanomic qzv. file into the qiime2 viewer and analyze the eDNA
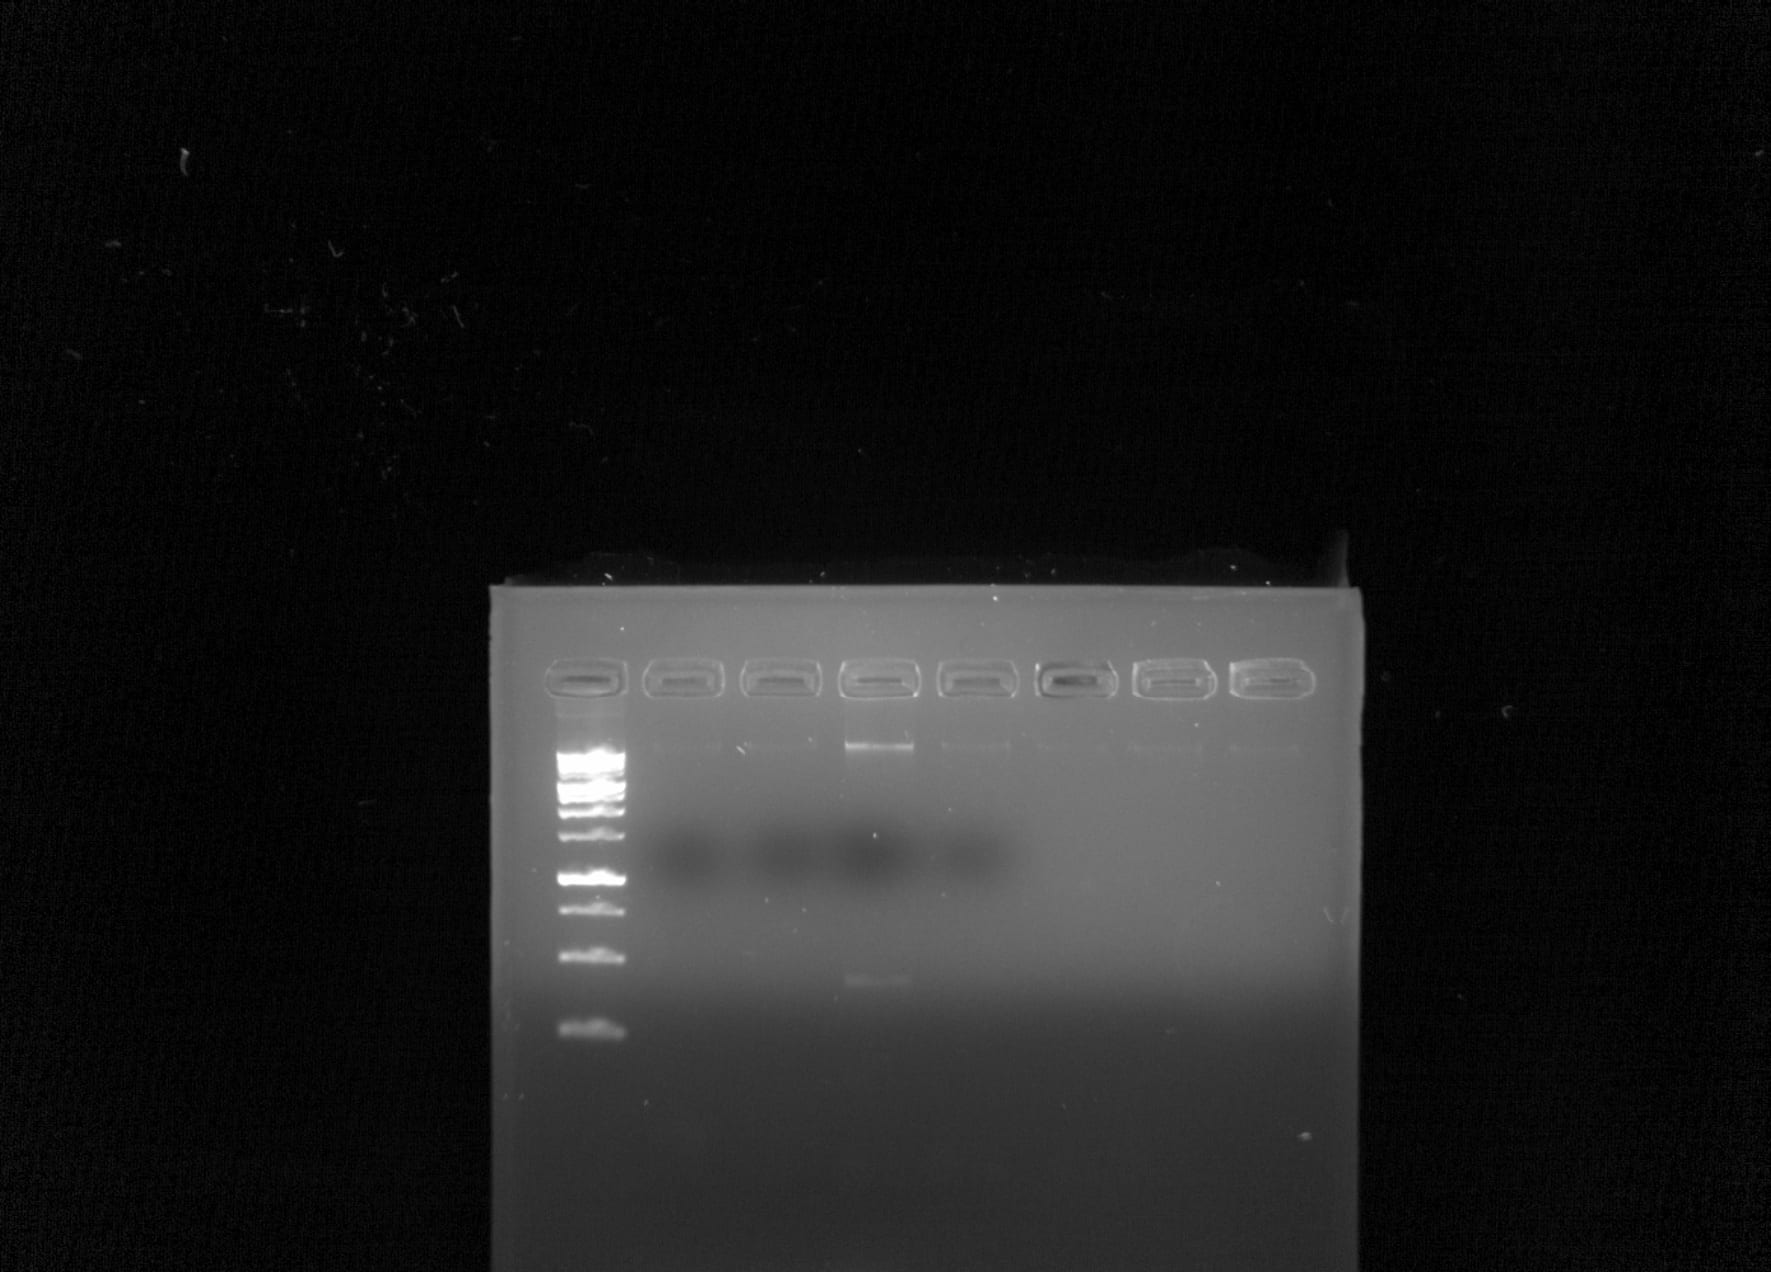


Data: 

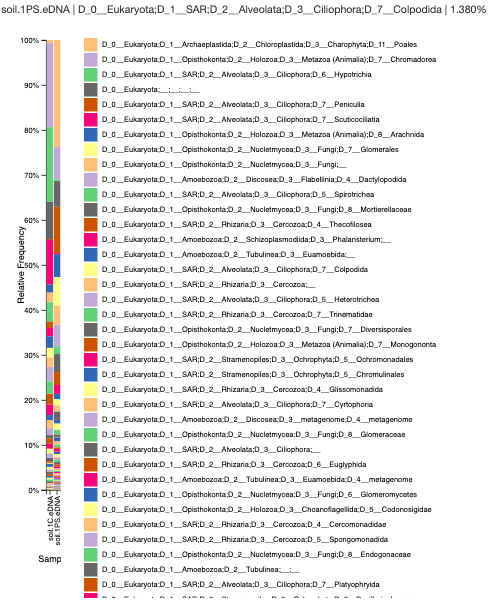
Analysis and Conclusion: The Chelex/Silica bead sample has a high amount of chromodorea DNA, which is a type of roundworm. The Powersoil sample consists of the flowering plants called Poales. The Chelex seems to have a high amount of nematodes and ciliates, but the Powersoil sample has a lot of plant material and amoebas. I was able to look at the hight amount of diversity in the sample as well.

Future Goals: In the future, I would like to be able to use these processes with future research and in my future career, if needed.


April 11

Lab 12: Next Generation Sequencing

Print Friendly, PDF & Email

Aynsley Gaspard

4-11-19

BIO 1106

Lab 12

Purpose:

The purpose of the lab was to introduce ourselves to NGS, QIIME2, and analyzing sequences and running them in Terminal. This is all in pursuit of mastering Metbarcoding.

Procedure:

  1. First, we needed to lead QIIME2 on our Terminal.
  2. We then downloaded and copied Moving pictures into our files and Terminal.
  3. After that, we downloaded a sample metadata file.
  4. We then copied the sequencing command into Terminal.
  5. Then imported the tools command into Terminal.
  6. Next, we moved on to Demultiplexing.
  7. We copied the qza command from that into Terminal.
  8. Then the qzv command.
  9. This brought us to the visualization step.
  10. We copied the DADA2 denoise and table qza command into Terminal.
  11. We then went to the visualizing section of QIIME2 and drug the table into the box that pops up.
  12. We then moved on to taxonomic analysis and copied the taxonomy qzv  and bar ploys qzv commands into Terminal.
  13. This file was hen drug to the box in QIIME2 again to visualize.
  14. This then showed us all the different taxa among our sample metadata.

Data:

Our sample data was shown in the QIIME2 visualization section.

Future Steps:

With this, we can determine the different species found in the sample data. Also, we can use the process we learned to sequence our own data from our soil collection.

Conclusion:

Overall, we learned how to use QIIME2 and Terminal to metabarcode data and determine different taxa among the species found.


April 4

Lab 11

Print Friendly, PDF & Email

Aynsley Gaspard

4-4-19

BIO 1106

Lab 11

Purpose:

The purpose of this lab was to familiarize ourselves with CyVerse and QIIME2.

Procedure:

We first got access to Atmosphere through CyVerse. Then, we went over QIIME2 and leaned how to use terminal. After that, we installed terminal that was laid out on the installation website.

Conclusion:

Overall, in this lab we learned skills that will help us in our future labs and projects. We went through how theses individual programs will aid our work in our work to come.

March 28

Lab 10: NGS DNA Sequencing

Print Friendly, PDF & Email

Aynsley Gaspard

3-28-19

BIO 1106

Lab 10


Purpose:

The purpose of this lab was to learn the the process of generating “reads”. We also learned about cloud computing.

Procedure:

  1. We were split up into groups of two to organize a set of “Illumina Card Challenge” sets in chronological order.
  2. We were to draw the process of the “work flow” and label each drawing. (I.Prepare and Amplify, II. Sequence by Synthesis, III. Data Analysis)
  3. Through that process we learned NGS terms and defined them.
  4. We then learned about CyVerse and set up our account to analyze DNA and eventually find our reads.

Conclusion:

Overall, this lab taught us how to visualize the ”work flow” process and to understand the terms used within it.  We also learned how to navigate CyVerse and find our class workshop.


March 22

Lab 9: Poster Presentation

Print Friendly, PDF & Email

Aynsley Gaspard

3-21-19

BIO 1106

Lab 9: Poster Presentation


Purpose:

The purpose of the lab was to present our first draft posters. We were to walk through our sections with the knowledge of the topic.

Procedure;

  1. My partner and I presented our poster in A305 to our entire lab section.
  2. We were then critiqued by Dr.Adair and Taylor Guynup.

Results:

We were told that for the most part our poster was well organized and neat. Our critiques were that we needed to remove the 1 kb ladder information image, make sure all of our results were accurate, create a flow chart for our methods, add a reference, add a marker to make clear which our sample was in the gel electrophoresis, find a new ciliate example picture, specify our introduction to our lab’s goal for this study and check our font size and possibly make smaller.

Conclusion:

Overall, this lab was very helpful in aiding us in the creation and tweaking of our poster. The critiques were given were specific and very helpful.


March 7

CiliCure Lab 8

Print Friendly, PDF & Email

Aynsley Gaspard

3-7-19

BIO 1106

Lab 8

Purpose:

The purpose of this lab was to run our DNA sample and to get an image of it.

Procedure:

  1. Set up 1.5% gel
  2. Load 5ul of PCR sample gel in 4th row  (I did the 4th row for my group’s sample).
  3. Load 10ul of 1 kb ladder to 1.5% gel in 5th row  (I did the 5th row for my group’s control).
  4. Run at 100V for 30 mins
  5. Take image of the final DNA concentration after it is run.
  6. We went up to the A305 to take Midterm and go over poster design.

Results:

This image shows our groups DNA after it was run. In the 4th row, it shows a faint concentration of DNA which my partner and I’s DNA sample (group 7). Row 2 and 3 are the DNA sample and the control of group 6.

Future Goals:

Future goals for this lab are to sequence the DNA we see in the image above and to discover the genus species of the varying amounts of ciliates. This will help with the discovery of bacteria and diseases that could affect the tress around Baylor’s campus.

February 21

Lab 6: DNA Running

Print Friendly, PDF & Email

Aynsley Gaspard

2-21-19

BIO 1106

Purpose:

The purpose of today’s lab was to determine if there is any DNA in our sample and if there is, approximately how much.  We were to use the gel we made last week to run our DNA.

Procedure:

DNA Running:

1. Make sure gel is placed in buffer chamber in correct oreintation and covered with 1X TAE buffer.

2. For each sample, in a microfuge tube, mix 9 ul of our DNA sample with 1 ul of 10X buffer for 10ul mix and give tube quick spin.

3. 10 ul of sample was loaded in lane 7.

4. 5 ul of DNA mass STD 1 ( “31” 6.5 ng/ul) was loaded into lane 6.

5. 5 ul of DNA mass STD 2 (“62.5” 12.5 ng/ul) was loaded in lane 8.

6. Run at 100V for ~ 20-30mins.

Imaging/Nanodrop:

  1. The gel was brought up to the imaging lab. It wasp on a tray in the MBC C305 to capture an image.
  2. Place a drop of DNA sample on nanodrop to measure absorbance .

Results:

Nanodrop:

ng/uL- 884.6

A260/A280- 1.44

A260/A230- 0.41

Future Goals:

The future goals I have involving this experiment would be to discover specific DNA sequences to categorize out tress and possible issues they might have or may develop.

February 15

Lab 5: DNA Purification and Agarose Gel

Print Friendly, PDF & Email

Aynsley Gaspard

2-15-19

BIO 1106

Purpose:

The purpose of this lab was to familiarize ourselves with DNA purification and gel electrophoresis. We were to start the process of analyzing our DNA from the soil collection we took.

Procedure:

DNA Purification-
1. Bring the “crude soil DNA” extraction up to 1 ml with sterile water. Add this 1
ml to a 15 ml tube, or other appropriate tube for mixing.
2. Add 2mls warm DNA resin. The resin should be at 37C. Make sure that you have swirled all the precipitates back in solution. Mix by inversion several times before pipetting 2 ml to the tube.
3. Set up a column bottom on a syringe barrel. Set the column and syringe
barrel on the vacuum filtration.
4. Add half of DNA/resin to the column. Turn on the vacuum. As soon as the
liquid has been pulled through the column, add the remainder of your sample.
5. Wash the column by adding 2ml 80% isopropanol and using the vacuum to
pull it through. Begin by adding a small amount of isopropanol and allowing it
to flow through before adding more. (Repeat twice more for a total of three washes) .
6. Remove the column from the barrel and put the column in a clean 1.5ml tube.
Spin at 8000 x g  for 5 min to remove residual isopropanol. Remember to balance the centrifuge.
7. Take the column out of the 1.5ml tubes and put it in the 80C+ heat block for
30s-1min. Do not exceed 1 minute.
8. Put the column in a new 1.5ml tubes. Apply 50μl sterile diH2O heated to 80C
directly to the column.
9. Incubate 1min.
10. Spin at 8000 x g for 1 min.
11. Make sure your tube is labeled correctly.
Agarose Gel-
1. Make 1xTAE (Tris acetate EDTA) in 1L Erlenmeyer flask from stock solution

2. Make 1.0% agarose gel

3. Add 2 mL 1xTAE to 0.4 g agarose in small Erlenmeyer flask

4. Cover lightly with weighing paper/Kimwipe and loose-fitting cap (do NOT tightly close the container, this is how things end up exploding and making a mess!)

5.Heat in the microwave until the solution is clear and small bubbles come off the bottom when gently swirled

6.Allow to cool (5-6 minutes)

7.Add ethidium bromide to a final concentration of 0.5 µg/ml and swirl gently.  The stock solution for ethidium bromide is normally 10mg/ml.

8.Set up a gel electrophoresis box, making sure the open ends are somehow sealed (with tape, turned sideways into box, rubber bumpers are in place), and that the comb is inserted with its back towards the nearest edge.

9.Pour agarose gel smoothly into prepared mold, with as few bubbles as possible. Allow to sit at least 30 minutes to solidify.

Conclusion:

Overall, this lab aided us learning new techniques dealing with DNA exctraction and purification. Also, we learned how to make agarose gel, which allows DNA fragments to be seen as bands.

Future Goals:

I hope this lab helped me to discover the ways in to discover DNA and that it is not as complicated as one may think.  I also hope this broadens my knowledge in bioinformatics.

February 7

Cili Cure Notebook 4

Print Friendly, PDF & Email

Aynsley Gaspard

2-7-19

BIO 1106

Purpose:

The purpose of this lab was to first identify our tree identification. We used a sheet provided by Dr.Adair to collect our tree metadata. We then started the process of DNA extraction.

Procedure:

Tree Identification:

  1. Sketch leaf in detail
  2. Use figure of leaves drawing to describe the type of leaf.
  3. Use dissecting microscope to observe and record other features.

Soil Texture:

  1. Measure the amount of soil in tube.
  2. Measure the layers of each kind of soil ( sand, silt, clay) in cm.
  3. Calculate percentage of each.
  4. Use triangle figure of soil textures to determine soil texture.

Silica Bead Extraction:

  1. Collect 1g of sry soil and 1g of silica glass beads and placed aluminum dish.
  2. Grind for 5 mins use mortar and pestle to break up large pieces of soil.
  3. Add 10g of activated charcoal to powder.
  4. Add 1 mL ( we used 2 mL) of DNA extraction liquid to powder. Mix by pipetting several times.
  5.  Place in eppendorf tube and incubate the tube for 10 mins at 65*C.
  6. Place tube in centrifuge for 5 mins at 12000g at 4*C.
  7. Transfer the supernatant to a new microfuge tube and place in refrigerator.
  8. Clean work area and wash M&P with bleach.

Results:

Tree Identification:

Tree genus species- Quercus virginiana

We identified the tree’s gens species by identifying its leaf shape and comparing it to the sheet provided with leaf drawings.

Soil Texture:

7 cm of soil

Clay- 0.5 cm 17%

Silt- 0.5 cm 17%

Sand- 2 cm 67%

Using this data we determine that the texture if the soil was Sandy Loam.

Silica Bead Extraction:

We chose my partners non-flooded plate because she has many more ciliates to work with and we felt that would have more promise on finding DNA.  The silica beads breakup the soil and break open the cells ( cell lysis) without destroying the DNA. The charcoal attracts the impurities so we can a clear reading of the DNA.

Future Goals:

With this, I hope to really discover what the sequence of these trees and what they lookalike. This could truly lead to some amazing discoveries about the trees on this campus and what we, in the scientific community, can do to prevent disease from killing them.


January 31

Cili Cure Lab 3

Print Friendly, PDF & Email

Aynsley Gaspard

1-31-19

BIO 1106

Lab 3

Purpose:

The purpose of this lab was to use our tube of soil we collected and try to find ciliates.  We are to continue our knowledge on discovering ciliates and both the microscopes.

Procedure:

We first got our plates with the soil we collected data on last week. It was allowed to dry and we collected percent water content. Next, then we took out tube and pipetted 10 uL of water from it to look for ciliates. Finally, we added dispersing agent to the tube and put it on the vortex to mix it up thoroughly. That will now sit for a week to determine type of soil.  We then took 10 more ul of the water from the tube and placed it in one of the wells in a 24 well plate.

Results:

Petri Dish: 3.1 g

Dish and ”wet” soil: 10.5 g

“wet” soil: 7.4 g

“dry” soil: 6.6 g

% water content: 10.1% water


Goals:

My goals is eventually find a great ciliate to culture and sequence its DNA. I want to further my knowledge on DNA and on ciliates.  I want to find more proof that there is DNA beyond humans, animals, and organisms we see with our naked eye.