Lab 6: Gel Electrophoresis and DNA Analysis

February 21, 2019
Noah Mendoza
Purpose:
This week’s lab was centered around conducting gel electrophoresis and analyzing the results of our DNA using a nanodrop spectrophotometer and observing our agarose gels under UV light. These steps will be a part of the development of our protocol, jokingly known as the “BU method,” for studying ciliate diversity.
Materials:
- 10x loading buffer
- 1x TAE buffer
- 31ng DNA mass
- 125ng DNA mass
- 500ng DNA mass
- Agarose Gel
- Electrophoresis Tray
- Nanodrop spectrophotometer
- UV Transilluminator
Procedure:
DNA Sample:
Due to accidental error in storage of our sample, it had dried up and needed to be hydrated with sterile water.
- Take 50 μl of sterilized water and add it to the purified DNA sample.
- Pipette the sterile water and DNA solution repeatedly until thoroughly mixed.
Gel Electrophoresis:
- Remove the agarose gel that was prepared during the previous lab from the fridge.
- Transfer the agarose gel to the loading dock and cover the surface of the gel with 1x TAE buffer.
- Wear proper PPE while handling the agarose gel.
- Select the wells that will be used and decide what will be inserted into each well before adding anything into the wells.
- Using a micropipette, add 5 μl of 31 ng mass standard to the 5th well.
- Using a micropipette, add 5 μl of 125 ng mass standard to the 7th well.
- Using a micropipette, add 5 μl of 500 ng mass standard to the 8th well.
- Extract 9 μl of DNA and transfer it into an Eppendorf tube.
- Add 1 μl of the 10x loading buffer and mix with the DNA.
- Transfer the 10 μl mixture of DNA and buffer into the 6th well.
- Run the agarose gel for 20 minutes at 100 volts.
- Take the gel to the UV transilluminator and wait for the picture to be produced.
- Observe the results and record your observations.
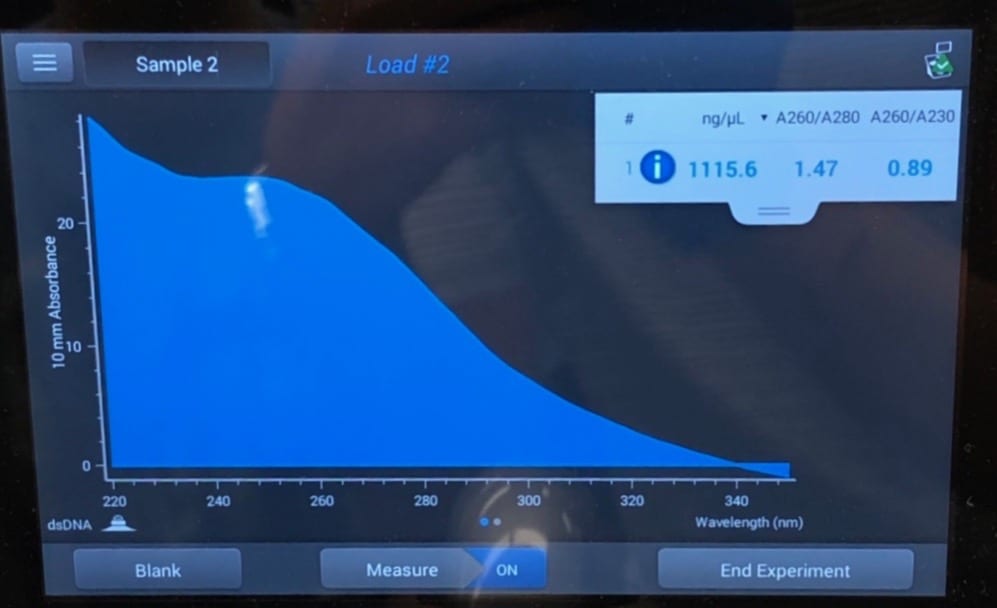
DNA Concentration/Nanodrop Spectrophotometer
- Clean the nanodrop spectrophotometer and be sure that it is completely dry from any previous use
- Place 1 μl of DNA sample onto the surface of the nanodrop spectrophotometer
- Close the try and wait for the analysis
- Take a picture and record observations/results of your DNA sample
Observations:
Results:
Our DNA was concentrated at 1115.6 ng/μl with a 1.47/1.80 A260/A280 ratio and 0.89/2 for A260/A230. This shows us that our DNA was not completely pure and that there were impurities in our sample.
Storage:
All materials used were put back into their original locations. This includes the samples prepared from previous weeks. The desks were wiped clean and all disposable materials were thrown away.
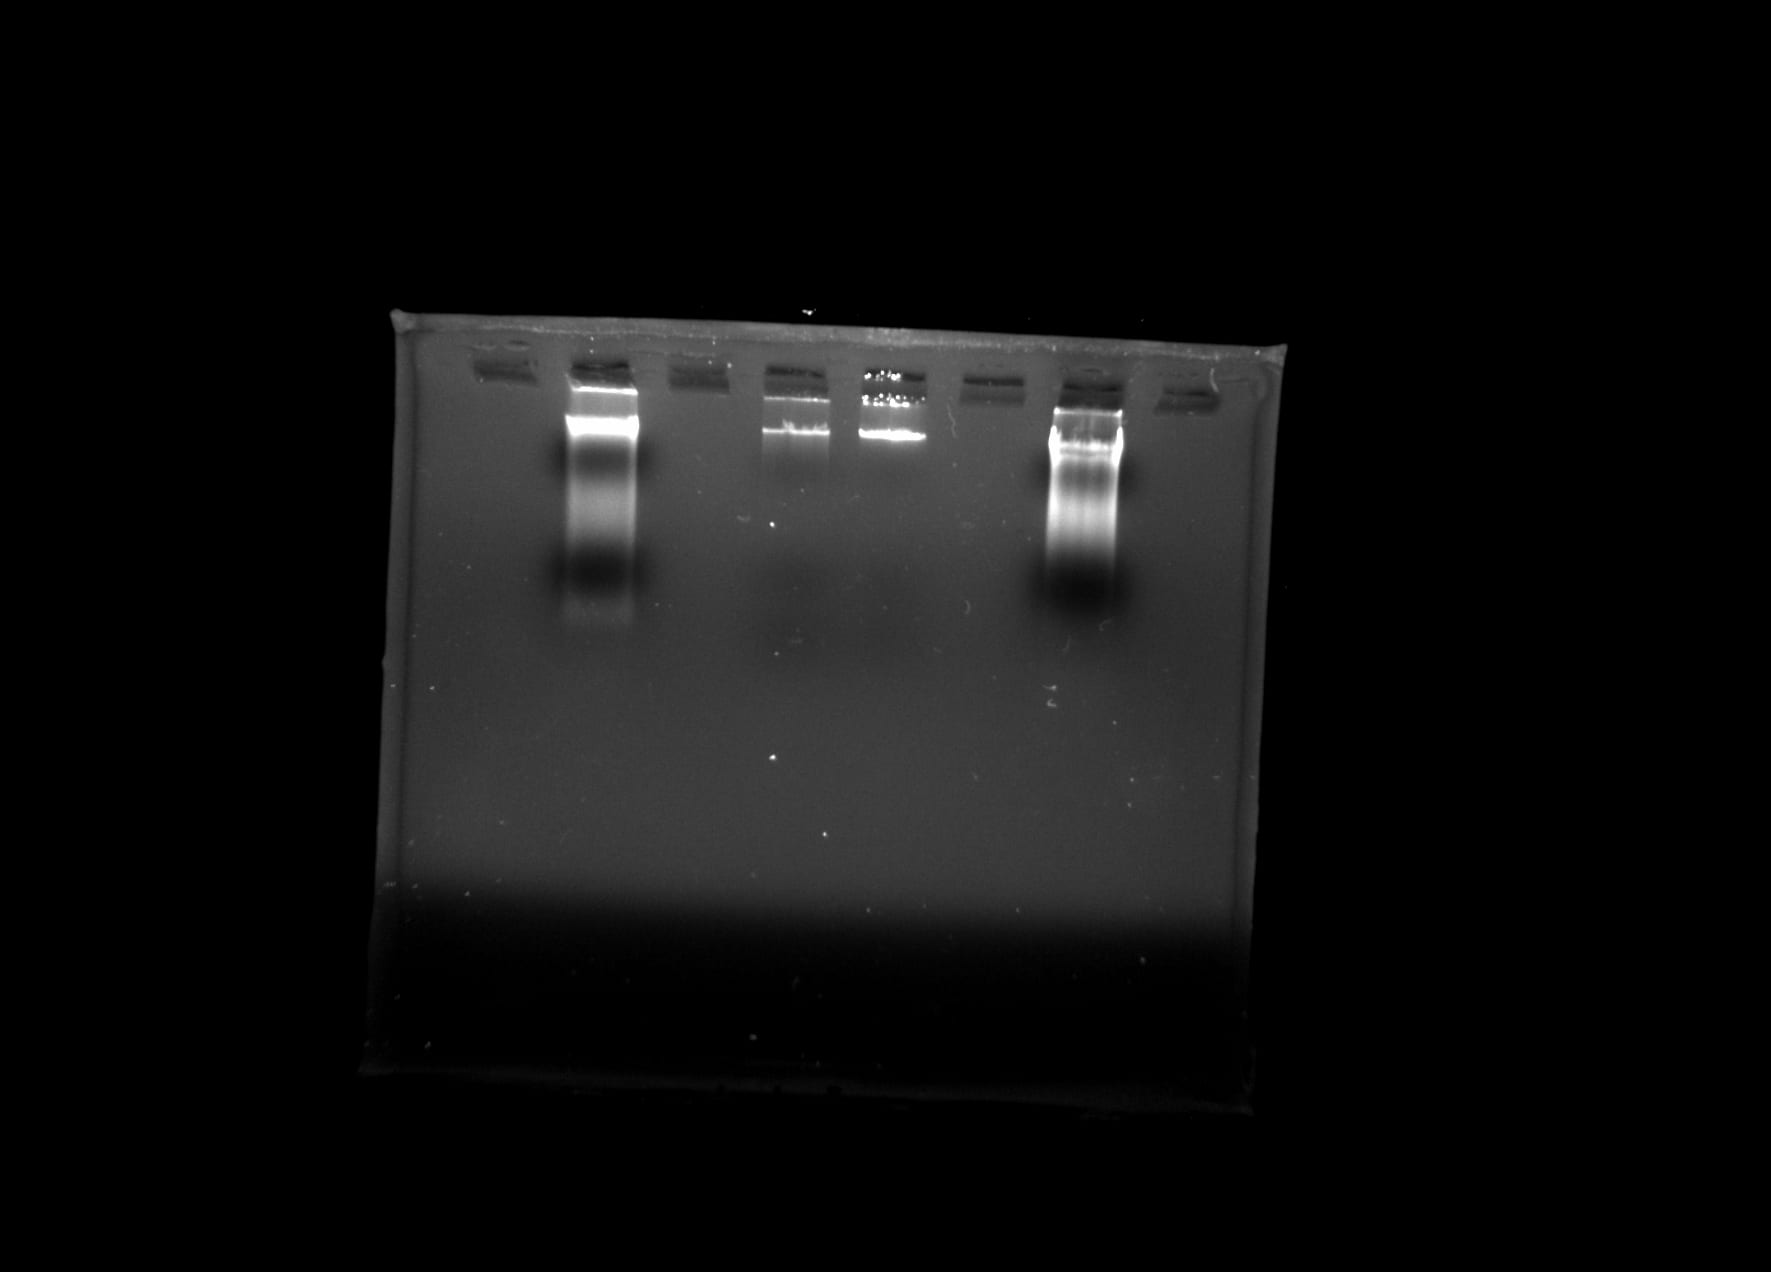
Conclusion:
Using gel electrophoresis, we were able to prove that there was DNA in our sample. The agarose gel showed us the different sizes of our DNA bands compared to our mass standards, and we were able to analyze them under a UV transilluminator. Additional analysis will be conducted during future labs on our band sizes. We were also able to use a nanodrop spectrophotometer to gather data relating to the concentration of DNA present in our sample. Using this we found that out DNA contained impurities, and this is likely due to contamination or the introduction of sterilized water that was contaminated between leaving its container and being added to our sample.
Future Steps:
In the future we will conduct a PCR on the DNA that was found during our gel electrophoresis and nanodrop experiments. We will also be able to further compare our DNA bands to the bands of our mass standards.