April
19
April
13
Lab 13: Gel Electrophoresis/ Poster Organization 4/12/18

Objective:
The objective of this lab is to perform gel electrophoresis and to observe our gel after it is imaged using BioRad technology. Another goal of today’s lab is to ensure that we start planning out how we are going to organize our poster. We also must individually brainstorm our own poster ideas then have them critiqued by our group members.
Purpose:
The purpose of this lab is to view our final gel electrophoresis attempt and to observe our results. We also will need to be able to interpret our data which we should be able to do based on previous trials. This will test your knowledge of our scientific literature and our pre-labs because that is what will determine whether or not students are able to interpret the data or not.
Procedure:
1.) Pour the 1X TAE solution into the gel powerbox.
2.) Pipet 5 micro-liters of a ladder into well one.
3.) Pipet 10 micro-liters of the -, +, and eDNA into the wells (repeat for the other group that you are sharing the gel with).
4.) Run the electrophoresis at about 100 volts for 30 minutes.
5.) While you are running the gel, use this time to discuss poster designs and the information that will go into each portion of the presentation as well as assign roles to each person in the group.
6.) After the electrophoresis, take the gel upstairs to be analyzed under UV light using the BioRad imaging technology.
7.) Review image from the BioRad technology and interpret the data and record the results for each reaction on the Excel sheet in the pre-lab module for lab 13.
***Make sure to meet up with your group members to ensure that everything gets completed on time.
Data/Observation:
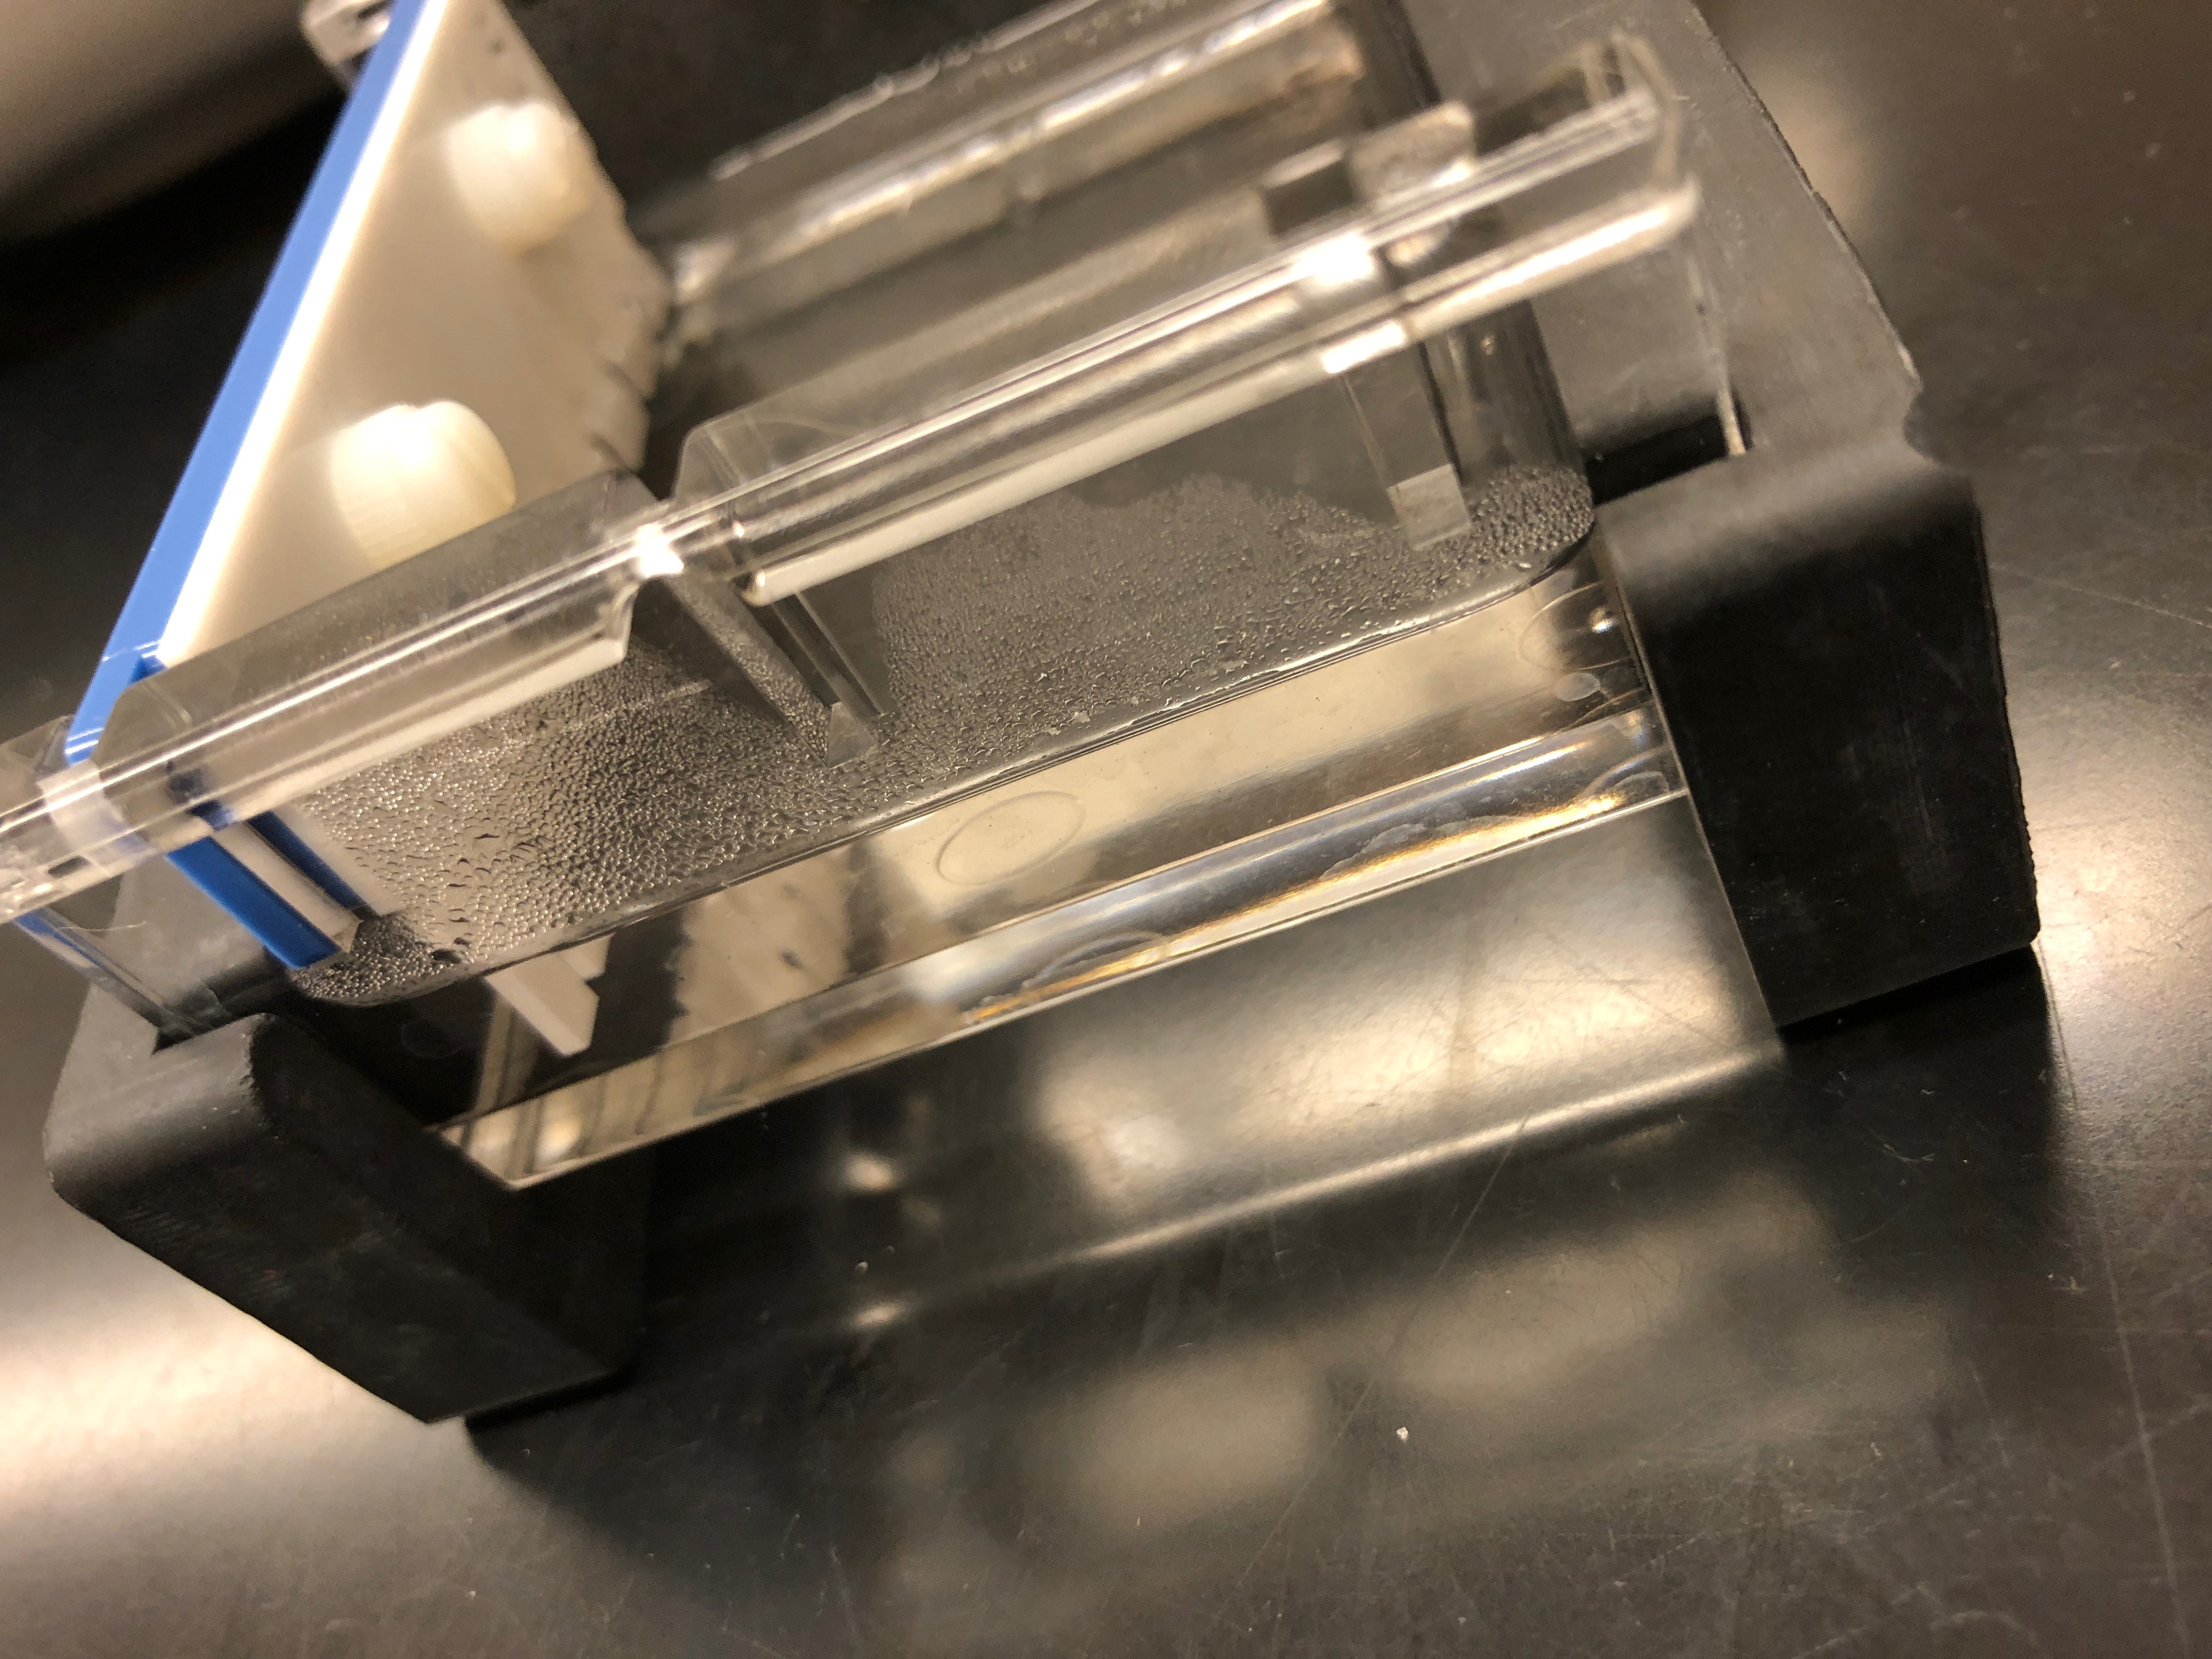
In this lab, we imaged our gel using BioRad imaging technology which clearly illustrates the bands present within the gel. Our gel showed very confusing results because we had very few bands in the positive control but we had the right band for our eDNA control which was about 420 base pairs. That is the right band for the V4 primer but it was very concerning that our positive control did show up but the environmental DNA sample did. Below is a picture of our gel that we shared with group 6. The wells go as follows: 1. Ladder, 2. Group 5 Negative Control, 3. Group 5 Positive Control, 4. Group 5 eDNA, 5. Group 6 Negative Control, 6. Positive Control, 7. Group 6 eDNA, 8. Empty. The wells 2-4 represents the results of group 5 and wells 5-7 represent group 6.

Storage:
We disposed of our gel after we were able to visualize it using the BioRad imagining technology. We did start organizing how we will format our poster project and assigned each member a task to work on. Sani: Results. Lindsay: Introduction. Kaitlyn: Abstract. Although we are starting these aspects of our poster separately, we are going to edit them together in order to make sure everyone is up to everyone’s standards. We also will make sure to contribute equally using this method. Our samples used during the gel electrophoresis were kept in case the gel electrophoresis needs to be run again and were put back a the front of the room in a tube rack.
Future Goals:
In the future, I think we should retest my groups’ positive control and the eDNA sample to clarify any discrepancies in our results. I hope that our gel electrophoresis will yield better results and allow us to submit the best samples of our controls to Illumina meta-barcoding where the DNA will be sequenced. This sequencing will allow us to further evaluate soil ciliate diversity. This could potentially lead to more taxonomic identification and for other researchers to follow in our footsteps and use a more efficient modified protocol when performing ciliate DNA extraction.
April
6
Lab 12: Chelex Extraction and PCR 4/5/18
Objective:
The goal of this experiment was to further our knowledge of the Chelex extraction and to further our lab experiences by creating gels at a certain concentration and understanding how PCR works. The main objective was to individually produce our own chelex extraction samples so that we may combine our samples with our groups to potentially increase the amount of DNA present to be primed with the V4 gene in gel electrophoresis.
Purpose:
The purpose of this experiment is to see if we can replicate successful results containing the V4 primers and other genes we may want to look for in our ciliate eDNA samples. If we are able to mimic the successful results that group 8 was able to able to find during last lab so that we may be able to create an effective and cost efficient procedure that may be easily used by other students in the future. Another purpose of this lab was to test our prior knowledge and experience in performing this procedure, it allows us to have a more solidified understanding of these procedure by doing it a second time.
Procedure:
1.) Isolate 1.5 ml of soil liquid from a non-flooded well plate then centrifuge at 6,000 x gravity. After this, discard the supernatant and repeat this step two-three times in order to achieve a viable amount of DNA for the rest of the procedure.
2.) Add 200 micro-liters of to the pellet and vortex briefly and then add 15 micro-liters of proteinase K located at the front of the room.
3.) Incubate for 30 minutes at 56 degrees Celsius in a heat block/water bath.
4.) After that is complete, boil the tubes for 8 minutes at 100 degrees Celsius in a heat block located on one of the lab desks, then vortex for 1 minute.
5.) Centrifuge at 16,000 x gravity for three minutes, then transfer 100 micro-liters of supernatant into to a clean micro-centrifuge tube (be careful and avoid transferring the chelex beads).
6.) Make sure to label your micro-centrifuge tube containing a total of 300 micro-liters of supernatant from you and all your group members (21-5 LSK chDNA 4-5-18).
7.) Then take your DNA upstairs and use the nano drop to determine the concentration of the DNA sample and place 1 micro-liter of this DNA into the tube marked “eDNA.” Then place all tubes in the thermocycler to proceed with PCR.
Preparing PCR tubes:
1.) Obtain three tubes containing 12.5 micro-liters of 2x MasterMix.
2.) Add 1.25 micro-liters of V4 primer to the negative control tube and 11.25 micro-liters of water to have a total volume of 25 micro-liters.
3.) Add 1 micro- liter of the positive control (obtained from group 8’s chelex extraction from the previous lab) to the positive control tube as well as 1.25 micro- liters of V4 primer and 10.25 micro-liters of water.
4.) Add 1 micro- liter of your eDNA sample into the eDNA tube as well as 1.25 of the V4 primer and 10.25 micro- liters of water.
*These tubes will placed in the thermocycler after the nanodrop determine the concentration of DNA in your sample.
*We used a positive control that contained group 8’s previous successful chelex extraction eDNA
Data/Observations:
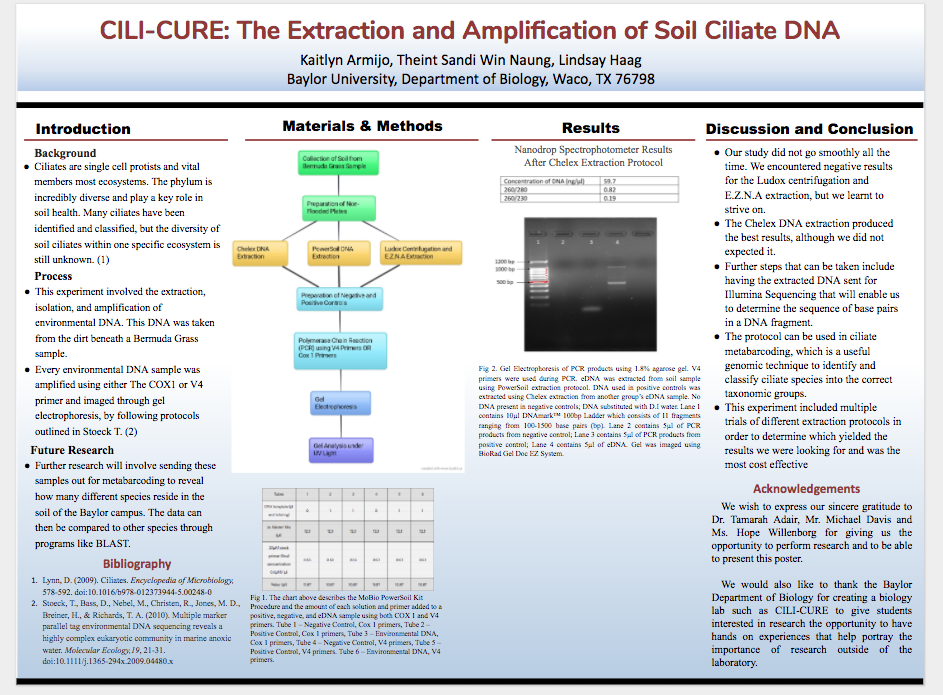
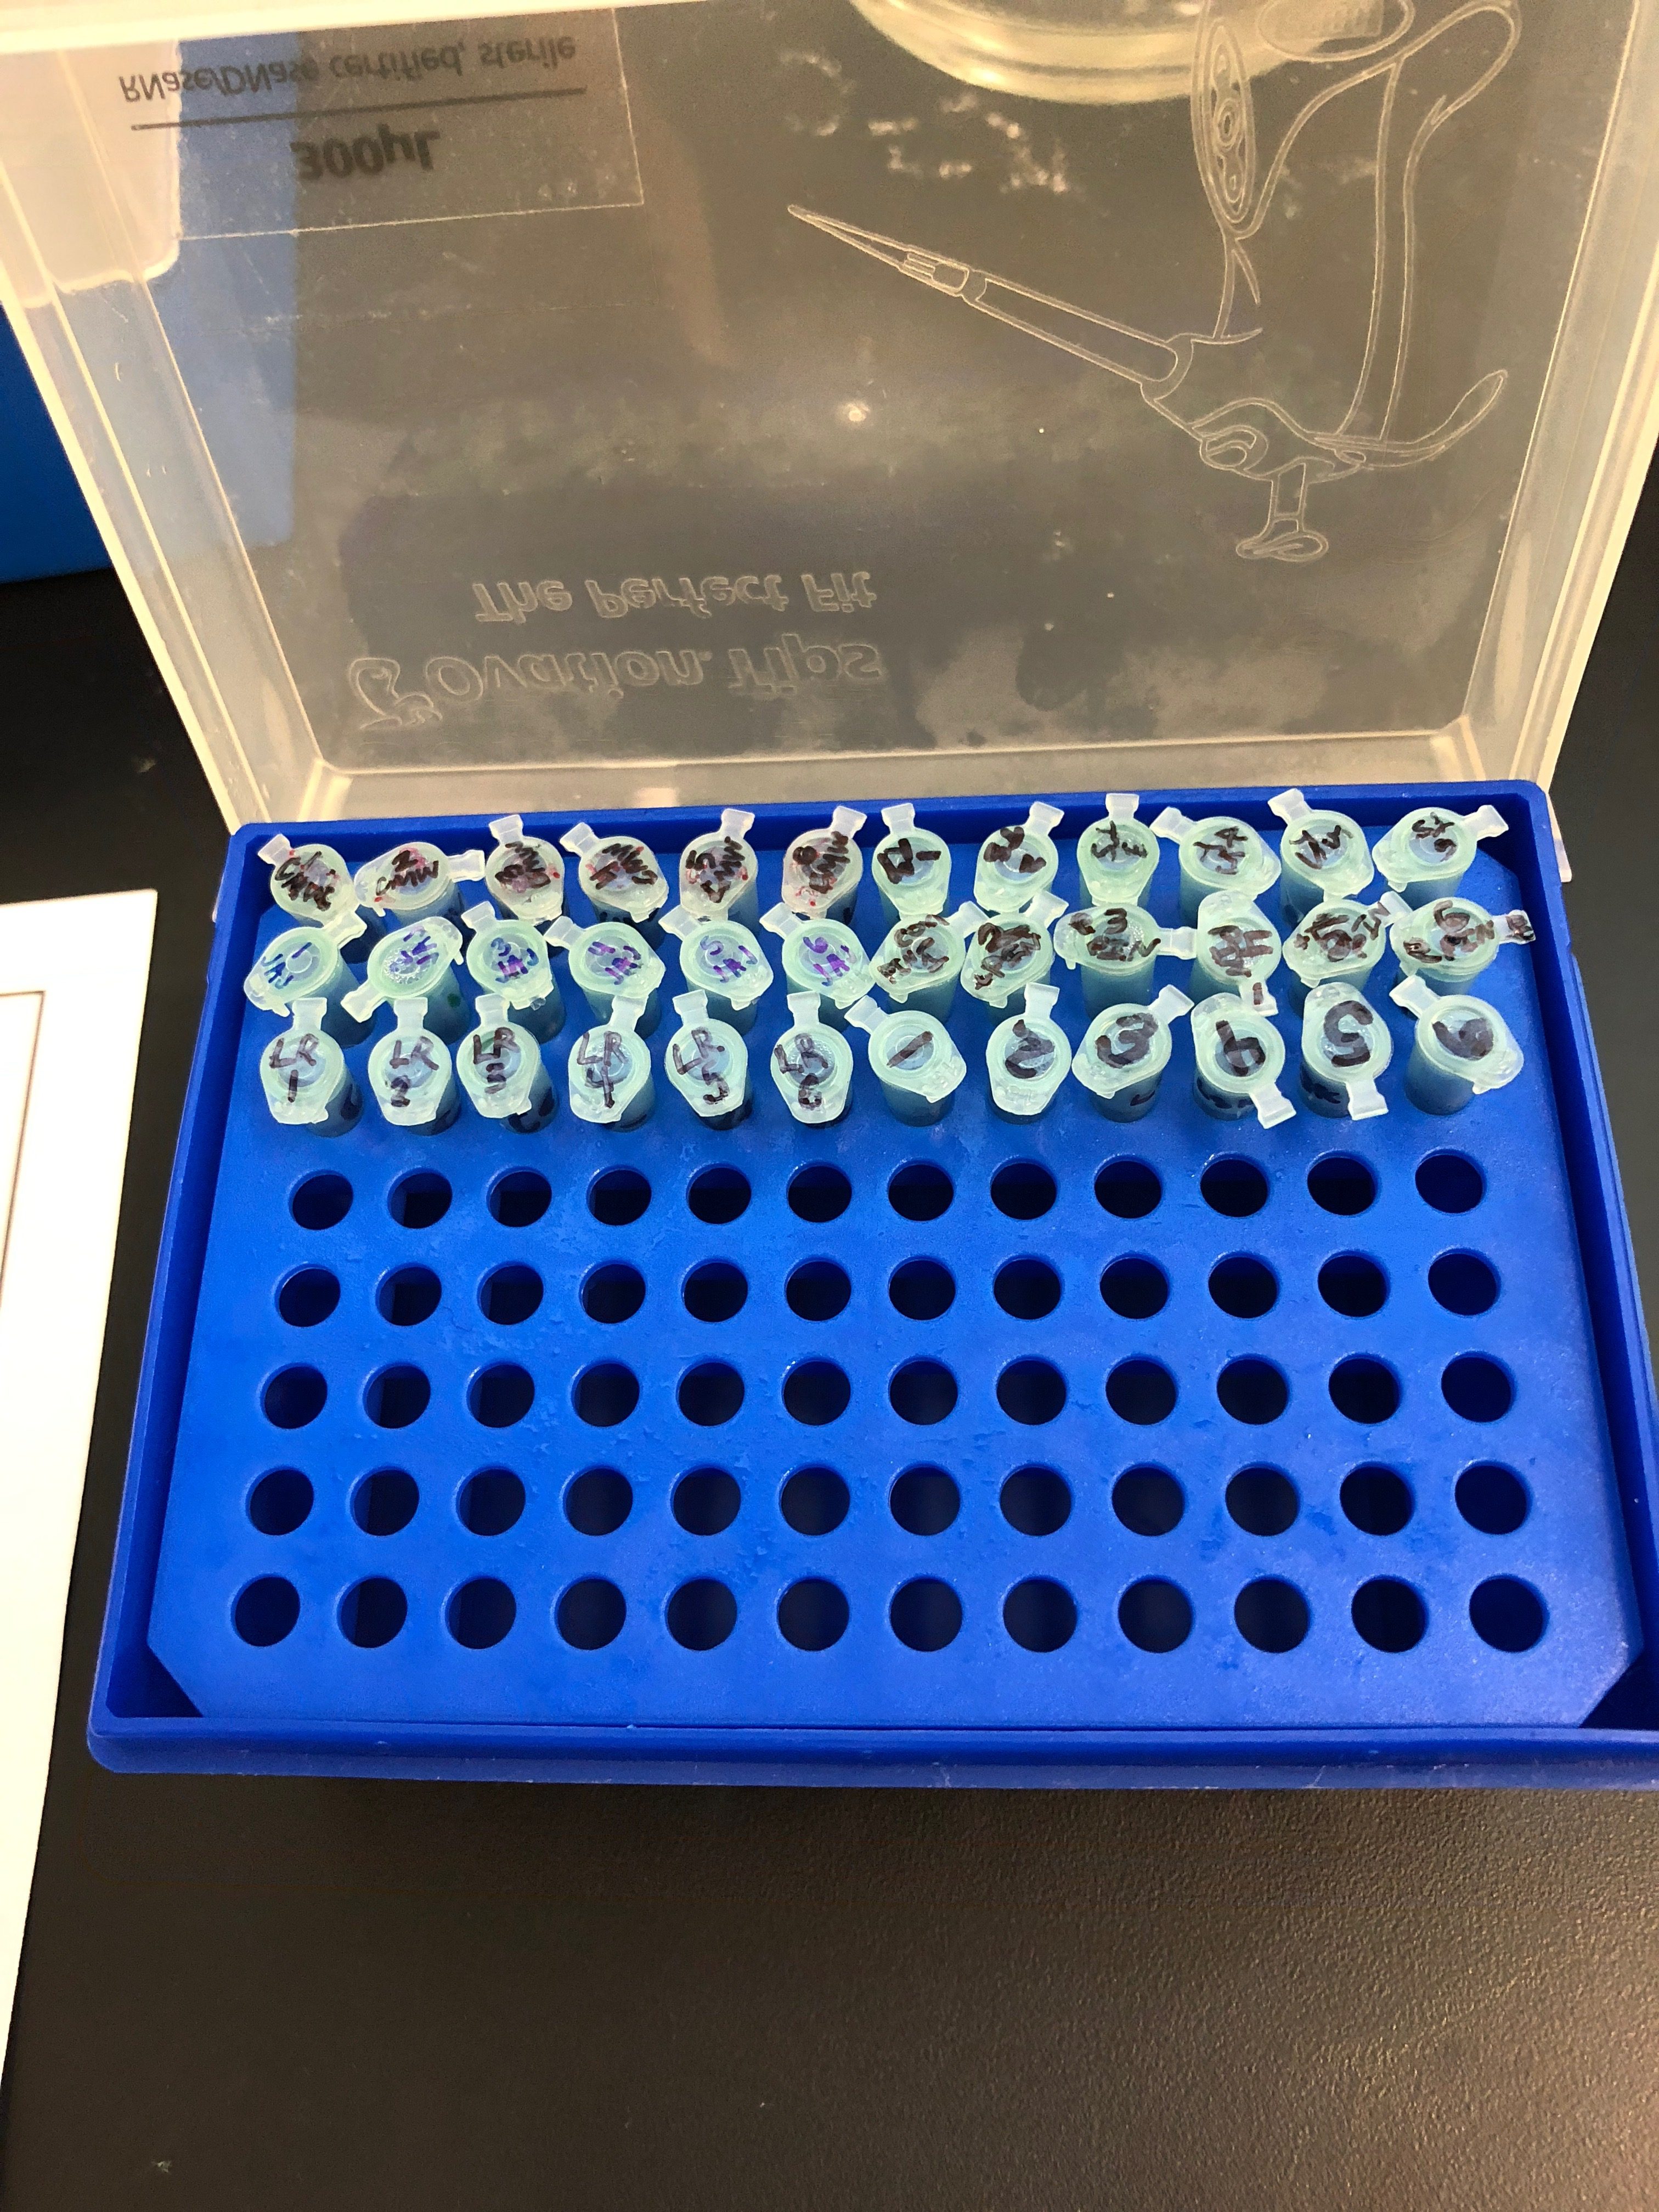
This is an image of our 3 PCR tubes located in the thermocycler.
*Our group’s tubes are located in spots 4-6
While creating the gel, I managed to pour the agarose liquid mixture into the mold at as hot of a temperature as I could so that the gel would solidify evenly because in the past, when the gel cooled for too long and was then poured, ended up being uneven because it had already started to harden before it was formed.
During this lab we were able to perform the chelex extraction individually which I think was very helpful because my group previously performed the PowerSoil Extraction so I was not necessarily aware of all of the components of this procedure. So, during this lab I was able to personally go through the Chelex protocol which allowed me to further understand why each step was being performed and what majored purpose it had within the procedure.
Storage:
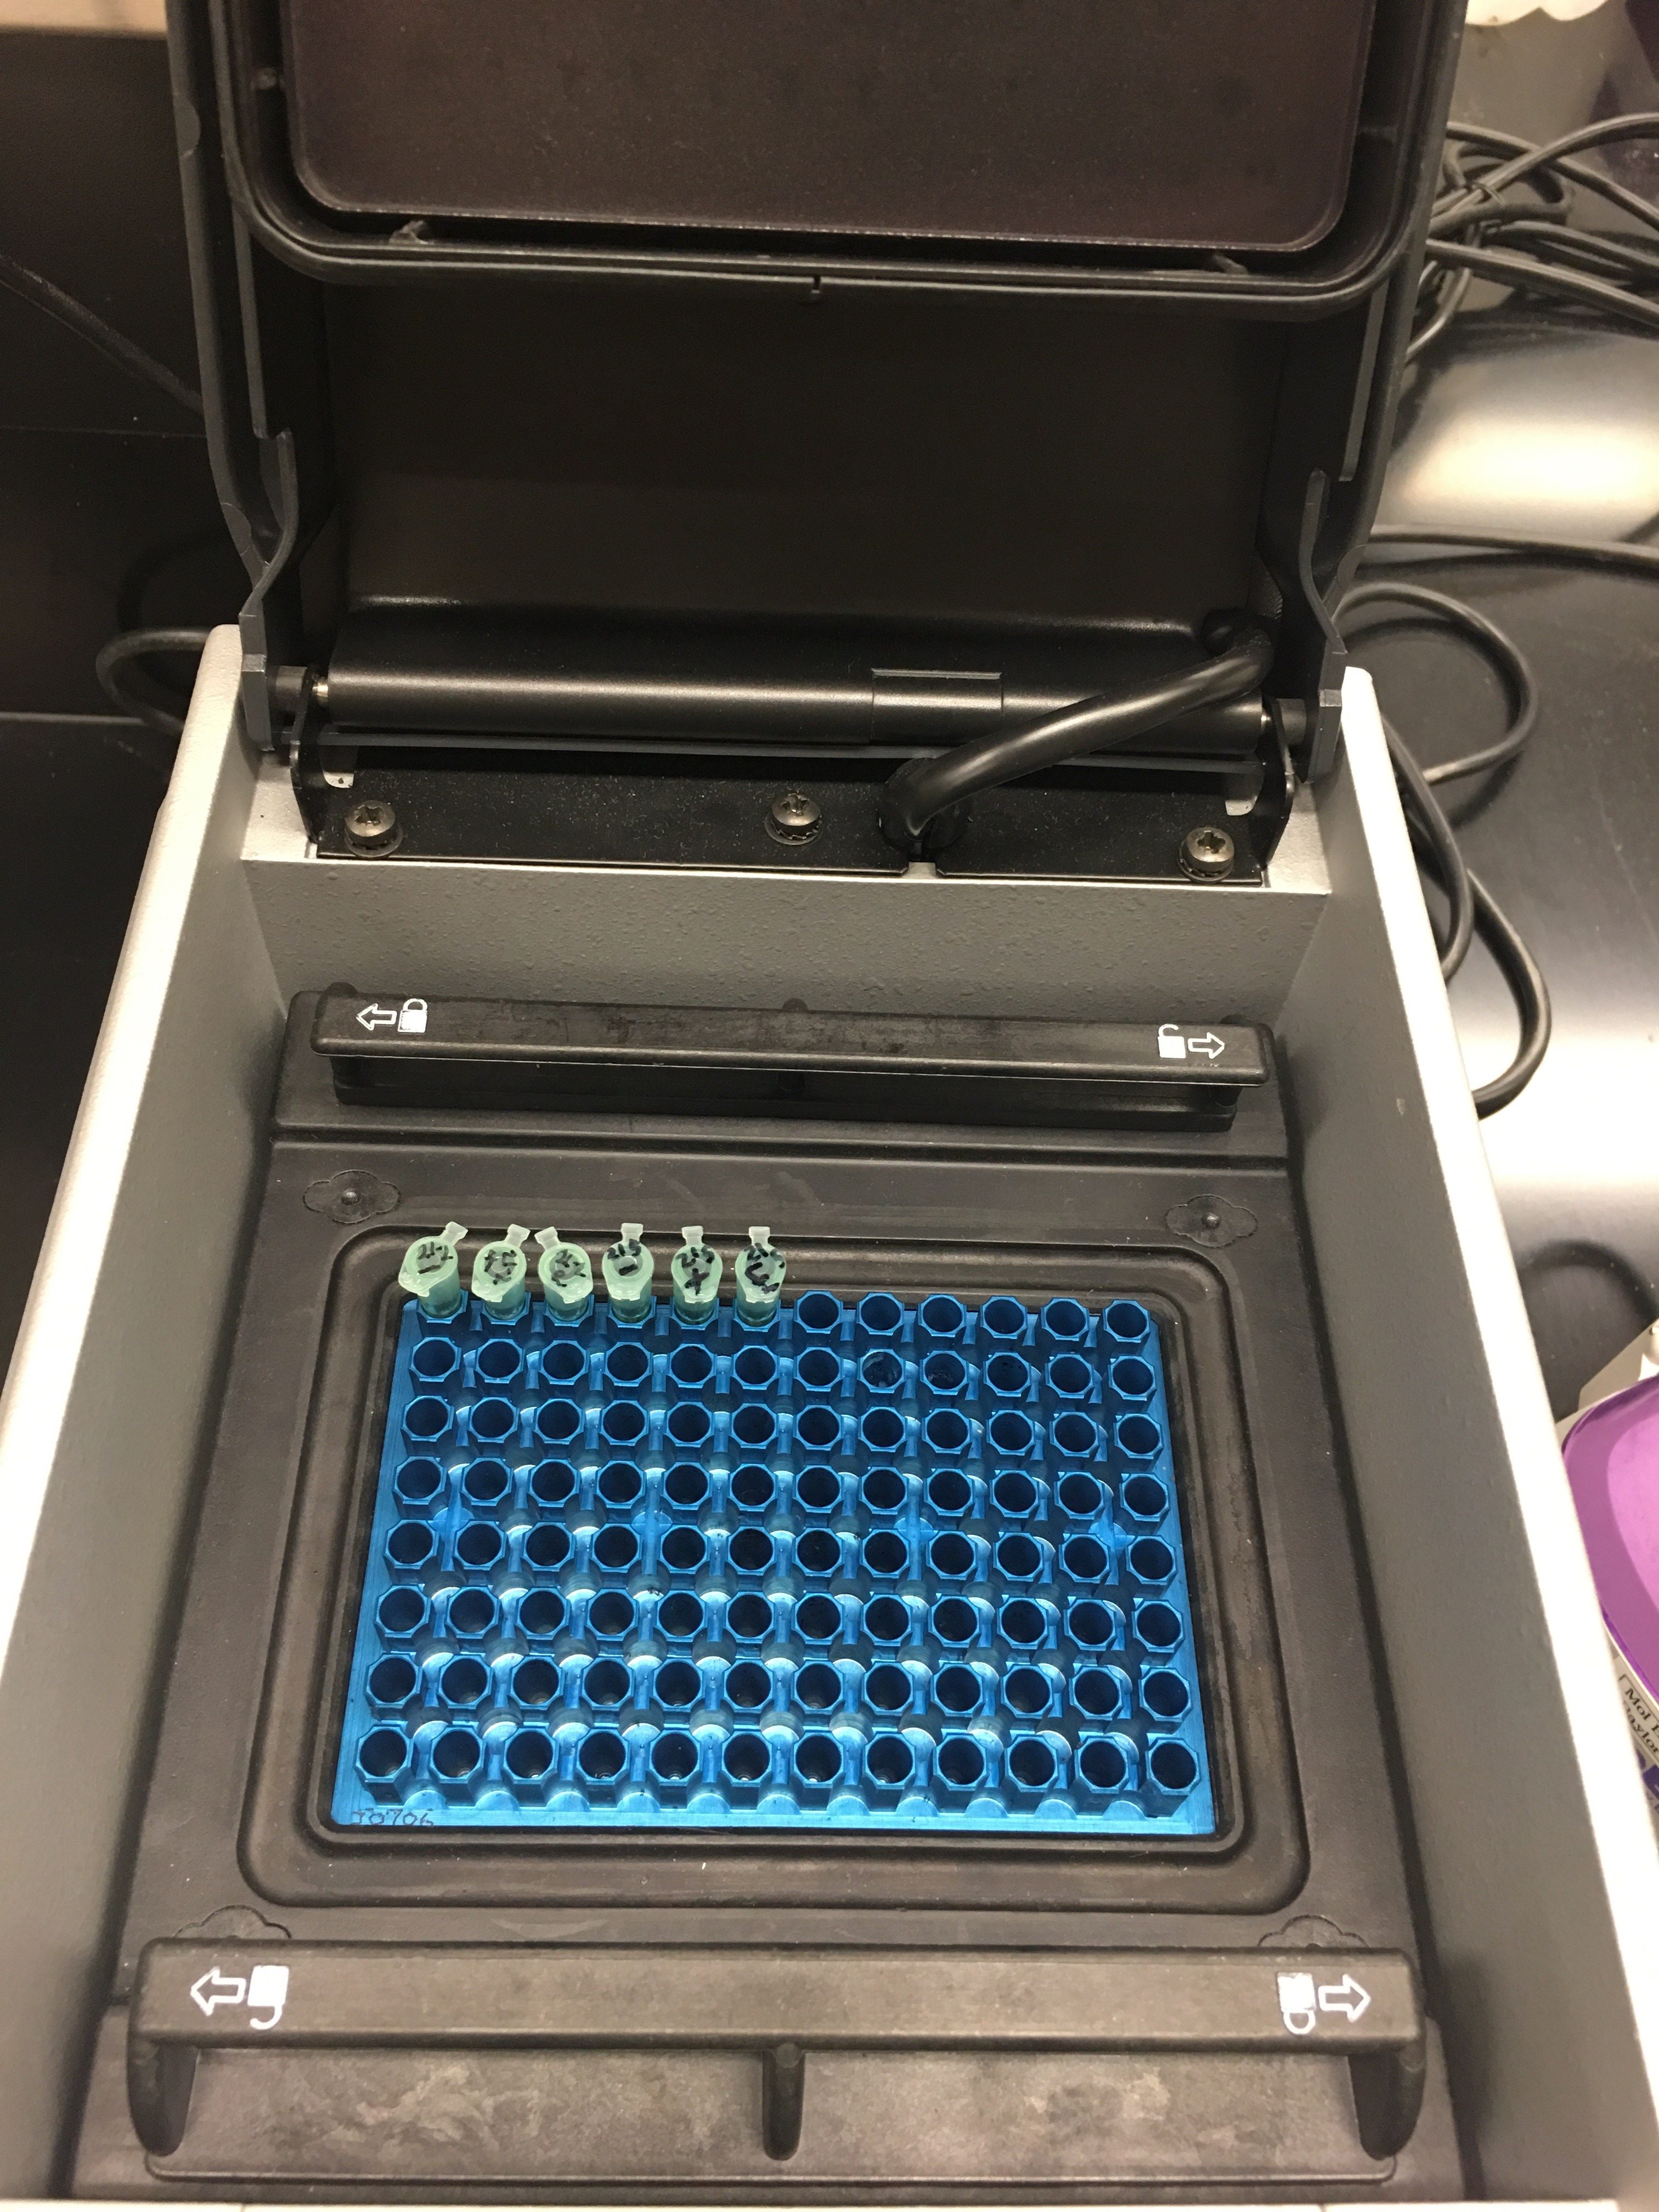
Our PCR tube that were labeled 21-5; -, +, eDNA, were placed in the thermocycler so we may run PCR, our gel was left on the table to be stored later for next lab and was labeled “KSL-5 + KEC-6”. These will be used to run gel electrophoresis during the next lab. Our eDNA sample was placed in a tube rack that was stored in the freezer for later use.
Future Goals:
In the future, I hope that our new gels, after our next run of gel electrophoresis, show that the Chelex extraction is a successful procedure that may continuously give us the results we want. If we are able to rely on this procedure then we may be able to add it to our metabarcoding protocol and have the eDNA we created be sent for sequencing and potentially aid us during taxonomic identification. I hope that this run of our experiments will be successful and we are able to consider it as an effective protocol.
April
5
Lab 11: Gel Electrophoresis 3/29/18
Objective:
The objective of lab today in to run our 6 PCR samples and a DNA ladder on the 1.8% gels that we made last week. In order to successfully perform gel electrophoresis we must carefully pipette our samples into the wells without damaging them. The goal of this is so that we are able to determine whether or not the eDNA sample we are using contains the cox1 and v4 genes we were looking for.
Purpose:
The purpose of this experiment is to test our knowledge of what we have learned this far in lab. We had to calculate the amount of agarose we needed to make a 1.8% gel and we continue to do mathematical equation so that we may become more familiar with these procedures that we will have to do for the majority of our careers. We are also doing this so that we can successfully run gel electrophoresis, and if the gel is too think or heavy concentrated with agarose then it may prevent the strands of DNA from properly traveling through the gel.
Procedure:
1.) Obtain the gel created from the previous lab and the negative controls, positive controls, and eDNA samples that your group created for each primer and ladder.
2.) Place the gel into the gel box and fill the box with TAE buffer until it is just above the gel.
3.) Pipet 5 micro-liters of the primer into the first well and 10 micro-liters on the controls and eDNA samples into the following wells.
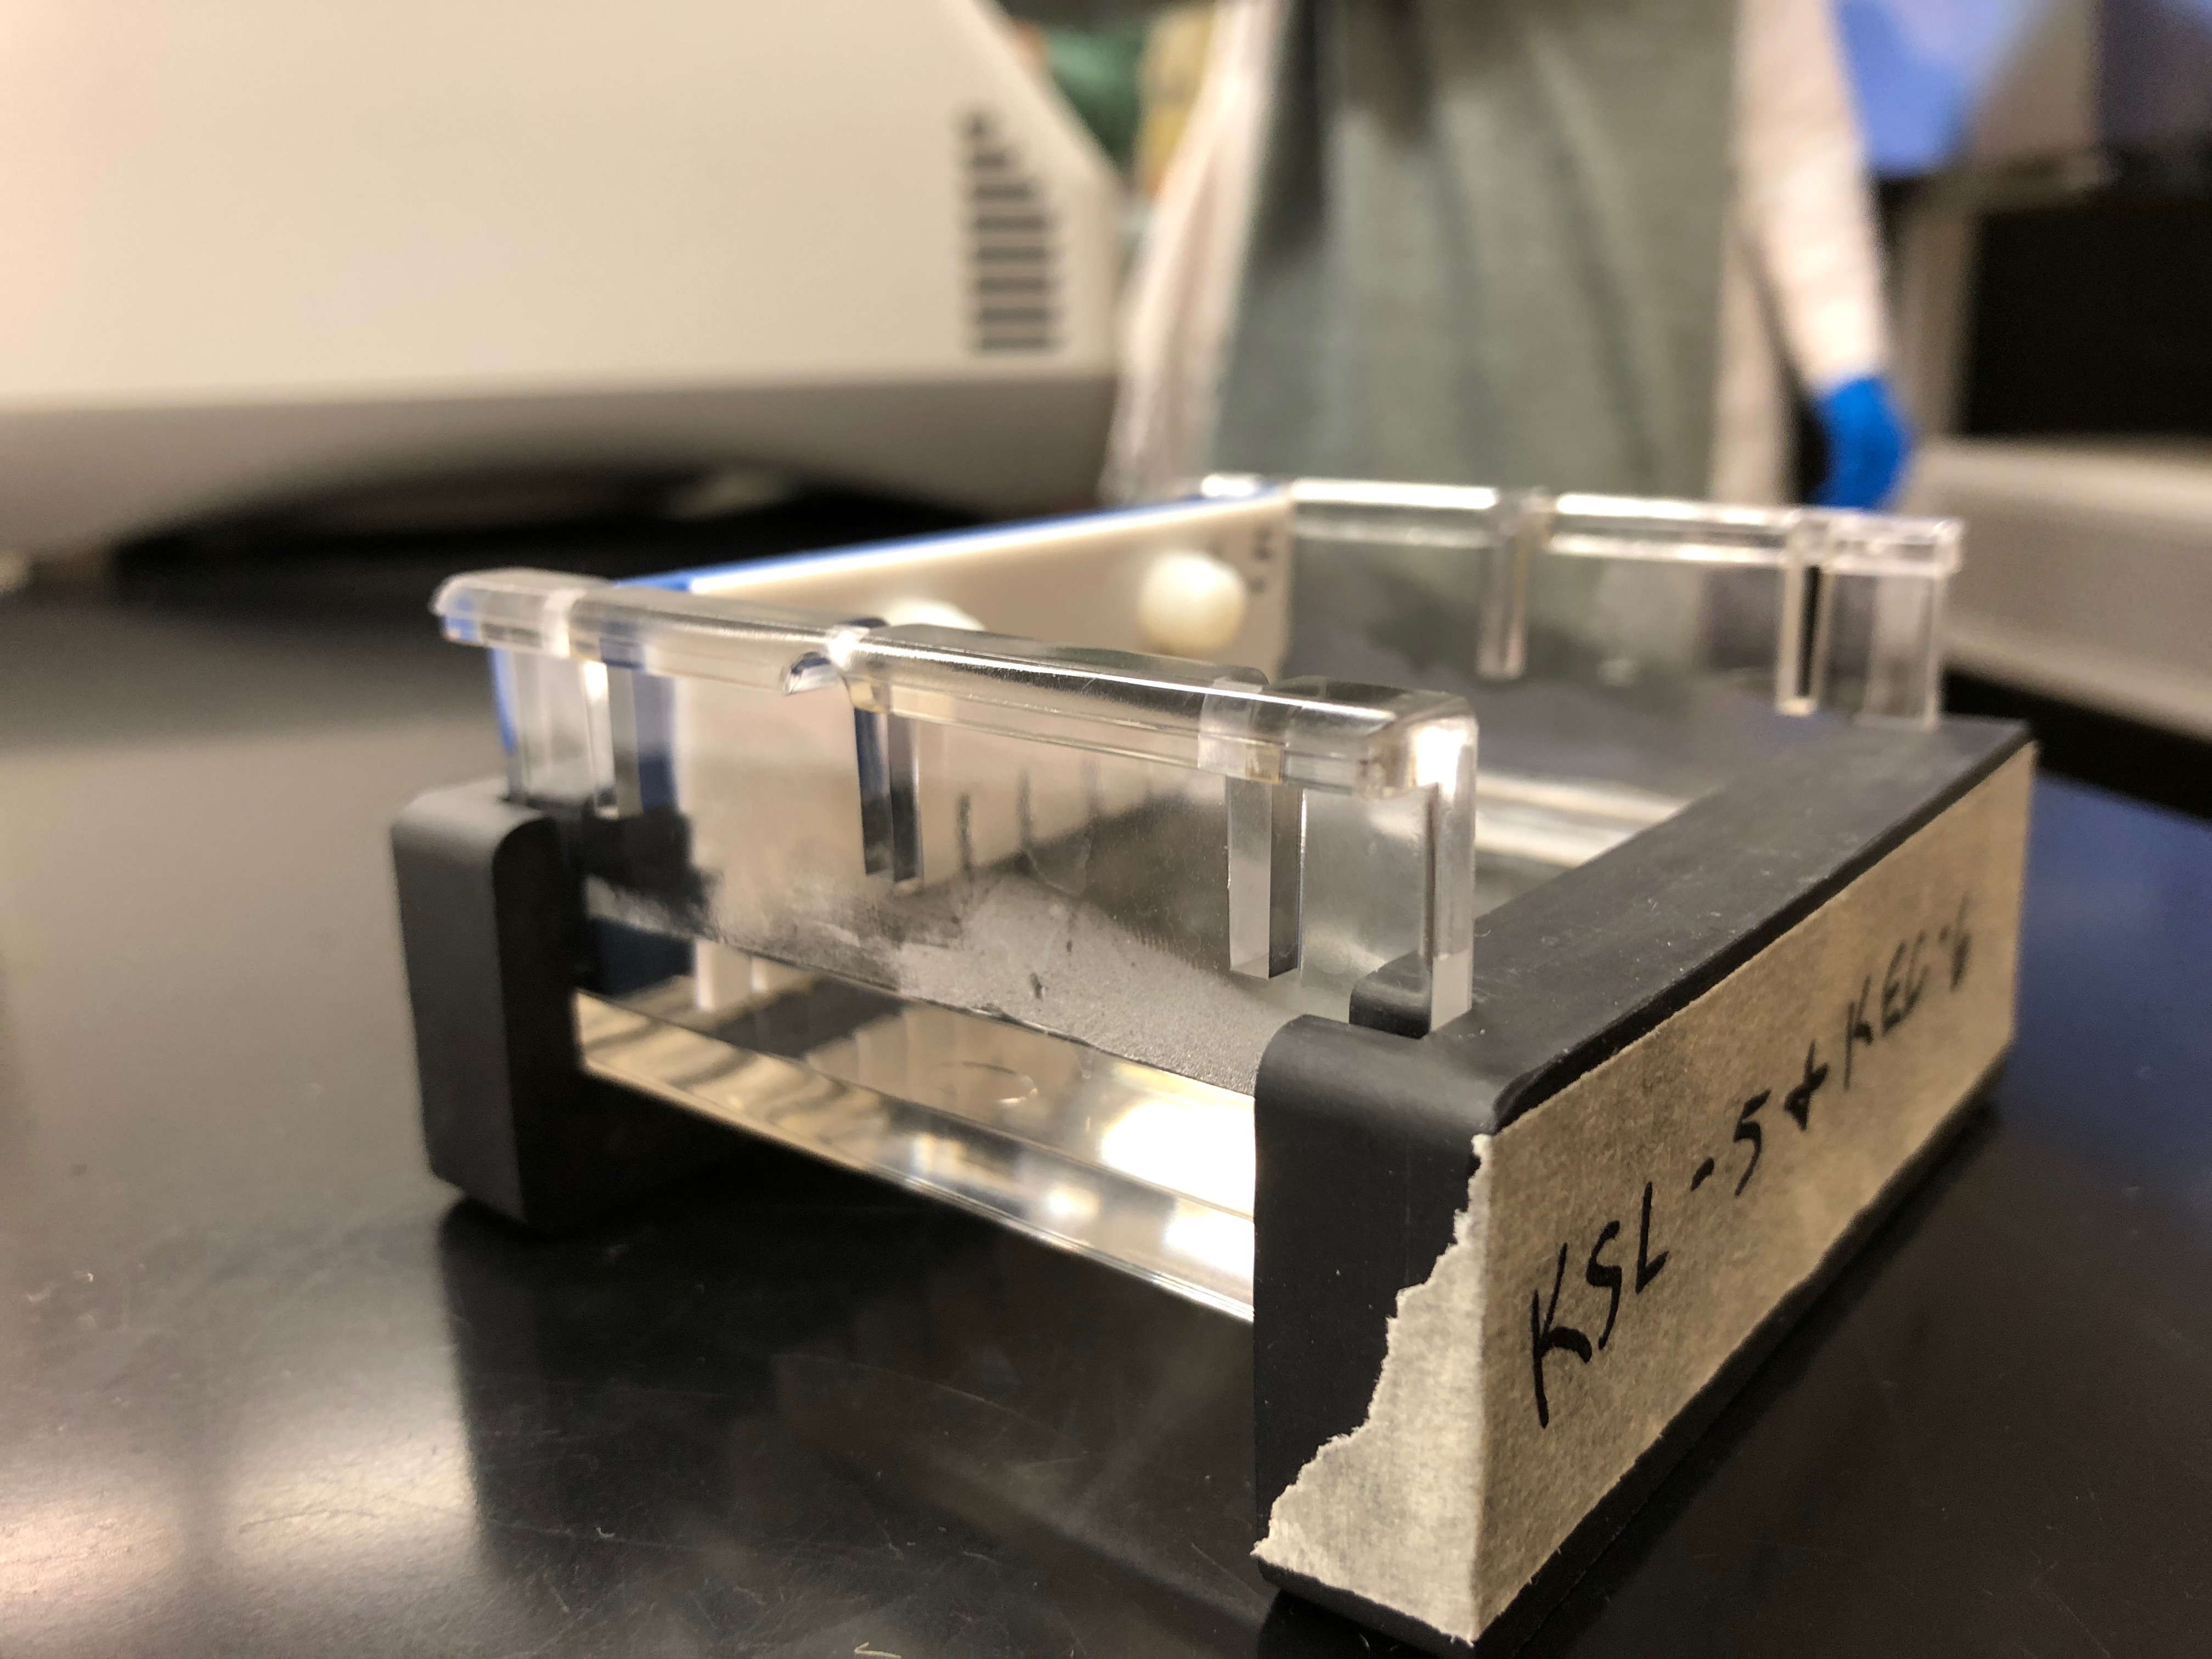
4.) More specifically, pipette the cox1 negative control into well 2, the cox1 positive control into well 3 and the cox1 eDNA sample into well 4.
5.) Then (leave well 5 empty) pipette the v4 negative control into well 6, the v4 positive control into well 7 and the v4 eDNA sample into well 8.
6.) Once all wells are full, cover the box with its lid and plug the red and black cables into the machine that conducts the electrical current.
7.) On this machine, set the voltage to 95 and start gel electrophoresis. Allow the gel to run for at least 30 minutes.
8.) Once the gel is done, remove it and place on the the BioRad Gel Doc imaging machine so that we may be able to see the bands on the gel. Record the information in your lab note book.
—————————————————————
***While waiting for the gels to complete gel electrophoresis, learn about NextGen Sequencing and the main steps of bridge amplification as well as draw a flow cell and label the oligonucleotides.
Data/Observations:
At the beginning of this lab we noticed that our original gels had been frozen so we borrowed a gel from the previous lab and Dr. Adair made them new ones. My group and I were also excited to see that both genes were found in our environmental DNA samples and we can’t wait for them to sent off and sequenced and the image above is a depiction of our gel electrophoresis results.
Storage:
The samples (previously labeled during last lab) used during gel electrophoresis were placed back in the tube rack that they were originally retrieved from since we had such great results from our gels, we were told to keep the original samples. Due to the fact that we now had an image of the gel, we were able to safely discard the gels and the gel mold was bleached and washed so that it may be reused.
Future Goals:
In the future, I hope that we able to discover new ciliates or at least be able to identify which ciliates are present within our sample if their DNA has already been sequenced. I hope to further my knowledge of the procedures we are currently using so that I may apply it to my future research. I hope that this experiment, and our results may pave the way for future labs to come. Maybe our research and the protocol we are trying to created can help scientist to further taxonomic identification of unknown ciliates.
March
23
Lab 10: Preparing for Gel Electrophoresis (cox1/v4 primers) 3/22/18
Objective:
The goal of the lab is to learn how to create a gel after having to perform multiple calculations. Being able to calculate how much of a substance goes into another substance can help us in later experiments in our research careers. Another objective of this lab is to understand the nano drop results and how they are crucial as we continue further research. We also have the continuous goal of becoming better more educated science majors by revising our rough drafts of our research papers to see how well we can communicate what we are doing in an accurate, precise, and scientific way.
Purpose:
The purpose of this lab is to prepare the samples with the primers so that we may later use them for gel electrophoresis. We eventually hope to see successful results in our gels that we created during gel electrophoresis. Many groups also hope to further advance our to our goal of metabarcoding ciliates once we get over this small obstacle related to PCR and gel electrophoresis since we have done this before. Another purpose of performing these experiments is to help determine which protocol, Power Soil or Chelex, provided the best results and if the results can be replicated.
Procedure:
1.) Obtain a tube rack containing water, the DNA that was extracted from the previous lab, six tubes containing 12.5 micro-liters of 2x master mix, the cox1 and v4 primers, 10x TAE buffer, a serological pipette, a 100mL Erlenmeyer flask and 0.6 grams of agarose powder (and weigh paper).
2.) Label the six tubes containing 2x Master mix with the number 1-6.
3.) In tubes 1-3, pipet 0.625 micro-liters of the cox1 primer.
4.) In tubes 4-6, pipet 0.625 micro-liters of the v4 primer.
5.) In tubes 1 and 4, (these are the negative control tubes) pipet 1 micro- liter of water.
6.) In tubes 2 and 5, (these will contain the positive control using a DNA sample from a paramecium culture) pipet 1 micro- liter the positive control sample into each.
7.) In tubes 3 and 6, (this will contain the environmental sample that was extracted using either the MoBio Power Soil kit or the Chelex protocol that was performed during the previous lab) pipet 1 micro-liter of the DNA that was extracted from the previous lab.
8.) After this is done, store your samples in the tube rack at the front of the room.
9.) In order to create the gel using a 1x TAE solution from the given 10x TAE solution, we added 90mL of water to 10mL of the 10x TAE and now we have the new solution.
10.) We then needed a total of 35mL of a 1.8% agarose TAE gel buffer. This was determined by multiplying the total amount of milliliters we needed with the percentage of agarose need and came up with 0.6mL and 1mL is about 1 gram. We concluded that we needed 0.6 grams of agarose to be added to the 1x TAE buffer.
11.) Once everything was added into a smaller 100mL Erlenmeyer flask, the flask was placed in the microwaved to be heated at power 7 for 1 minute and 20 seconds, or until boiled.
12.) Once it was boiling, it was removed from the microwave to cool for a few minutes. Then the ethidium bromide was added (make sure you wear gloves because this is a carcinogen).
13.) While that is being completed, make sure that the gel mold is properly assembled and ready for the hot agarose to be added.
14.) Retrieve the flask from Dr. Adair and quickly return to the gel mold and pour the hot agarose liquid into the mold before it cools.
15.) Let the gel set for several minutes so that it may harden and be later used for gel electrophoresis.
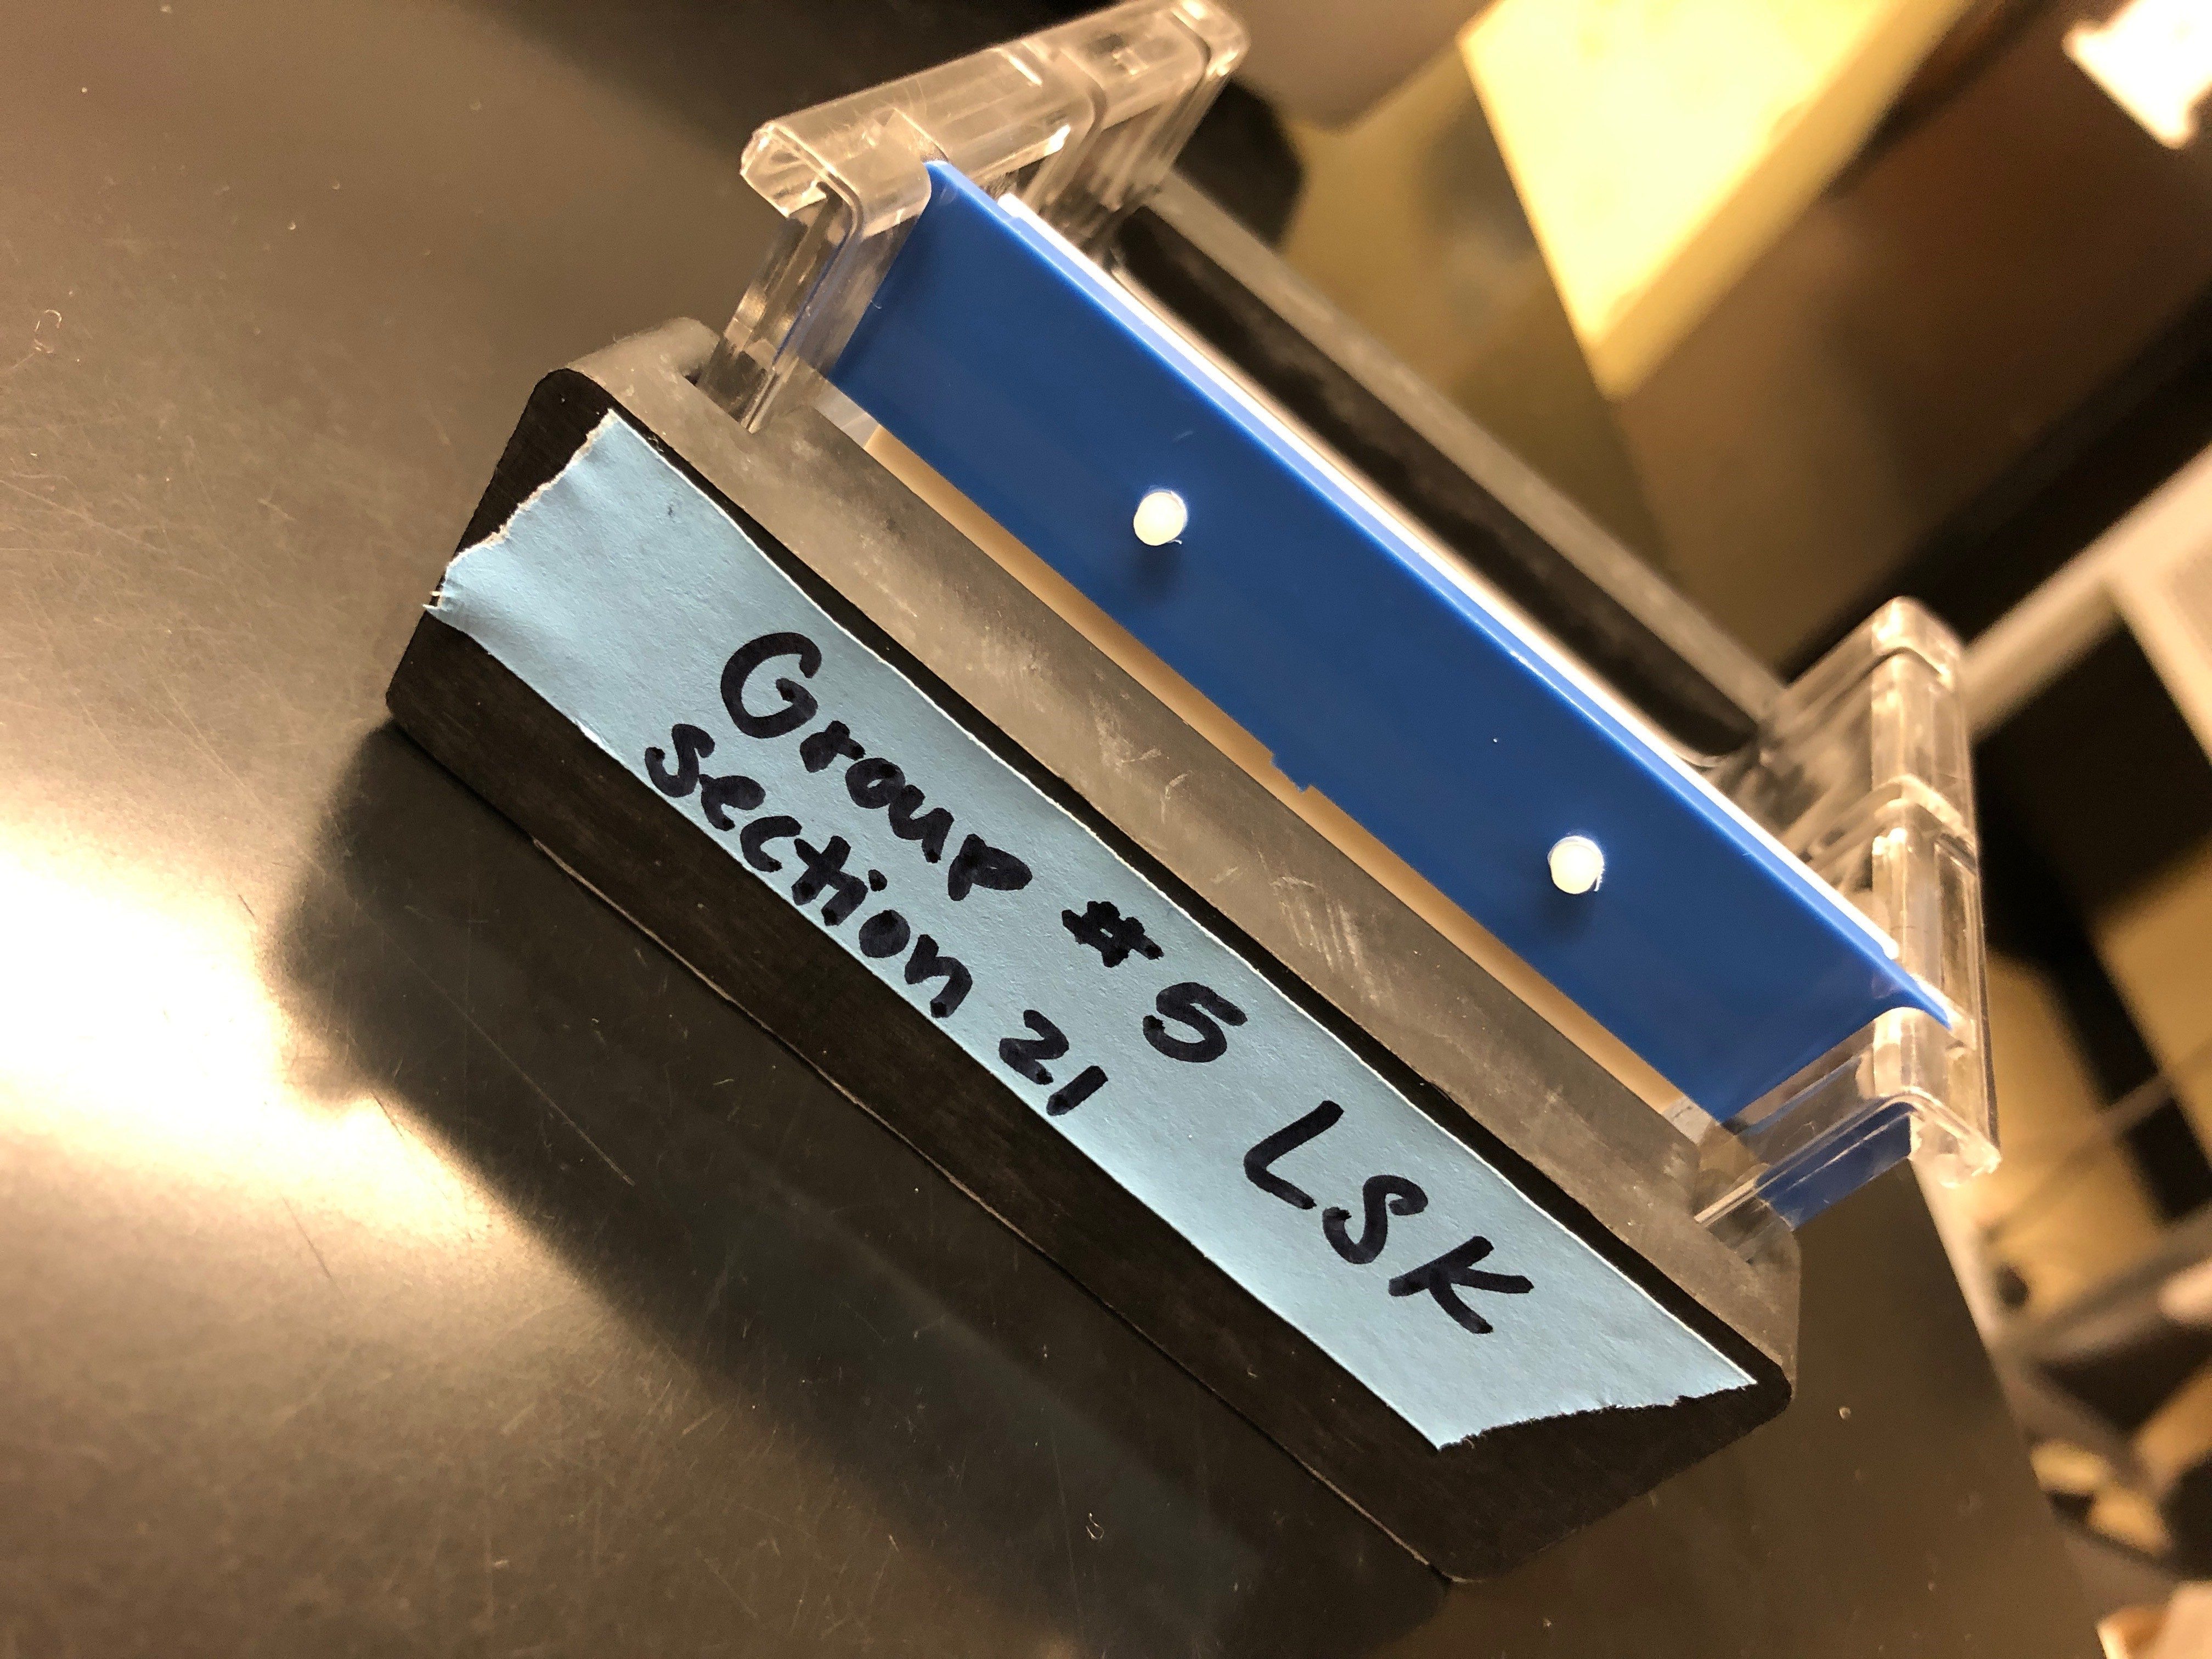
16.) Obtain blue tape from hope and write your groups identifier on it and place on the side of your gel mold.
Data/ Observations:
During this lab, we had to create our own concentration of the TAE buffer to create the gel. I poured the gels both times we have had to do this in lab and I’ve found that making an even gel is crucial to the amount of time in between adding the ethidium bromide after it boiled and pouring it into the mold. The last time I poured the gel I waited for the flask containing the agarose to cool a little bit but I noticed that the mixture started to harden within the flask so that when I poured it in the mold, it was uneven because the pieces that had harden prevented the remaining liquid from being distributed evenly throughout the mold. When I poured the gel this time, Dr. Adair gave me the flask (after she had added ethidium bromide) when it was still extremely hot and told me that it was okay to pour. I almost burnt my hand through my gloves as I was carrying the flask back to my lab station. As soon as I got to lab station, I poured the hot agarose liquid into the gel mold and it seemed to have evenly dispersed throughout the mold and because I didn’t really let it sit in between, there were no clumps that had started to hardened that prevented the liquid from evenly filling the mold.
*My group used the MoBio Power Soil Kit
*Our nano drop results showed 1.98.
Storage:
After we finished preparing our primers and creating our gel, we labeled the gel mold using a piece of blue tape that says “G#5 LSK Section 21”. The gels still needed to set before they could be moved so we left them on our lab stations to be later stored for the next lab session.
We stored our samples (to be later used for gel electrophoresis) in the micro-centrifuge tubes in a tube rack at the front of the rooms and labeled them with the number one through six to represent whether they were the COX 1 primer or the V4 primer. Tubes 1, 2, and 3 were using the COX 1 gene and they contained (in order from left to right), the negative control, the positive control, and the sample containing the environmental DNA. Tubes 4, 5, and 6, used the V4 primer and contained (in order from left to right) the negative control, the positive control, and the environmental DNA sample.
Future Goals:
In the future, I hope that we are able to successfully run gel electrophoresis. In the past when we have run gels, we did not see any DNA marker bands but we also didn’t have very great numbers from the nano drop results. This time our nano drop results are better and show that there is in fact DNA present in the samples, so I am hopeful that the gel we will run in the future will accurately show the DNA present within the sample we isolated using the MoBio Power Soil kit. I also hope that we can see that the DNA does in fact carry the cytochrome oxidase one gene and the V4 gene.
March
16
Lab 9: DNA Extraction 3/15/18
Objective:
The goal of today’s lab is to use to different types of DNA extraction methods. We will use the MoBio Power Soil Kit and the Chelex Extraction protocol to determine which procedure would work best when we use the DNA in later experiments. The main go is to try these new procedures because the one’s used in the past did not yield any significant results.
Purpose:
Due to the fact that we are implementing new procedures, we may be able to determine sources of error if any arise since we are using different protocols. We are trying new protocols to compare their results which will help us to determine whether or not our metabarcoding goal could be achieved. We also split up the protocols within our table groups which would also help us to interact with more people and discuss the protocols we are each using.
Procedure:
MoBio/Power Soil Kit-
1.) Weigh out 0.3 grams of soil and add it to the powerbead tubes then gently vortex.
2.) Add 60 micro-liters of solution C1 and invert several times or vortex briefly to mix.
3.) Place the powerbead tube horizontally on a flat-bed vortex pad with tape and vortex at maximum fro ten minutes.
4.) Centrifuge tubes at 10,000 x gravity for thirty seconds at room temperature then transfer the supernatant to a clean 2mL collection tube.
5.) Add 250 micro-liters of solution C2 and vortex briefly.
6.) Incubate for five minutes at 4 degrees Celsius (place in the refrigerator).
7.) Centrifuge the tube at room temperature for one minute at 10,000 x gravity.
8.) Then transfer 600 micro-liters of supernatant to a clean 2mL collection tube.
9.) Add 200 micro-liters of solution C3 and vortex briefly then incubate at 4 degrees Celsius by putting the tube in the green tube rack within the refrigerator.
10.) Centrifuge the tubes at the room temperature for one minute at 10,000 x gravity.
11.) Transfer up to 750 micro-liters of supernatant to a clean 2mL collection tube.
12.) Add 1.2mL of solution C4 to the supernatant and vortex for five seconds.
13.) Load about 675 micro-liters onto a spin filter and centrifuge at 10,000 x gravity for one minute at room temperature. Discard the flow through and add 675 micro- liters of supernatant to the spin filter and centrifuge again at room temperature for one minute.
14.) Load the remaining supernatant onto the spin filter and centrifuge at 10,000 x gravity for one minute at room temperature.
15.) Add 500 micro-liters of C5 solution and centrifuge at room temperature for thirty seconds at 10,000 x gravity.
16.) Discard the flow through from the 2mL collection tube
17.) Centrifuge at room temperature for one minute at 10,000 x gravity.
18.) Carefully place the spin filter into a clean 2mL collection tube, then add 100 micro-liters of solution C6 to the center of the white filter membrane.
19.) Centrifuge at room temperature for thirty seconds at 10,000 x gravity.
20.) Discard the spin filter and store in the freezer.
Chelex Extraction-
1.) Transfer 300-500 micro-liters of ciliate culture from a non-flooded plate to a microcentrifuge tube. Record which ciliate culture you are extracting and label your tubes.
2.) Centrifuge at 6,000 x gravity for five minutes, after centrifugation, using a pipet to extract out the supernatant.
3.) Weigh 0.5 grams of chelex and transfer to a 15mL conical tube then add D.I. water to the 10mL line of the tube.
4.) Add 200 micro-liters of 5% Chelex to the pellet in the microcentrifuge tube, then vortex for one minute (use a p1000 micropipette and cut the tip slightly to allow more of the sample through and avoid clogging).
5.) Incubate for 30 minutes in a 56 degree Celsius water bath to help break open the cells and denature some of the proteins.
6.) Then boil for eight minutes in a 100 degree Celsius water bath.
7.) Vortex for one minute.
8.) Centrifuge at 16,000 x gravity for three minutes (this is to pellet cellular debris and chelex beads).
9.) Use a micropipette to transfer the supernatant with DNA in solution to a clean microcentrifuge tube (try to avoid pipetting out the Chelex beads).
10.) Make sure to label the top and sides of the microcentrifuge tubes.
Controls-
*Create a control by using the paramecium sample and performing the procedures identically to before. this will show will help us determine wether or not the cells are destroyed further or the protocols we followed did not produce the results we wanted since we know that the control would infect have cells.
Data/Observations:
In this lab, the soil from the non- flooded plate in the Chelex procedure looked a lot lighter compared to the soil used in the MoBio kit. I think this had much to do with the fact that the PowerSoil procedure called for 0.3 grams of actual soil where as the other procedure try to extract cells from the water of a non-flooded soil sample plate. The PowerSoil would probably be a more pure procedure do to the fact that we used the exact soil we wanted to isolate versus trying to extract ciliates from a well plate. I thought it was interesting that we placed the soil directly into the power bead tube because we had always previously extracted our cells from some time of aqueous environment. It was also interesting when comparing the two procedures because they were very different, yet supposed to yield the same result. The MoBio kit incubated at fairly cold temperatures wheres the Chelex protocol incubated at extremely hot temperatures. I am curious to see if each samples will yield the same results in gel electrophoresis or using the nano drop technology as our experiment progresses.
Storage:
In both protocols, we stored the samples in the freezer in a tube rack for later use. This will help preserve our DNA so that we may be able to continue to use these samples the next time we are in lab.
Future Goals:
In the future I hope that we will be able to perform PCR and eventually have a successful run of gel electrophoresis where bands of DNA are present. I hope that using these new kits for DNA extraction with help us to further are original goal of metabarcoding ciliates within the soil.
March
2
Lab 8: Gel Electrophoresis 3/1/18
Objective:
The goal of this lab is to successfully learn how to pipet loading buffer and other samples into the wells of an agarose gel. We also learned how to calculate how much of a certain solution you would need depending on there original concentrations. The main part go this lab was to remind us why we are trying metabarcode ciliate DNA and how it would be beneficial to the environment.
Purpose:
The purpose of learning how to load samples into wells is so that we could successfully run gel electrophoresis. If we pipetted the samples into the wells improperly, then the fluid may have been released into the loading buffer and contaminated other wells. Another purpose of this lab is to help remind us why we are doing what we are doing and how this research may be beneficial to the environment.
Procedure:
1.) Add 30 µL of 10x TAE to a Erlyenmeyer flask using a serological pipette, then add 270 µL of water and swirl to create a loading buffer solution.
2.) Obtain your gel and place it into the gel box. Place the red cable into the red colored hole of the power box that creates the electrical impulses and then place the back cable into the black colored hole.
3.) Add the loading buffer solution to the gel box with the gel until a thin layer of solution covers the gel so that the wells are completely submerged.
4.) Create a practice loading buffer solution with tube micro-centrifuge tube containing 5 micro-liters of the loading dye and 10 micro-liters of water.
5.) Have each group member practice pipetting into a well of the gel.
6.) Obtain the DNA, positive control, and negative control samples as well as the ladder. Pipet 10 micro-liters id the loading dye into each of the samples but not the ladder.
7.) Once each sample contains the bromophenol blue dye, pipet 5 micro-liters of the ladder into a well and then pipet 10 micro-liters of each of the DNA, positive control, and negative control into their own wells.
8.) Cover the gel tray and run for 30 minutes at 110 power.
9.) Draw a picture of your gel and label the wells with the corresponding solution present in each to keep track of everything.
*We ran the gels for longer than this in order to get the fragments, if any, to migrate further down the gel.
*Today we also were able to review each others rough drafts of the introductions for our research papers. We gave and received feedback to help us improve our draft for next time.
Data/ Observations:

The image above depicts our gel after it was scanned by a gel imaging machine that used UV like to differentiate the bands from the gel itself. Our wells were used as follows: 1. Practice Loading Buffer One, 2. Ladder, 3. DNA sample, 4. Positive Control, 5. Negative Control, 6. Empty well, 7. Practice Loading Buffer Two, Practice Loading Buffer Three. Unfortunately, the only bands that are present after completion of gel electrophoresis. We can conclude that there was no DNA present in the samples that we had tested. Due to the fact that there were no bands present in the positive control then we can assume the cells that were present must have been destroyed in an earlier process. Without bands and fragment separation of base pairs, we are unable to continue the experiment and this step may have to be repeated with different DNA samples and positive controls.
Current Storage:
During lab we were unable to complete gel electrophoresis because the bands had only migrated half way through the gel after being in the gel boxes for thirty minutes at high power. After this, I assume that the gel way removed from the gel box and scanned with UV light under a gel imaging machine. These scans were uploaded to canvas as pdf’s that were labeled with each group’s number and course section number. My group’s pdf was labeled “group 5 -21”.
Future Goals:
In the future, I hope that we are able to see the fragments of DNA within the samples using gel electrophoresis. We may not be able to proceed with the metabarcoding process because we have no DNA to compare anything with. I hope that once we get a sample that will migrate down the gel and visually show the presence of bands/ base pairs, we may then be able to compare that with the DNA of other organisms that have the cox 1 gene to determine whether or not our DNA samples also contained that gene.
February
23
Lab 7: Cytochrome Oxidase 1 (cox1/COI) and PCR 2/22/18
Objective:
In lab our goal is to learn how to quantify DNA using the “nanodrop” technique, how to set up and run a PCR reaction as well as learn to make an agarose gel. We hope to successfully complete the PCR reaction after learning the procedure, and achieve the end goal of being able to complete the metabarcoding process and be able to analyze as well as classify soil ciliates.
Purpose:
The purpose of today’s lab is to continue the PCR process and testing positive and negative controls as well as the DNA extracted from the soil sample. The purpose of learning how to make a gel and actually physically creating it, is to be able to successfully run gel electrophoresis. After reading the scenific literature provided from our pre-lab, we are able to conceptualize how the cox1 gene primers bind to the DNA and how this will allow us continue in our metabarcoding process.
Procedure:
*Use bleach to create a sterile work station. This will help avoid any contamination from other microbes and bacteria on the lab tables.
1.) Obtain three small tubes containing 12.5 micro-liters of the TAQ polymerase mixture.
2.) Label the tubes, “DNA test”, “positive control”,and “negative control”.
3.) Add 5 micro-liters of the DNA template sample to the tubes labeled “DNA test”, and “positive control”.
4.) Add 1 microliter of the cox1 primer to each of the three small test tubes.
5.) Add 11.5 micro-liters of H2O to the negative control tube.
6.) Add 6.5 micro-liters of water to the DNA test tube and the test tube labeled positive control.
7.) Add up the volume of everything added into the tubes to ensure that each has a final volume of 25 micro-liters.
8.) Place the tubes in a tube rack at the front of the room, record the place of each of the rubes within the rack.
9.) Store the tubes at 4 degrees Celsius or freeze until confirmation through gel electrophoresis may be performed.
10.) Proceed to making the gel for gel electrophoresis by adding 0.6 grams of agarose to 40mL of 1 x TAQ in an erlenmeyer flask. (Weigh the agar on a scale using weigh paper, tare the balance after placing the weigh paper on the scale and add agar powder until there is 0.6 grams).
11.) Cover the top of the flask with weigh paper and then place the lid loosely over both to prevent it from exploding in the microwave.
12.) Place in the microwave at power 7 for 1 minute and 20 seconds, or until boiling.
13.) After, place in heat bath for about 5 minutes then add ethidium bromide.
14.) Pour the mixture in a gel mold and label is with your group identifier (LSK G#5).
15.) Let sit for 30 minutes then store in the refrigerator for next lab.
Data/ Observations:

COX 1 Gene Forward Primer:
5′-ATGTGAGTTGATTTTATAGAGCAGA-3′
COX 1Gene Reverse Primer:
5′-GGDATACCRTTCATTTT-3′
PCR Cycling Conditions for COX 1 Primers:
Stage 1: 94 degrees Celsius for 4 minutes.
Stage 2: 5 cycles of denaturation at 94 degrees Celsius for 30 seconds, annealing at 45 degrees Celsius for 1 minute and extension at 72 degrees Celsius for 105 seconds.
Stage 3: 35 cycles of denaturation at 94 degrees Celsius, annealing at 55 degrees Celsius for 1 minute and extension at 72 degrees Celsius for 105 seconds.
Stage 4: Hold at 72 degrees Celsius for 10 minutes.
*We were required to where gloves for sterilization purposes and because ethidium bromide is a carcinogen.
*After pouring the gel into the mold, we believe that the liquid did not distribute equally before it started to harder, causing it to have a sense dense area of the agarose mixture around the wells.
Storage:
The three small tubes with the DNA test, positive and negative controls, were placed under the projector in a tube rack labeled on one axis with numbers and the other axis with letters. The DNA test tube is located in slot B1 labeled “DNA” on the side and a “5” that represent group number five. The positive control tube is located in slot B2 and is labeled with a “+” on the side and a “5” on the top and the negative control tube is located in slot B3 and is labeled with a “-” on the side and a “5” on the top. After creating a gel, we let it sot for thirty minutes so it could take the shape of the mold. It was later left on the end of our lab tables to be picked up and stored in the refrigerator so that we may use it during the next lab. The gel mold has a piece of blue tape that is labeled “LSK G#5” which stands for “Lindsey, Sandi, Kaitlyn Group # 5” which we have created as our group identifier.
Future Goals:
After completing the steps of PCR and creating a gel, I hope that we are able to run gel electrophoresis and are able to view the DNA fragments under the UV light. Our gel was not evenly distributed throughout the mold; I hope that this will not effect the DNA fragment traveling through it. I am somewhat worried that we will not be able to clearly see and DNA markers on the ladder in the gel because of our soil samples. In the future, I would like to be able to continue on with the metabarcoding process and hope the see the DNA fragments with in the gel so we can compare it to the markers of other organisms and classify them.
February
16
Lab 6: E.Z.N.A Tissue DNA Kit Protocol 2/15/18
Objective:
The objective of today’s lab is to finish our Ludox protocol and start the E.Z.N.A Tissue DNA Kit protocol. We hope to be able to have successfully isolated our organic cell layer from the original sample into a centrifuged pellet that can be washed with PBS buffer to further our process of DNA extraction. We aim to continue with the procedure we had previously discussed and are prepared to adjust when something doesn’t go exactly as planned.
Purpose:
The purpose of finishing the Ludox protocol is that we may be able to start the new protocol related to PCR. The purpose of the new protocol is to perform PCR and denature the DNA so that we can run gel electrophoresis. By performing these procedures, we hope to get one step closer to being able to our goal of metabarcoding and being able to classify and analyze ciliate DNA.
Procedure:
Finishing the Ludox Protocol
1.) Centrifuge at 4300 x g for 15 minutes in a swinging bucket rotor.
2.) Remove the liquid from the cell layer, about 1.5mL below the water-ludox interface. Make sure you move a total of 4mL. Transfer this to two labeled 2mL micro-centrifuge tubes.
3.) Centrifuge the 2mL tubes at 3000 x g for 5 minutes in order to completely pellet the cells.
4.) Remove the supernatant with a p1000 micro-pipette without disturbing the pellet and dispose of the liquid in your waste container.
5.) Add 100 micro-liters of the phosphate buffer saline (PBS) to each pellet and re-suspend them by flicking and pipetting up and down. Combine the cell suspension pellets together into one tube for a total of 200 micro-liters.
6.) Place five, 2 micro-liter drops on a concavity slide and count each cell present using the 40x lens. Record your number of cells per micro-liters, then obtain a class average of cell numbers. Use iodine to see the cysts of cells under the microscope.
Beginning E.Z.N.A Tissue DNA Kit Protocol
-
Preparing Cell Suspension
1.) Wash the cells by adding 200 micro-liters of PBS buffer and re-suspend the cells with the vortex. Remove the supernatant carefully and then add 25 micro-liters of OB Protease solution, vortex briefly.
-
Lysis
2.) Add 220 micro-liters of BL buffer, pipet slowly because the solution is very viscus. Vortex briefly and incubate the tube at 70 degrees Celsius for 10 minutes in the heat block and vortex again once during this time.
-
Binding
3.) Add 220 micro-liters of 100% ethanol to the tube and vortex briefly. This will help the DNA to bind to the silica column.
4.) Insert HiBind. DNA mini column into the 2mL tube.
5.) Transfer the entire sample from step two to the HiBind. DNA mini column including any predicates that may have formed the centrifuge at maximum speed for 1 minute.
6.) Discard the liquid that went into the collection tube so you are able to reuse it.
-
Wash and Dry
7.) Add 500 micro-liters of the HBC Buffer to the column and centrifuge at maximum speed for 30 seconds.
8.) After the HBC buffer wash, discard the filtrate and collection tube and insert the HiBind. DNA mini column into a new 2mL tube.
9.) Add 700 micro-liters of DNA wash buffer the centrifuge again at maximum speed for 30 seconds.
10.) Discard the filtrate and reuse the collection tube, repeat steps 7-9 for a second DNA wash with the HBC buffer.
11.) Centrifuge the empty HiBind. DNA mini column at maximum speed for two minutes to dry the column.
-
Elute
12.) Transfer the HiBind. DNA mini column into a nuclease-free 1.5mL micro centrifuge tube and make sure the label the tube with either your name and group number.
13.) Add 100 micro-litersof elution buffer that has been heated to 70 degrees Celsius then let it sit at room temperature for about 2 minutes.
14.) Centrifuge at maximum speed for 1 minute, the discard the column and keep the 2mL tube.
15.) Store eluted DNA at -20 degrees Celsius.
*My group had to stop at step 4 because it took so long to complete the rest of the Ludox protocol.
Data/Observations:

The above picture shows our 2mL tubes containing our sample and PBS buffer. My group ran into a couple problems because as you can see in our picture that the cell layer is not a pellet and looks more like debris. This photo was taking after the tube had been centrifuges twice for five minutes at 3,000 x g. The pellet would not form at the bottom and kept floating up to the top. It seems like the power of the centrifuge was not strong enough to pull the cell down to the bottom. After the cells were washed with PBS buffer about six times and centrifuged each time, Dr. Adair finally got the pellet to form at the bottom of the 2mL tube. Later, we were finally able to start washing the pellet with PBS buffer and start re-suspending the pellet and continue the procedure.
Current Storage:
The 2mL tube is labeled “LKS G# 5” and was put in a yellow test tube rack and was stored in the freezer for later use. We did not complete out experiment and stopped at step seven of the E.Z.N.A protocol.
Future Goals:
I hope that this protocol was successful and we are able to successfully extract viable DNA. Hopefully the DNA is denatured enough to perform gel electrophoresis and get results that we may be able to view. I also hope that after gel electrophoresis we can see different DNA markers and DNA of different types of ciliates. I am also excited to see how we are able to continue this procedure to reach the metabarcoding process.
February
9
Lab 5: New Ludox Protocol 2/8/18
Objective:
The goal of lab today is to test out our new ludox protocol that has been comprised of protocols that have been made be everyone in class. We hope to use this new protocol that has been created to further our experiment and help lead us to complete the metabarcoding process.
Purpose:
The purpose of today’s lab is to try another ludox protocol to see if this one will give us the results we desire. We hope that by changing our protocol once again we will get one step closer to being able to extract DNA from the ciliates and start the metabarcoding process and classify them.
Procedure:
1.) Collect 5 grams of fresh top soil (screened of debris) and add 10mL of water. Mix for 5-10 minutes by either shaking it up and down or using the vortex.
2.) After shaking, allow the vial to sit undisturbed for 1-2 minutes to let the soil settle.
3.) Transfer 3.68mL of soil water to a clean glass tube and add 368 micro-liters of 25% Gluteraldahyde and mix by vortexing or shaking briefly.
4.) Add 16mL of ludox to a 50mL conical tube. Inject 4mL of the fixed sample into the ludox solution.
5.) Carefully layer colored 2mL of water that has been dyed with one drop of food coloring on top of the ludox layer.
6.) Centrifuge at 4300 x g for 15 minutes in a swinging bucket rotor.
7.) Remove the liquid from the cell layer, about 1.5mL below the water-ludox interface. Make sure you move a total of 4mL. Transfer this to two labeled 2mL micro-centrifuge tubes.
8.) Centrifuge the 2mL tubes at 3000 x g for 5 minutes in order to completely pellet the cells.
9.) Remove the supernatant with a p1000 micro-pipette without disturbing the pellet and dispose of the liquid in your waste container.
10.) Add 100 micro-liters of the phosphate buffer saline (PBS) to each pellet and re-suspend them by flicking and pipetting up and down. Combine the cell suspension pellets together into one tube for a total of 200 micro-liters.
11.) Place five, 2 micro-liter drops on a concavity slide and count each cell present using the 40x lens. Record your number of cells per micro-liters, then obtain a class average of cell numbers.
*Most cells may be in cyst form.
-We only got to step 8 during lab today.
During lab:
-We also practiced out pipetting skills using serological pipets. We also measured to see if our pipetting skills were accurate by seeing if 1mL was equal to 1 gram, and 100 micro-liters is equal to one tenth of a gram.
Data/Observations:
During lab today, after the first centrifugation, the layers that had been created by the swinging bucket rotor were very undefined. The organic layer seemed to have mixed with the ludox which made it difficult to pipette out the organic layer. My groups conical tube weighed 40.5 grams originally but we had to add water to match the weight of the other group at our table. The weight of our conical tube was 41.0 grams before it was placed into the centrifuge. We didn’t have time to observe/ count our cells under the microscope because we ran out of time. We only got to step 8, we have been stopping at around the same spot in the past labs and have not been able to wash the pellet with any buffer yet.
Storage:
The conical tubes were collected by Dr. Adair to be properly disposed of and the 2mL micro-centrifuge tubes were left in the green racks at the end of the lab tables to be collected for centrifugation. We labeled our conical tube and 2mL micro-centrifuge tubes “Group #5 LSK”.
Future Goals:
In the future I hope that we eventually figure out a new ludox protocol that will allow us to gain the results we desire. I hope that the protocol that we come up with can be used by other researchers and future sections of this lab and help pave the way for future experiments. If we can create a more standardized protocol now, more experiments can be conducted in the future too further our knowledge of ciliates and the metabarcoding process.