April 20

Lab 14: Posters 04/19/2018

Print Friendly, PDF & Email

Purpose

The purpose for today’s lab was to continue working on our posters and our presentations.

Abstract 

Currently, the routes for examining species biodiversity in the soil have been deficient. This study is concerned with finding optimal protocols for determining the biodiversity of ciliates in the soil, which is an indicator of soil health. The purpose of this work is to develop a working protocol for DNA extraction of soil samples. With a sufficient protocol, the metabarcoding of purified DNA samples will be able to measure the diversity of environmental DNA (eDNA). The optimal protocol has been identified to be the modified Chelex DNA extraction. Other protocols such as MoBio’s PowerSoil Kit and ludox centrifugation have proven to be inadequate. The Chelex protocol uses chelating agents combined with centrifugation to obtain purified DNA. The V4 region, a variable region of the ribosomal 18S gene, was then amplified through PCR producing V4 PCR products 50% of the time. Eight out of 16 trials had V4 positive PCR products around 450 base pairs as shown by gel electrophoresis. This study is important to determine ciliate biodiversity for evaluating the well-being of food web interlinkages and biochemical cycles. While the modified Chelex protocol has shown to be effective half of the time, it provides the foundation for an ongoing investigation into further steps. Future goals include further developing of the protocol to more consistently obtain DNA for analysis. When developed, metabarcoding of the eDNA will allow the comparison of sequences to existing databases for species determination.

Poster

Conclusion

At the end of today’s lab we were very successful in completing a majority of the poster. Furthermore, we were able to establish the main topics we wanted to focus for when we present.

April 6

Lab 12: Chelex, Gel Prep and Nanodrop 04/05/2018

Print Friendly, PDF & Email

Purpose

For today’s lab everyone will be completing the same protocol. This will allow us to have wider and hopefully more consistent results throughout the entirety of the lab. After trial and error we were able to determine that Chelex would be the most efficient protocol to perform.

Procedures

Chelex DNA Extraction

Each of these steps will be performed by each group member. So, at the end all 3 tubes will be combined into 1 tube.

  1. Transfer 1.5 mL of soil liquid from the non-flooded plate & place in a microfuge tube to gather cells
  2. Centrifuge at 6,000xg for 5 minutes
  3. Remove the supernatant
  4. Repeat steps 1-3
  5. Add 200 µL of 5% Chelex to the pellet in the microfuge tube
  6. Vortex for 1 minute
  7. Add 15 µL of proteinase K
  8. Incubate for 30 minutes in 56°C water bath
  9. Boil for 8 minutes in a 100°C heat block
  10. Vortex for 1 minute
  11. Centrifuge at 16,000 xg for 3 minutes
  12. Transfer 100 µL of the supernatant to a clean micro centrifuge tube without any Chelex beads
  13. Label the top (22-8b +/-/e)

PCR Procedure

  1. Obtain 3 PCR Tubes with 12.5μL of MasterMix
  2. Calculate amounts of primers and water for each tube
  3. Make a (-) control, (+) control, and eDNA
    • Negative control: No DNA, 12.5 μL of MasterMix, 1.25 V4 primers, 11.25 μL water
    • Positive control: 1 μL of Paramecium culture, 12.5 μL of MasterMix, 1.25 uL V4 primers, 10.25 μL water
    • eDNA: 1 μL of DNA from Chelex Procedure, 12.5 μL of MasterMix, 1.25 uL V4 primers, 10.25 μL water

Gel Preparation

  1. Weigh 0.6 g of agarose on a weighing sheet and transfer to an Erlenmeyer flask
  2. Mix with 35 mL of 1X TAE to produce a 1.8% agarose gel
  3. Microwave for 1:20 at power 7
  4. Cool in a 60°C water bath for about 5 minutes
  5. Add Ethidium Bromide (with gloves) and stir gently
  6. Pour into mold then add the comb making sure to avoid bubbles

Nanodrop

  • Nanodrop Reading – 365.2 ng/uL
  • Diluted by adding 45 uL of DI water & 5 uL of DNA to get it to our a 50 ng/uL

A260/280: 1.31

A260/230: 0.51

Questions that Matter Chart

(-) Control (+) Control eDNA
DNA (uL) 0 uL 1 uL 1 uL
2x MasterMix (uL) 12.5 uL 12.5 uL 12.5 uL
10 uM V4 Primer Mix (uL) 1.25 uL 1.25 uL 1.25 uL
Water 11.25 uL 10.5 uL 10.5 uL
Total volume 25 uL 25 uL 25 uL

Conclusion

At the conclusion of today’s lab we were able to complete each of the steps. While it took longer than expected, we were able to work slow and reduce our errors. Our nanodrop reading was unexpectedly very high and so we had to dilute the solution to make the correct ratio.

April 4

Lab 11: Gel Electrophoresis 03/29/2018

Print Friendly, PDF & Email

Purpose

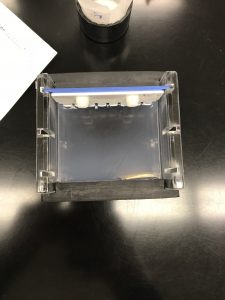
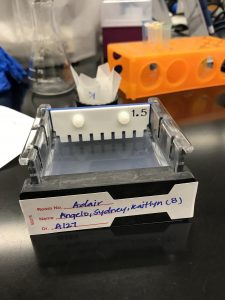
The purpose for today’s lab was to load and run the gel we made last week. We will run it with both the Cox1 and V4 primers. After the completion of the run we will go upstairs to the lab and look at our gels under UV to determine if we were successful or not.

Procedure

Gel Electrophoresis

  1. Remove the bumpers from the gel made in the last lab
  2. Add 5 µl of ladder to well 1
  3. In well 2 add 10 µl of positive control Cox1
  4. In well 3 add 10 µl of negative Control Cox1
  5. In well 4 add 10 µl of eDNA Cox1
  6. In well 5 add 10 µl of positive Control V4
  7. In well 6 add 10 µl of negative Control V4
  8. In well 7 add 10 µl of eDNA V4
  9. Place the correctly colored cord in the corresponding outlet
  10. Run the gel at 100 volts for 30 minutes.
  11. Remove the gel
  12. Examine the gel under a UV light

Conclusion

After observing our gels in the upstairs lab we were unsuccessful in replicating our DNA. There were no ladders under any of the controls, only under the well containing the ladder. The reason for our lack of success could easily be from the low quality DNA we possessed due to our error while doing the PowerSoil protocol. Next lab when we are able to re-try we will follow the protocol much better than our previous attempt.

March 23

Week 10: V4 PCR 03/23/2018

Print Friendly, PDF & Email

Introduction

In order to decide which method is the most effective for DNA replication (power soil versus chelex) we are going to keep the PCR as a control and do the same method for each. These steps will be the same as lab 7 and lab 10. Since we have already done the protocol once we hopefully decrease in errors the second time around.

Purpose

The purpose for today’s lab is to set up our PCR and mix our aragose gel to be prepared for next week.

Procedure

Complete the calculations to determine how much of the power soil sample and water was to be added to the previously prepared solution.

PCR Set Up

  1. Obtain three microfuge tubes containing 12.5 microliters of 2X master mix from Dr. Adair.
  2. Label each tube 1-6
  3. Add 0.625 microliters of 20 µM stock Cox1 primers to tubes 1-3
  4. Add 1 microliter of the paramecium control obtained from last week’s lab protocol into the 1 tube.
  5. Add 1 microliters of positive control DNA into the 2 tube.
  6. Add 11.875 microliters of DI water to the 1 tube.
  7. Add 10.875 microliters of DI water to the 2 tube.
  8. Add 10.875 microliters of DI water to the 3 tube.
  9. Repeat steps 3-8 with 20 µM of stock V4 primers instead of stock Cox1 primers.
    1. The numbers on each tube correspond to those on the questions that matter sheet
  10. Place the tubes in the class tube rack and record their location on the rack and designate them with a group number and group initials.

Agarose Gel Protocol

  1. Dilute the 10x TAE to 1x TAE by adding 10 mL of 10xTAE and 90 mL of deionized water to an Erlenmeyer flask
  2. Measure out 35 mL of the created solution
  3. Add 0.6 grams of agarose to it along with the 35 mL of TAE solution.
  4. Cover the flask
  5. Heat the solution in the microwave for 1 minute ad 20 seconds at high
  6. Cool the gel in a water bath
  7. While cooling, set up the gel electrophoresis box.
  8. Add 2 microliters of ethidium bromide to the now cooled mixture and swirl.
  9. Pour the cool agarose gel into the mold
  10. Insert the comb into the furthest holder to the back of the box.
  11. Label the gel electrophoresis box with a group name

Results

Nucleic acid concentration – 1.04 ng/uL

A260/A280 ratio – 0.267

A260/A230 ratio – 0.267

Conclusion

This lab was slow due to our efforts to not make an error. We did have to start over for the V4 tubes due to accidentally putting in the Cox1 instead of the V4. However, we fixed our error and finished the lab without any more.

March 16

Lab 9: Troubleshooting Methods for DNA extraction/PCR 03/16/2018

Print Friendly, PDF & Email

Introduction

After a complete lack of success in the initial protocol and PCR we needed to reevaluate our protocol and how we will discover the vast ciliate diversity. We will be using a chelation method which utilizes a type of bonding to metal ions. In our case, the chelex is binding metal ions that are required for nucleases to function. The second procedure is the power soil protocol and will increase the amount of cleaning DNA in order to isolate as much organic material as possible.

Purpose

The purpose of today’s lab is to perform each of the two procedures and hopefully not make an error like we did previously.

Power Soil Protocol

  1. To the PowerBead Tubes provided, add 0.25 grams of soil sample.
  2. Gently vortex to mix.
  3. Add 60 μl of Solution C1 and invert several times or vortex briefly.
  4. Secure PowerBead Tubes horizontally using the MO BIO Vortex Adapter
  5. Make sure the PowerBead Tubes rotate freely in your centrifuge without rubbing. Centrifuge tubes at 10,000 x g for 30 seconds at room temperature. CAUTION: Be sure not to exceed 10,000 x g or tubes may break.
  6. Transfer the supernatant to a clean 2 ml Collection Tube (provided). 
  7. Add 250 μl of Solution C2 and vortex for 5 seconds. Incubate at 4°C for 5 
minutes.
  8. Centrifuge the tubes at room temperature for 1 minute at 10,000 x g.
10. Avoiding the pellet, transfer up to, but no more than, 600 μl of supernatant to a clean 2 ml Collection Tube (provided).
  9. Add 200 μl of Solution C3 and vortex briefly. Incubate at 4°C for 5 minutes.
  10. Centrifuge the tubes at room temperature for 1 minute at 10,000 x g.
  11. Avoiding the pellet, transfer up to, but no more than, 750 μl of supernatant into a clean 2 ml Collection Tube (provided).
  12. Shake to mix Solution C4 before use. Add 1200 μl of Solution C4 to the supernatant and vortex for 5 seconds.
  13. Load approximately 675 μl onto a Spin Filter and centrifuge at 10,000 x g for 1 minute at room temperature. Discard the flow through and add an additional 675 μl of supernatant to the Spin Filter and centrifuge at 10,000 x g for 1 minute at room temperature. Load the remaining supernatant onto the Spin Filter and centrifuge at 10,000 x g for 1 minute at room temperature.
  14. Add 500 μl of Solution C5 and centrifuge at room temperature for 30 seconds at 10,000 x g.
  15. Discard the flow through.
  16. Centrifuge again at room temperature for 1 minute at 10,000 x g.
  17. Carefully place spin filter in a clean 2 ml Collection Tube (provided). Avoid splashing any Solution C5 onto the Spin Filter.
  18. Add 100 μl of Solution C6 to the center of the white filter membrane.
  19. Centrifuge at room temperature for 30 seconds at 10,000 x g.
  20. Discard the Spin Filter. The DNA in the tube is now ready for any downstream application.

Modified Chelex Extraction Protocol

  1. Transfer 300-500 µl of dense ciliate culture (20 or more individuals) to a microcentrifuge tube. If you do not have your own culture, perform a replicate from another student’s culture.
    1. Make sure to record which ciliate culture you are extracting from
  2. Label your tube with your initials and section and record all the information about the sample in your notebook.
  3. Centrifuge @6000xg for 5 minutes, discard supernatant
  4. For Chelex extraction from non-flooded plates, remove 1.5 ml of liquid from the non-flooded plate.  Spin at 6000xg for 5 minutes and remove the supernatant.  Repeat this procedure 2-3 times to concentrate the cells in the liquid into a pellet.  Avoid pipetting the soil.
  5. Weigh 0.5 g Chelex and transfer to a 15 ml conical tube.  Add DI water to 10 ml.
    1. Add 200µL 5% Chelex to pellet, and vortex for 1 minute.
    2. For this step, use large-bore micropipette tips or simply cut off the tip of a 1000µL micropipette tip
    3. Add 15 µl of proteinase K.
  6. Incubate for 30 minutes in 56oC water bath or heat block
  7. Boil for 8 minutes in 100oC water bath or heat block.
  8. Vortex for 1 minute
  9. Centrifuge @ 16,000xg for 3 minutes to pellet cellular debris and Chelex beads
  10. Transfer supernatant with DNA in solution to clean microcentrifuge tube, being careful not to transfer Chelex beads
  11. Carefully label top and side of microcentrifuge tube with your ID that you will be able to identify.

Conclusion

At the end of this lab both of the procedures were much simpler than our previous one. Thus, it made it easier to follow and understand. However, we did make an error on the last step. Instead of discarding the filter we discarded the supernatant, which contained the DNA.

March 2

Lab 9: Gel Electrophoresis 03/1/2018

Print Friendly, PDF & Email

Introduction

DNA is negatively charged thus, gel electrophoresis is very effective. The pores of the gel is used to allow for slow movement of the DNA towards the positive end of the gel. The DNA ladder allows us to know the size of the unknown. The 6x loading buffer consists of blue dye so we can see the gel and glycerol that helps it settle to the bottom.

Purpose

The purpose for today’s lab is to run our gels and see if our PCR was successful. This will be represented by a positive band and if it does not work there will be no band (negative band).

Procedure

Loading the gel

  1. Dilute the 10x TAE to 1x TAE
  2. Add 30mL of TAE to 270 of deionized water
  3. Place into flask and mix
  4. Practice loading the gel using a combination of 20 µl of buffer and 5 µl of 6x loading buffer
    1. Each group member does one well
  5. Attain your groups PCR
  6. Add 5 µl of 6x buffer to the +, – and S tubes
  7. Add 10 µl of from the +, – and S tubes to the gel wells
  8. Plug the correct wires in the correctly marked area
  9. Time 4:30pm

Conclusion

After all the gels completed running we were informed that none of them were successful. So we now need to go back and reevaluate where we went wrong.

February 23

Lab 7: PCR amplification of Ludox extracted DNA 02/23/2018

Print Friendly, PDF & Email

Introduction

After completing theDNA extraction from last week we are now going to try and amplify our DNA samples. In the pre-lab we learned about the nano-drop, review of PCR and how to make agarose gel. We will be using two different primers: one with the SSU ribosomal/universal primers (EUKV4) and 1 with the Cytochrome oxidase (COX1) primers.  While setting up the PCR procedure, utilizing the correct aseptic technique is crucial. The three most in important part of this whole process are the DNA primers (that can be whatever nucleotide sequence you want), nucleotides and DNA polymerase (the protein that helps replicate DNA naturally and through PCR).

Purpose

The purpose of today’s lab is to set up what we need for PCR and to prepare our agarose gel to run next week.

Procedure/Data

PCR Set Up


  1. Clean the table and anything that will eventually touch the table with bleach
  2. Label the three small tubes that contain the previously mixed mixture
  3. Add to the negative tube
    1. 12.5 uL of 2x Master Mix
    2. 1 uL of primer
    3. 11.5 uL of water to have a total volume of 25 uL
  4. Add to the positive tube
    1. 12.5 uL of 2x Master Mix
    2. 5 uL of DNA template
    3. 1 uL of primer, and 6.5 uL of water to have a total volume of 25 uL
  5. Add to the S tube
    1. 12.5 uL of 2x Master Mix
    2. 5 uL of DNA template, 1 uL of primer
    3. 6.5 uL of water to have a total of 25 uL in the tube labeled “S”
  6. Label each tube with your group number (8)
  7. Place these tubes in the rack at the front of the room with the rest of the class


Agarose Gel

  1. In an Erlenmeyer flask add 40 mL of 1x TAE to 0.6 grams of agarose
  2. Cover the flask with weighing paper
  3. Heat the flask in the a microwave for 1.5 minutes on power 7
  4. Take the flask out and place into a water bath for 5 minutes to cool
  5. Add ethidium bromide to the solution
  6. Pour into gel tray
  7. Label the tray with tape and let the gel set for about 30 minutes or until foggy

Conclusion

After today’s lab we were able to fully understand the process of how to set up PCR and how the agarose gel is made. Furthermore, we were able to learn more about why we use specific primers and how they will be beneficial to our procedure. While the protocol was a little confusing to follow it became easy once we got the hang of it. I am excited to see if we will be able to successfully run the DNA in the gel.

February 16

Lab 6: DNA Extraction 02/15/2018

Print Friendly, PDF & Email

Introduction

After the previous three times in doing the same protocol we are struggling to get concise and workable results. We have had a major problem with a standing soil layer which inhibits our ability to extract our cell layer. Furthermore, this soil layer can contain PCR inhibitors that won’t allow us to properly extract our DNA.


Purpose

The purpose of today’s procedure is to try and get rid of the soil layer and hopefully extract some cells that we can view.


Procedure/Data

  1. Spin your tubes from last lab for 5 minutes at 3000g in the centrifuge
  2. Remove the supernatant (the fluid on top of the pellet)
  3. Add 1 mL of 1x PBS to the tube to resuspend
  4. Centrifuge at 3000g for 5 minutes
  5. Remove the supernatant
  6. Resuspend the cells in 100 μl of PBS
  7. Combine each of the tubes into one
  8. In a new tube add 20μl of iodine and 20μl of cells
    1. Here is where we messed up and added the combined mixture of iodine and cells to the tube we will be using in the next part
  9. Observe 3 drops of 2μl of the iodine cell mixture (photo at bottom)
    1. One drop had 14, 17 and 25 cells and on the other slide there were 22, 25 and 32 per 2μl drop
  10. Add 200 μl PBS and resuspend the cells using the vortex or flicking, and then
  11. Spin in centrifuge and remove the supernatant
  12. Resuspend cells in 200 μL of fresh PBS.
  13. Add 25 μL OB Protease Solution. Vortex to mix thoroughly.
  14. Add 220 μL BL Buffer. BL Buffer is a Guanidine Hydrochloride lysis buffer. This is an example of a chaotropic salt solution. Chaotropes have two important roles in nucleic acid extraction. First, they destabilize hydrogen bonds, van der Waals forces and hydrophobic interactions, leading to destabilization of proteins, including nucleases. Second, they disrupt the association of nucleic acids with water, thereby providing optimal conditions for their transfer or binding to silica. This step releases the DNA under denaturing conditions, so proteins and most enzymes are inactivated. In addition, a detergent and enzyme for digesting proteins is present. The buffer is viscous, so be sure and mix the sample well (vortex) to achieve complete mixing. Use gloves when handling this buffer. 
  15. Incubate at 70°C for 10 minutes in the heat block.
    1. Briefly vortex the tube once during incubation.
  16. Add 220 μL 100% ethanol. Vortex to mix thoroughly. 
  17. Insert a HiBind into a 2 mL Collection Tube.
  18. Transfer the entire previous sample to the HiBind.
  19. Centrifuge at maximum speed (≥10,000 x g) for 1 minute.
  20. Discard the filtrate (the liquid that went into the collection tube) and reuse the collection tube.
  21. Add 500 μL HBC Buffer to the column.  
  22. Centrifuge at maximum speed for 30 seconds
  23. After the HBC Buffer wash, discard the filtrate and collection tube.
  24. Insert the HiBind DNA Mini Column into a new 2 mL Collection Tube.
  25. Add 700 μL DNA Wash Buffer
  26. Centrifuge at maximum speed for 30 seconds.
  27. Discard the filtrate and reuse the collection tube.
  28. Repeat the steps for a second DNA Wash Buffer wash step
  29. Centrifuge the empty HiBind DNA Mini Column at maximum speed for 2 minutes to dry the column.
  30. Transfer the HiBind DNA Mini Column into a nuclease-free 1.5 mL microcentrifuge tube. Make sure to label your tube with your name and date.
  31. Add 100μL Elution Buffer heated to 70°C
  32. Let sit at room temperature for 2 minutes.
  33. Centrifuge at maximum speed for 1 minute.
    1. Your DNA is now in the liquid flow through and you may discard the column.
  34. Store eluted DNA at -20°C.  


(Step 9)

Conclusion

So at the conclusion of our lab we followed the protocol with the exception of the addition of the iodine to our cell mixture. We were able to successfully observe some of the cells that we extracted even though we impaired the original protocol. However, due to our mistake we will see if the addition of the iodine hindered our ability to observe and sequence the DNA.

February 9

Lab 5: DNA Extraction and PCR part 2

Print Friendly, PDF & Email

Introduction

Since our second protocol didnt work out very well we are to readjust once again. Hopefully a new protocol will reduce the soil layer and provide us with a more obvious cell layer.

Purpose

The purpose for today’s lab is to do another protocol with adjustments to hopefully get rid of that soil layer. In order to do so we are changing the soil to ludox ratio and the order in which the steps are done

Procedure/Data

  • Before any procedure we are to practice our pipetting to reduce the error
  • Furthermore, we are going to try the different types of pipettes
  • Also, we are doing conversions to see how accurate the pipettes are
  1. Collect 5 grams of top soil
  2. Add 10 ml of water
  3. Mix for 5-10 mins
  4. Let soil settle for 5 minutes
  5. Transfer 3.68 ml of the soil water mixture to a clean glass tube
  6. Add 368 ml of gluteraldehyde
  7. Add 16 ml of Ludox to a 50ml conical tube
  8. Inject 4ml of the soil mixture to the Ludox tube
  9. Carefully layer 2ml of colored water to the mixture
  10. Centrifuge 4300x g for 15 min
  11. Remove the liquid cell layer
    1. This is as far as we got yesterday
  12. Centrifuge for 5 min at 3000x g
  13. Remove the liquid from the tube
  14. Add 100 ml of PBS (buffer) and flick to help remove pellet
  15. Place 5 two ml drops on a slide and observe

Conclusion

At the end of this lab we were able to get to the step before using the microfuge to establish a pellet. During open lab we will extract the liquid that surrounds the pellet and look at it under the microscope.

February 2

Lab 4: DNA Extraction 02/01/2018

Print Friendly, PDF & Email

Introduction

After last weeks experiment we are trying to see if there is a different protocol we can use to be more successful. The previous lab was more of a test to see what factors we will need to adjust. In today’s lab constancy is key and making sure everyone does the same procedure to make the results as precise as possible.

Purpose

The purpose of today’s lab is to come up with a new protocol as a class and then execute it before class ends. There are so many factors that can be changed that we need to figure out which will make the most impact on the prominence of the cell layer.

Procedure/Data

  1. Place 10 grams of soil and 20 mL of water into a baby food jar
  2. Mix well on the vortex for 5 minutes
  3. Let the soil settle for about 3 minutes
  4. Pipette 2700 microliters (3 of 900) off the top of the soil sample into a labeled small glass tube
    1. Our weight was 23.4 grams
  5. Add 300 microliters of glutaraldehyde to the small glass tube
  6. Microfuge for 5 minutes
  7. Pipette the sample from the glass tube into the tube of 9mL of Ludox
    1. Remember to pipette to the 5mL mark
  8. Add 2mL of colored water t0 the top of the Ludox tube – should be filled to about the 14mL mark
    1. Do not mix colored water and Ludox
  9. Label and weigh tube – needs to be equal to the other group at your table
  10. Centrifuge for 15 minutes at 4300g then put in the freezer
  11. Take 5 2microliter drops and observe under the microscope
  12. Calculate the efficiency (observed number of cells/expected number of cells) x 100
  13. Pellet out the cells in the microfuge tube by spinning at 1200g for 1 minute
  • Since we were unable to complete the procedure we have to go into open lab and finish.
  • Our mass was 23.4 grams
  • Switched from the swinging bucket to a fixed angle

Conclusion

This new and improved protocol will hopefully increase the number of cells we will see when we observe the new cell layer. After open lab today we will be able to evaluate the efficiency of the new protocol in comparison to the previous.