April 20

Lab 14: Poster Workshop 4/19/18

Print Friendly, PDF & Email

Purpose:

To allow students to revise their abstract and work on their poster presentation.

Procedure:

  • Have a group discussion about the information that goes on each section
  • Write down what goes on each section
  • Revise what  you wrote
  • Make a poster presentation on powerpoint.

Data: 

My group’s poster is shown above.

Abstract:

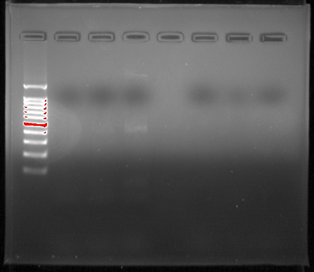
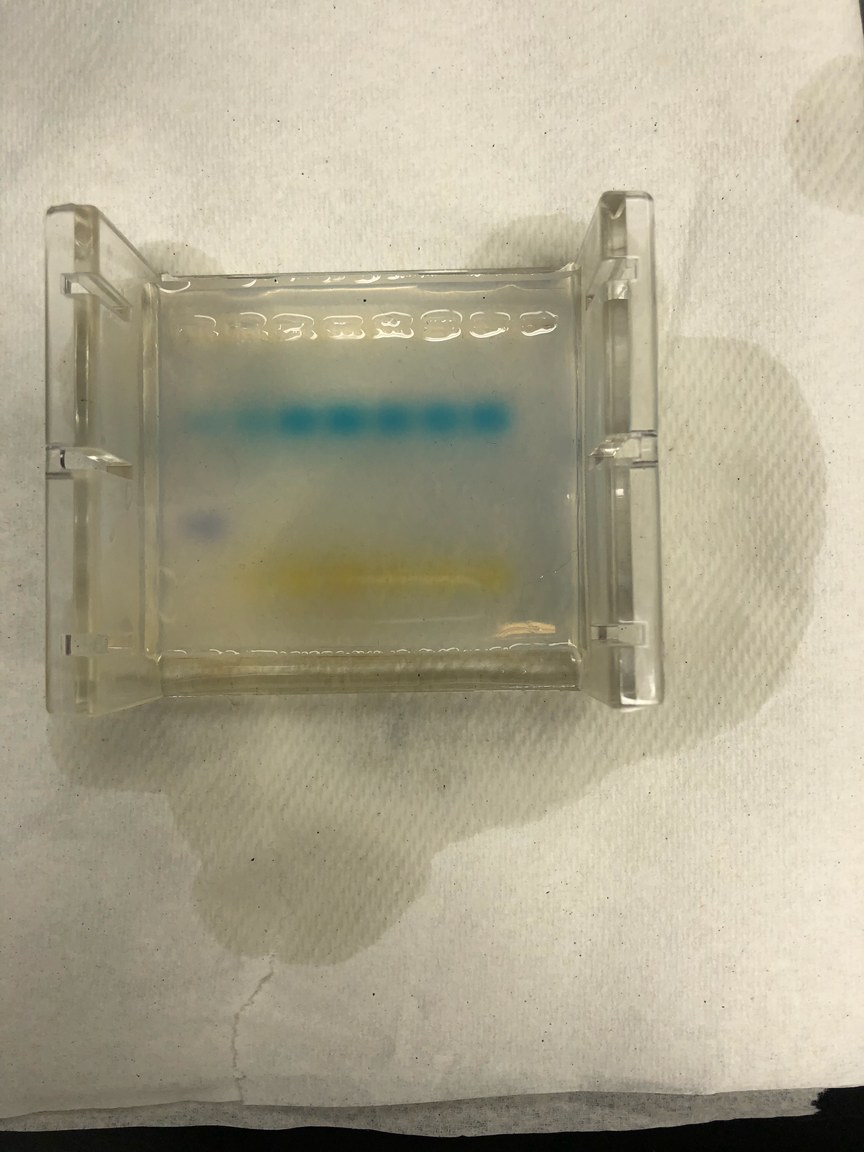
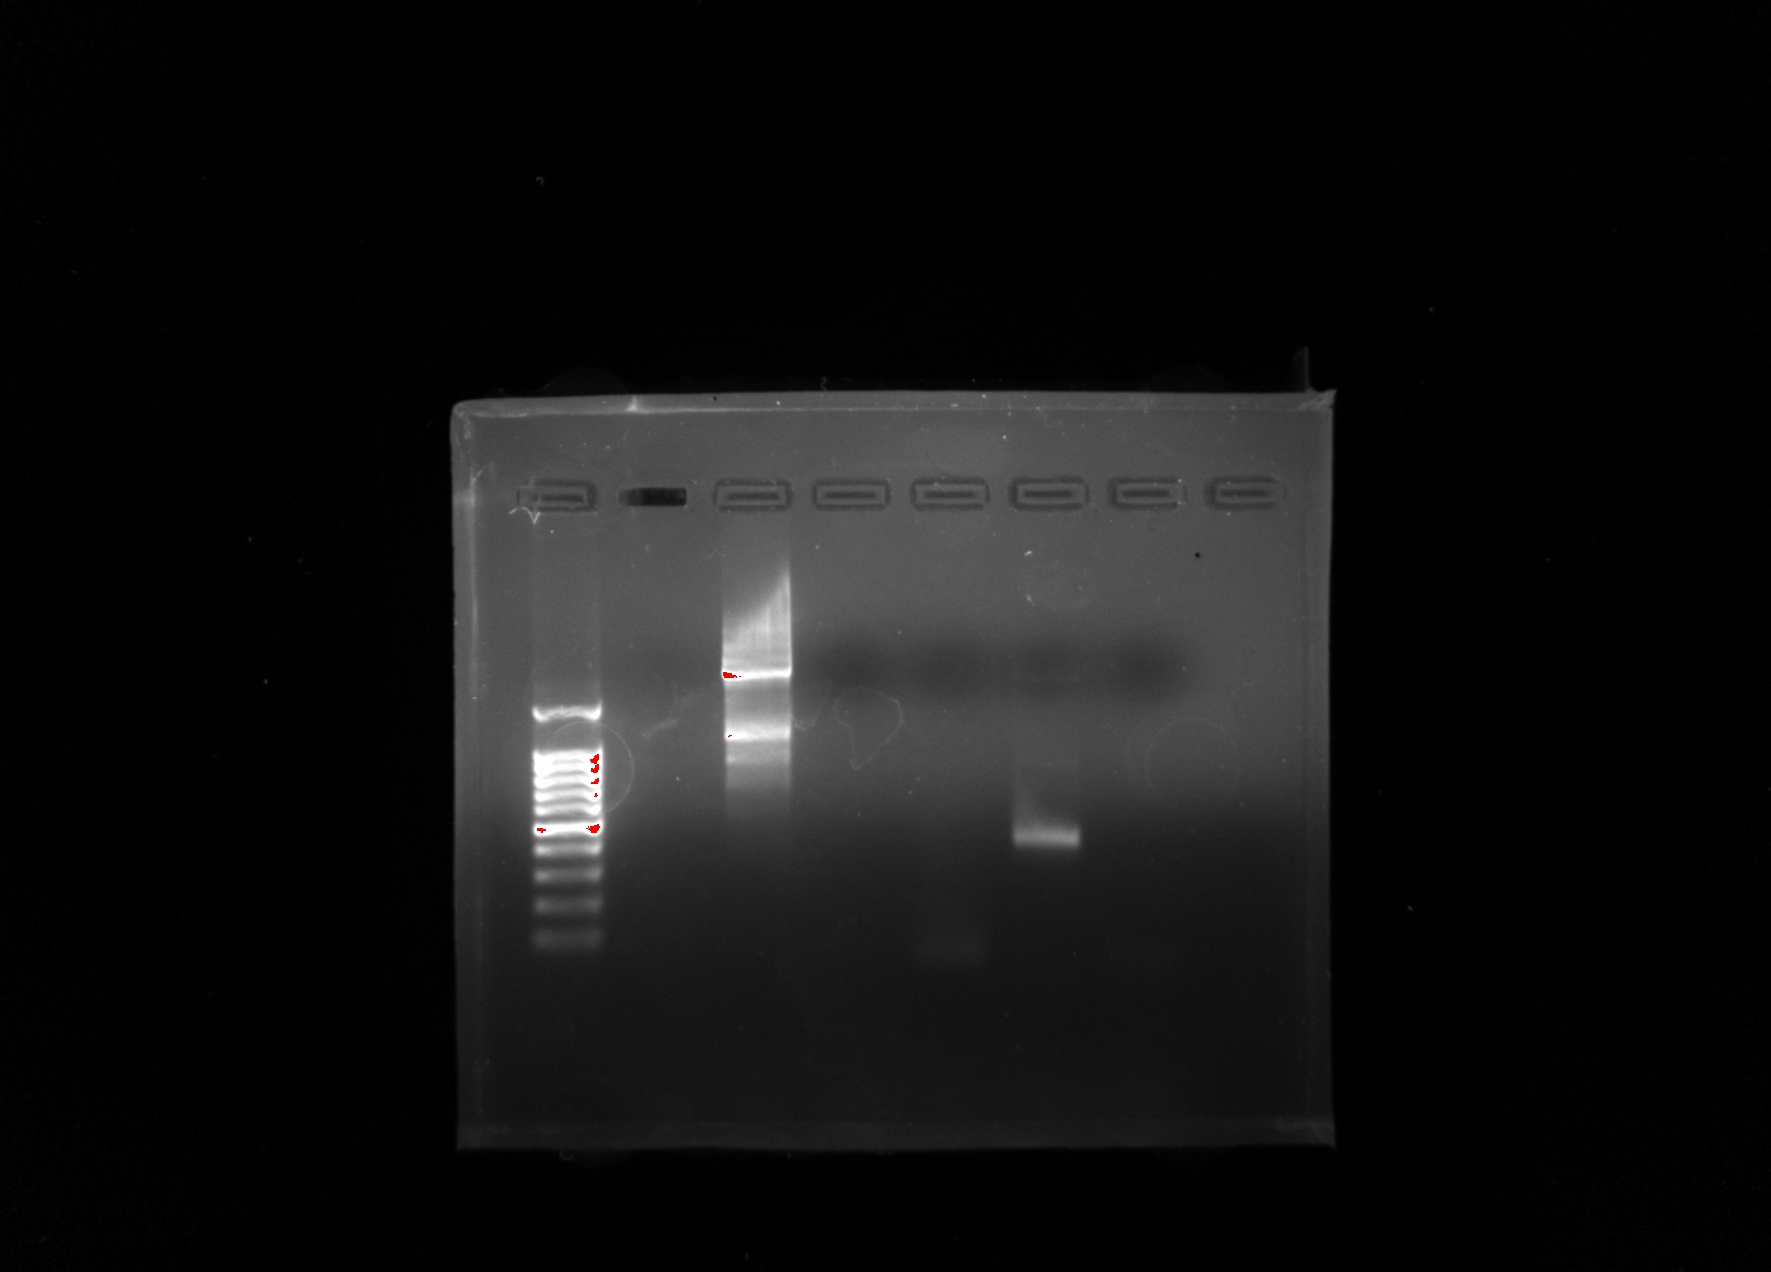
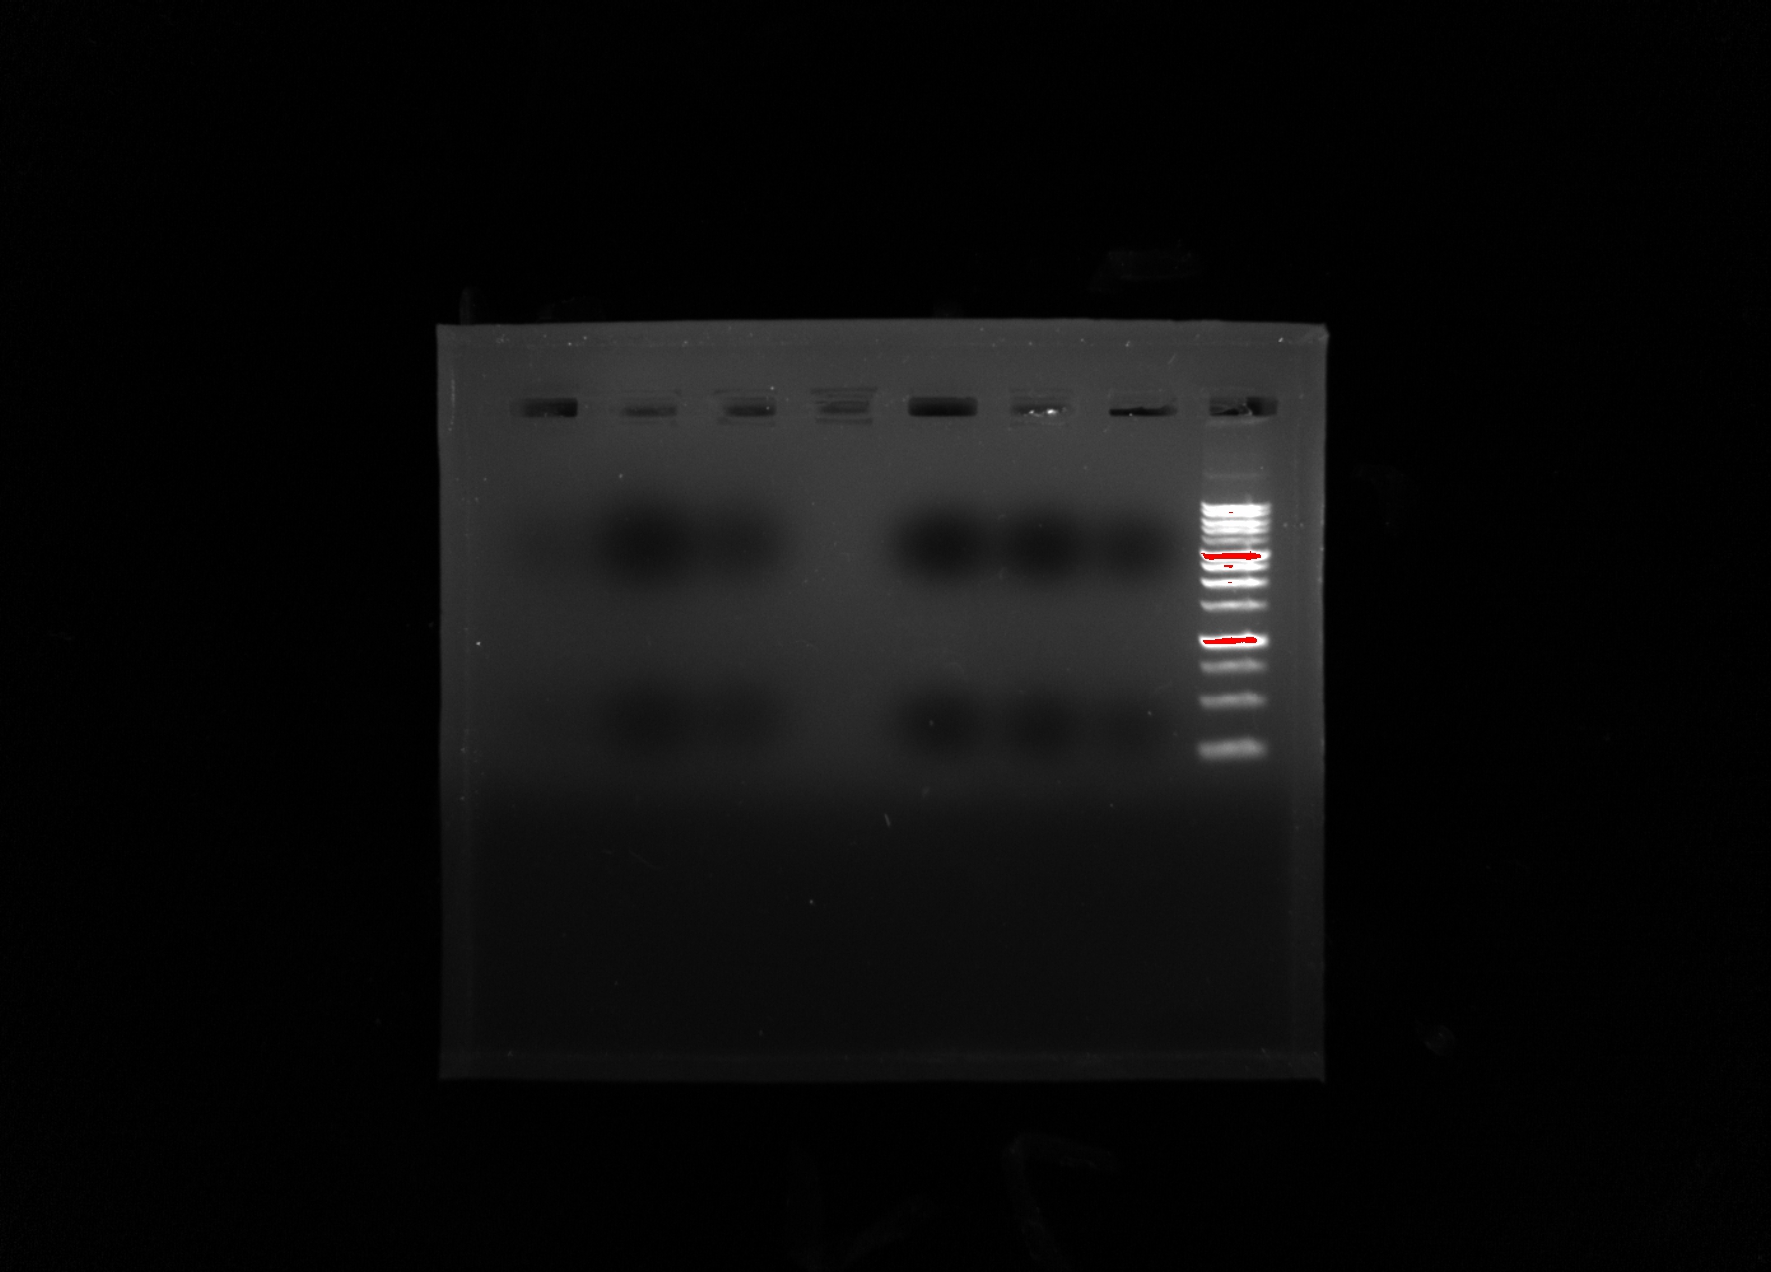
Organisms within the soil are important because they are what help sustain all life on Earth. Scientists have begun to recognize that there is a large diversity of soil protists whose existences have not yet been known, simply due to the lack of knowledge in the scientific community about soil biodiversity. In order to provide a solution, a correct protocol needs to be found to extract the DNA found in samples and what primers should be used to amplify it. Multi-methodological approaches were used to link morphological, molecular, and functional information of distinct ciliates. Various protocols were used: LudoxGradient, E.Z.N.A, Gel Electrophoresis, Chelex, and Powersoil. The Chelexand the Powersoilprotocols showed the most promising results in comparison, so the Chelexand Powersoilmethods were the two that were concentrated on. Each protocol was followed meticulously, and the COX 1 and V4 primers were the focus of each PCR amplification. Some errors in precise pipette techniques and accurate measuring could have been apparent after taking into account the results of each protocol. A gel from the Electrophoresis Protocol was made each time in order to analyze the negative, positive, and the environmental DNA samples to determine if DNA was extracted. The Ludoxprotocol did not produce any positive results from the gel. The PowerSoil technique did not produce many positive results from the gel as well. The chelex protocol had the best results for positive results in the gel. For further experiments, multiple tests of a singular protocol will be conducted, in order to ensure maximum accuracy.

Conclusion: 

In conclusion, my group finished a good working draft of the poster. The next steps are to revise the poster and practice presenting the poster.

April 13

Lab 13: Gel electrophoresis and Poster and abstract preparation 4/12/18

Print Friendly, PDF & Email

Purpose:

The purpose of the lab was to run the gels prepared from the last lab, analyze those results, and begin a working template for the poster presentations as well as setting up the abstract.

Procedure:

  1. Remove the rubber ends from the agarose gels made from last week’s lab and place the gels in the gel electrophoresis box containing 1X TAE buffer.
  2. Ensure that the gel is covered with the TAE buffer and add 5 µl of the ladder to well 1 using a p20 micropipette.
  3. Using a new micropipette tip for each well, add 10 µl to each designated well:
    • Well 2: Group 7  negative
    • Well 3: Group 7  positive
    • Well 4: Group 7 eDNA
    • Well 5: Empty
    • Well 6: Group 8 negative
    • Well 7: Group 8 positive
    • Well 8: Group 8 eDNA
  4. Close the electrophoresis box and connect the power sources ensuring that the red cord corresponds to the red input and output sources. Ensure the black cord corresponds to the black input and output sources.
  5. Run the gel electrophoresis at 100 volts for at least 30 minutes.
  6. Remove the gel and examine the gel under a UV light.
  7. Take a picture of the gel and record the results.

Data/Results:

Group 7 and 8 gel results shown in the picture below:

  • Wells are arranged from well 1 (most left) to well 8 (most right).
  • There were no bands but a faint band in well 4 around 500 bp which was the group 7 eDNA sample

Conclusion:

In conclusion, the procedure did not go as planned because we did not have successful results as we hoped. There had to be some type of error during the experiment because the eDNA had a faint band and the positive control had negative results. Our hopes for the future is to find an even better protocol to obtain desired results. My group also planned out how the poster will look like and details going into the abstract as well as our goals on when to finish everything.

April 6

Lab 12: Chelex extraction, PCR, and gel preparation 4/5/17

Print Friendly, PDF & Email

Purpose: The purpose of this lab was to extract DNA using the Chelex protocol. We are doing this protocol again because it was shown to be the most effective and we want to have better results for our final project. We also made the agarose gel in order to be able to run it all next class.

Procedure:

Chelex Extraction

  • Transfer 1.5 mL of soil liquid from the non-flooded plate & place in a microfuge tube to gather cells.
  • Centrifuge at 6,000 xg for 5 minutes and remove the supernatant
  • Repeat steps 1-2 two more times
  • Add 200 µL of 5% Chelex to the pellet in the microfuge tube
  • Vortex for 1 minute
  • Add 15 µL of proteinase K
  • Incubate for 30 minutes in 56°C water bath
  • Boil for 8 minutes in a 100°C heat block
  • Vortex for 1 minute
  • Centrifuge at 16,000 xg for 3 minutes
  • Transfer 100 µL of the supernatant to a clean microcentrifuge tube avoiding the Chelex beads
  • Label the top of the tube with your group’s initials and section, SAM 22-7

PCR Procedure

  • Obtain 3 PCR Tubes with 12.5μL of MasterMix
  • Calculate amounts of primers and water for each tube
  • Make a negative control, positive control, and environmental DNA.
    • Negative Control – No DNA, 12.5 μL of master mix, 1.25 μL V4 primers, 11.25 μL water.
    • Positive Control – 1 μL of Paramecium culture, 12.5 μL of master mix, 1.25 μL V4 primers, 10.25 μL water.
    • eDNA – 1 μL of DNA from Chelex Procedure, 12.5 μL of master mix, 1.25 μL V4 primers, 10.25 μL water.

Gel Preparation

  1. Take 35mL of 1 x TAE and put it in a new Erlenmeyer flask to produce a 1.8% agarose gel
  2. Add 0.6g of agarose to the flask
  3. Cover the flask with weighing paper and heat up in the microwave for 1:20 minutes on 70 power
  4. Place in a cool water bath for 5 minutes
  5. Add 2ul of ethidium bromide
  6. Assemble gel tray to prepare for the solution to be poured in it
  7. Gently pour the agarose gel mixture into the tray and be sure there are no bubbles
  8. Allow it to sit for about 30 minutes to were it is foggy in color
  9. Cover the gel with more 1 x TAE stock to make sure it will not dry out and remove the comb once the gel is solidified

Data:

  • Our nanodrop was 138.8 concentration so we diluted our sample by half to make our concentration about 70 nanograms/ul which caused us to use a 1ul drop for our eDNA

Conclusion:

Overall, we were able to finish the protocol, even though we stayed over class time to complete. Since we were so careful, we are hoping for better results. Everything was labeled SAM 22-7 and stored away appropriately.

April 5

Lab 11: Gel Electrophoresis 3/29/17

Print Friendly, PDF & Email

Purpose: Perform gel electrophoresis on our cox1 and V4 samples in our agarose gel from the previous lab

Procedure:

  • Obtain gel made from previous lab meeting from the freezer
  • Pour in 1x TAE stock solution over the gel
  • Micropipette 5ul of the ladder into the well 1
  • Using a new micropipette tip for each well, add 10 µl to each designated well:
    • Well 2: Positive Control Cox1 solution.
    • Well 3: Negative Control Cox1 solution.
    • Well 4: Environmental Treatment Cox1 solution.
    • Well 5: Positive Control V4 solution.
    • Well 6: Negative Control V4 solution.
    • Well 7: Environmental Treatment V4 solution.
  • Set up and run the gel box for 30 min at 100 volts
  • After, carefully take out gel and observe under the UV light

Results:

This is our Gel after the 30 minutes at 100 volts.

Our gel under the UV light. Both negative cox1 and v4 solutions gave a positive outcome as well as the ladder, and all the other results were invalid.

Conclusion:

The whole process of running the gel electrophoresis and observing the gel under the UV light went smoothly and gave more desirable results, and the gel was discarded after the lab.

March 23

Lab 10: PCR and Gel Preparation 3/22/18

Print Friendly, PDF & Email

Purpose: 

The purpose of the lab was to set up a PCR amplification procedure in order to extract DNA and prepare the agarose gel for gel electrophoresis.

Procedure:

PCR:

  1. Obtain 6 microfuge tubes that have 12.5 ul of 2X Master Mix in them and label them 1-6.
  2. Add 0.6ul of 20 uM stock COX1 primer to the first three tubes
  3. Add 0.6ul of 20 uM stock V4 primer to tubes 3-6
  4. Add 1 ul of our experimental DNA to tubes 3 and 6
  5. Add 1 ul of our control DNA to tubes 2 and 5
  6. Add 10.9 ul of water to tubes 2,3,5, and 6
  7. Add 11.9 ul of water to tubes 1 and 4
  8. Label each tube accordingly
  9. Place tubes in the rack and label the sheet to know where your group’s tubes are kept for next class

Agarose Gel preparation:

  1. Pour 90mL of DI water and 10mL of 1 x TAE into a flask
  2. Take 35mL of that mixture and put it in a new Erlenmeyer flask
  3. Add 0.6g of agarose to the flask
  4. Cover the flask with weighing paper and heat up in the microwave for 1:20 minutes on 70 power
  5. Place in a cool water bath for 5 minutes
  6. Add 2ul of ethidium bromide
  7. Assemble gel tray to prepare for the solution to be poured in it
  8. Gently pour the agarose gel mixture into the tray and be sure there are no bubbles
  9. Allow it to sit for about 30 minutes to were it is foggy in color
  10. Cover the gel with more 1 2 TAE stock to make sure it will not dry out and remove the comb once the gel is solidified

Data:

QTM data

1 Negative Control 2 Positive Control 3 Experimental DNA  4 Negative       Control 5 Positive Control 6 Experimental DNA
2X Master Mix 12.5 µL 12.5 µL 12.5 µL 2x Master Mix 12.5 µL 12.5 µL 12.5 µL
DNA 0 µL 1 µL 1 µL DNA 0 µL 1 µL 1 µL
20 µM COX1 0.6 µL 0.6 µL 0.6 µL 20 µM V4 0.6 µL 0.6 µL 0.6 µL
Water 11.9 µL 10.9 µL 10.9 µL Water 11.9 µL 10.9 µL 10.9 µL
Total Volume 25 µL 25 µL 25 µL Total Volume 25 µL 25 µL 25 µL

nanodrop data:

Nucleic Acid (ng/ul)            A260/A280        A260/A230

SAM 22 C           54.96                1.045                  0.2

SAM 22 S           138.8                  1.2                    0.407

The gel was labeled SAM section 22 and the tubes are labeled 1-6 and on the paper are labeled SAM

Conclusion:

In conclusion, the lab went well and we are hoping for better results than the last trial by making sure we followed the protocol exactly. If bad results are obtained it was not my group’s error but another error outside of what we did.

March 16

Lab 9: Chelex DNA Extraction and PowerSoil 3/15/17

Print Friendly, PDF & Email

Purpose: The purpose of this lab was to find the pros and cons of two different extraction protocols to determine which one was the better option

Procedures:

Chelex:

  1. Transfer 300-500 µl of dense ciliate culture (20 or more individuals) to a microcentrifuge tube. If you do not have your own culture, perform a replicate from another student’s culture.
    1. Make sure to record which ciliate culture you are extracting from
  2. Label your tube with your initials and section and record all the information about the sample in your notebook.
  3. Centrifuge @6000xg for 5 minutes, discard
  4. Weigh 0.5 g Chelex and transfer to a 15 ml conical tube. Add di water to 10 ml.
    1. Add 200µL 5% Chelex to pellet, and vortex for 1 minute.
    2. For this step, use large-bore micropipette tips or simply cut off the tip of a 1000µL micropipette tip
    3. Add 15 µl of proteinase K.
  5. Incubate for 30 minutes in 56oC water bath or heat block: This will break open the cells and denature some proteins.
  6. Boil for 8 minutes in 100oC water bath or heat block.
  7. Vortex for 1 minute
  8. Centrifuge @ 16,000xg for 3 minutes to pellet cellular debris and Chelex beads
  9. Transfer supernatant with DNA in solution to clean microcentrifuge tube, being careful not to transfer Chelex beads
  10. Carefully label top and side of microcentrifuge tube.

PowerSoil:

  1. To the PowerBead Tubes provided, add 0.25 grams of soil sample.
  2. Gently vortex to mix.
  3. Check Solution C1. If Solution C1 is precipitated, heat solution to 60°C until dissolved before use.
  4. Add 60 μl of Solution C1 and invert several times or vortex brie y.
  5. Secure PowerBead Tubes horizontally using the MO BIO Vortex Adapter
  6. Make sure the PowerBead Tubes rotate freely in your centrifuge without rubbing. Centrifuge tubes at 10,000 x g for 30 seconds at room temperature. CAUTION: Be sure not to exceed 10,000 x g or tubes may break.
  7. Transfer the supernatant to a clean 2 ml Collection Tube.
  8. Add 250 μl of Solution C2 and vortex for 5 seconds. Incubate at 4°C for 5

minutes.

9. Centrifuge the tubes at room temperature for 1 minute at 10,000 x g.
10. Avoiding the pellet, transfer up to, but no more than, 600 μl of supernatant to a clean 2 ml Collection Tube (provided).

11. Add 200 μl of Solution C3 and vortex brie y. Incubate at 4°C for 5 minutes.

12. Centrifuge the tubes at room temperature for 1 minute at 10,000 x g.

13. Avoiding the pellet, transfer up to, but no more than, 750 μl of supernatant into a clean 2 ml Collection Tube (provided).

14. Shake to mix Solution C4 before use. Add 1200 μl of Solution C4 to the supernatant and vortex for 5 seconds. If you are using the 24 place Vortex Adapter for more than 12 preps, increase the vortex time by 5-10 minutes.

Expect between 400 to 500 μl of supernatant. Supernatant may still contain some soil particles.

15. Load approximately 675 μl onto a Spin Filter and centrifuge at 10,000 x g for 1 minute at room temperature. Discard the ow through and add an additional 675 μl of supernatant to the Spin Filter and centrifuge at 10,000 x g for 1 minute at room temperature. Load the remaining supernatant onto the Spin Filter and centrifuge at 10,000 x g for 1 minute at room temperature.

16. Add 500 μl of Solution C5 and centrifuge at room temperature for 30 seconds at 10,000 x g.

17. Discard the flow through from the 2 ml collection tube.
18. Centrifuge again at room temperature for 1 minute at 10,000 x g.

19. Carefully place spin lter in a clean 2 ml Collection Tube (provided). Avoid splashing any Solution C5 onto the Spin Filter.

20. Add 100 μl of Solution C6 to the center of the white lter membrane. Alternatively, sterile DNA-Free PCR Grade Water may be used for elution from the silica Spin Filter membrane at this step (MO BIO Catalog# 17000-10).

21. Centrifuge at room temperature for 30 seconds at 10,000 x g.

22. Discard the Spin Filter. The DNA in the tube is now ready for any downstream application. No further steps are required.

Data:

My group did the Chelex DNA Extraction procedure.

Attached is the soil sample we used, and we labled all the tubes with “SAM” for all our initials

Conclusion: 

In conclusion, although the chelex procedure was faster and simpler than the PowerSoil method, the PowerSoil method provided cleaner DNA through the many cleaning procedures done. The next step is to do PCR to see if there are any viable DNA obtained from the extractions.


March 2

Lab 8: Gel Electrophoresis 3/1/18

Print Friendly, PDF & Email

Purpose:

The purpose of the lab was to perform gel electrophoresis of the DNA sample, gel and positive and negative controls that was performed last week, also we peer reviewed our group’s introduction to make changes into making it better.

Procedure:

Gel Electrophoresis:

  1. Prepare 300ml of 1X buffer solution using 10 TAE stock solution and water (30ml of 10X TAE stock solution has to be mixed with 270ml of water).
  2. Measure 270ml of water using a measuring cylinder and transfer the water into a conical flask. Then, transfer 30ml of 10X TAE stock solution into the same conical flask using a serological pipette.
  3. Prepare 30µl of 1X loading dye using 6X loading dye and water (5µl of 6X loading dye and 25µl water).
  4. Carefully place the agarose gel into the gel box, ensuring that the gel is placed in such a way that the wells are nearer to the negative electrode.
  5. Connect the wires from the gel box to the power supply, ensuring that the same colored cord is plugged into the same colored plug.
  6. Carefully pour the buffer solution from step 2 onto the gel, so that the buffer solution covers the gel completely.
  7. Practice loading a well with 5µl of loading dye from step 3.
  8. Using a p10 micropipette, load a well with 5µl of the DNA ladder.
  9. Using a p10 micropipette, transfer 10µl of soil DNA sample into a microcentrifuge tube. Micropipette 5µl of ethidium bromide into the same tube.
  10. Repeat step 9 using the positive control and the negative control in place of soil DNA sample.
  11. Using a p10 micropipette, load a well with 10µl of soil DNA sample.
  12. Using a p10 micropipette, load a well with 10µl of the positive control solution.
  13. Using a p10 micropipette, load a well with 10µl of the negative control solution.
  14. Secure the lid on top of the gel box and switch on the power.
  15. Adjust the settings on the power supply to run for 30 minutes at a voltage of 110V.
  16. Remove the gel after 30 mins for analysis of the gel under UV light, so as to examine the bands of DNA present in the sample DNA.

Peer Review:

  1. Exchange your introduction draft with a group member.
  2. Read and write suggestions that could be used to better the draft.

Data:

  • Wells 1-3 contained trials (one of each member of my group)
  • Well 4 was unloaded
  • Well 5 contained the negative control
  • Well 6 contained the DNA sample
  • Well 7 contained the positive control
  • Well 8 contained the DNA ladder


The photo above is the UV imaging of my group’s gel.

The photo above is how the gel looked after gel electrophoresis was performed.

Conclusion:

In conclusion, my group was not able to observe any bands for the DNA sample which means there was an error at some point of the experiment in past labs. My group will try to figure out our problem in a future lab to see where we went wrong and if there is anything to do in order to fix it.

February 16

Lab 6: EZNA Tissue DNA Kit Protocol (modified for ciliate samples) 2/15/18

Print Friendly, PDF & Email

Purpose: 

The purpose of the lab was to extract cells in the pellet we obtained from the previous lab.

Procedure:

Before starting:

  • Set heat block to 70° C
  • Heat Elution Buffer to 70° C in the heat block
  • Chill PBS to 4° C

Cell counts:

  • Spin sample for 5 min at 3000 x g
  • Remove supernatant using a p1000 and discard
  • Add 1ml of PBS, washing the cells
  • Spin for 5 min at 3000 x g
  • Remove supernatant using p100 and discard
  • Put 100 microliters PBS in each tube to resuspend cells, then combine the two samples into one tube
  • Put 20 microliters of Iodine and 20 microliters of cells in a new tube and vortex
  • Take 3, 2 microliter drops and examine them under the microscope. Record cell counts
  • Combine 20 microliters of Iodine and 20 microliters of cells in a new tube and vortex briefly

Prepare the cell suspension:

  1. Wash the cells with cold PBS
  2. Resuspend cells in 200 μl of fresh PBS
  3. Add 25 μl OB Protease Solution. Vortex to mix thoroughly.

Lysis:

  1. Add 220 μl BL Buffer
  2. Incubate at 70°C for 10 minutes in the heat block. Briefly vortex the tube once during incubation.

Binding:

  1. Add 220 μl 100% ethanol. Vortex to mix thoroughly
  2. Insert a HiBind. DNA Mini Column into a 2 mL Collection Tube
  3. Transfer the entire sample from Step 5 to the HiBind. DNA Mini Column including any precipitates that may have formed
  4. Centrifuge at maximum speed for 1 minute
  5. Discard the filtrate and reuse the collection tube

Wash and Dry:

  1. Add 500 μl HBC Buffer to the column
  2. Centrifuge at maximum speed for 30 seconds
  3. After the HBC Buffer wash, discard the filtrate and collection tube.
  4. Insert the HiBind DNA Mini Column into a new 2 mL Collection Tube.
  5. Add 700 μl DNA Wash Buffer.
  6. Centrifuge at maximum speed for 30 seconds.
  7. Discard the filtrate and reuse the collection tube.
  8. Repeat the steps for a second DNA Wash Buffer wash step
  9. Centrifuge the empty HiBind DNA Mini Column at maximum speed for 2 minutes to dry the column.

Elute:

  1. Transfer the HiBind DNA Mini Column into a nuclease-free 1.5 mL microcentrifuge tube. Make sure to label your tube with your name and date
  2. Add 100μl Elution Buffer heated to 70°C
  3. Let sit at room temperature for 2 minutes.
  4. Centrifuge at maximum speed for 1 minute
  5. Store eluted DNA at -20°C.

Data:

Under the microscope, I saw a yellow solution with a bunch of red dots and I ended up diluting it by a factor of 1:100 because it was too much to count and the drop I had was about 22 cells so that means there are a total of 2,200 cells in the 200 microliter suspension.

The microfuge tube was labeled SAM 2/15 on the top and group 2.7 DNA on the side.

The final sample was clear in color.

Conclusion:

In conclusion, the experiment was successful and the next step is to extract the DNA.

February 9

Lab 5: Modified Ludox Protocol 2/8/18

Print Friendly, PDF & Email

Purpose:

The purpose of the lab was to practice pipetting using a new type of pipette, a serological pipette, and make a new protocol to try and obtain more cells.

Procedure:

Pipette practice:

  • Pipette 1ml, 0.1ml, 0.01ml of water using a micropipette and weigh the amount of water
  • Pipette 1ml of water using a serological pipette and weigh the amount of water

New Protocol:

  • Obtain 5g of soil by using a screen and add 10ml of water into the container
  • Put the lid on and mix for about 1-2 minutes and use the vortex for 5 minutes
  • Let the mixture sit for 5 minutes so the soil can settle to the bottom
  • Pipette 3.68ml of the soil water into a glass tube then add 320microliters of 25% Glutaraldehyde
  • Mix the mixture for about 1-2 minutes
  • Obtain a 50ml conical tube filled with 16ml of ludox and add 4ml of the soil water from the glass tube to the ludox about 2ml before the surface
  • Add 2ml of the red dyed water carefully to the top of the ludox tube
  • centrifuge the tube for 15 minutes at 4300xg
  • Carefully pipette out the cell layer right below the water layer and transfer into a new microfuge tube
  • Centrifuge the tube for 5 minutes at 3000xg
  • Remove the water on the top of the tube, and leave the pellet alone at the bottom
  • add 100microliters of the buffer PBS to each pellet, and combine the two tubes together for a total of 200microliters
  • Place 5 2microliter drops on a slide and look at them under the 40x objective lens
  • Total the number of cells counted and divide them by 10microliters to get the cells per microliter

Data:

Micropipette

  • 1mL – 1g
  • 0.1mL – 0.1g
  • 0.01mL – 0.01g

Serological pipette

  • 1mL – 1g

*We did not have enough time to put drops on a slide and get cell counts*

  • Ludox tube weight: 40.3g
  • Our soil had issues because the soil water had too much soil in it and our soil didnt settle to the bottom when we were supposed to obtain our soil water because we believed we used really fine soil
  • All our tubes were labeled SAM

Conclusion:

In conclusion, the new protocol seemed to work better than last weeks because it helped avoid some problems, but we did come across the soil water problem which other groups seemed to not have. Overall, the experiment went well and hopefully there will be plenty of cells to obtain.

February 2

Lab 4: Modified Ludox Centrifugation 2/1/18

Print Friendly, PDF & Email

Purpose: The purpose of the experiment was to find a more accurate way to find cells and a better proportion for ludox centrifugation in order to get more accurate results.

Procedure: 

  1. Weigh out 10g of soil without having any debris.
  2. Add 20mL of water to the baby food jar
  3.  Centrifuge the jar for 5 minutes
  4. Let the soil settle to the bottom by leaving the sample alone for a few minutes.
  5. Add 2.7 mL of soil juice  and 0.3mL of Glutaraldehyde to a small glass bottle and mix.
  6. Inject 3mL of mixture into 9mL of Ludox solution to the 5mL mark
  7. Add 2mL of water to the top of the tube gently
  8. Centrifuge the tube at 4300g for 15 minutes
  9. Draw 2mL of organic layer between the water and Ludox layers
  10. Put the organic layer in the microfuge tubes and mix well
  11. Take 5 2ul drops (per person) off the sample and observe under the microscope
  12. Calculate the efficiency by diving the actual over the expected multiplied by 100
  13. Centrifuge the sample at an angle at 12,000g for 1 minute
  14. Make sure to keep the pellet in sight when removing the excess fluid from the sample
  15. Label and store pellet in freezer.

Results: 

Soil weighed 10.0g

Ludox mixture weighed 23.4g

All of the samples were labeled SAM which is an acronym for my group’s initials.

Conclusion: In conclusion, we are hoping to get better results and find more cells using this new protocol. This lab helped engage students to use critical thinking skills and engage in team work.