January 26

Lab 3 Isopycnic Centrifugation of Ciliates 01/24/18

Lab 3 “Isopycnic Centrifugation” 01/24/18


Pre-Lab ideas to understand: 

  • Ludox centrifugation
  • qualities and dangers of working with Ludox SiO2
  • understand process of PCR and how primers work

Purpose: Begin the process of isolating the ciliate DNA to eventually successfully barcode the genetic information.

Procedure:

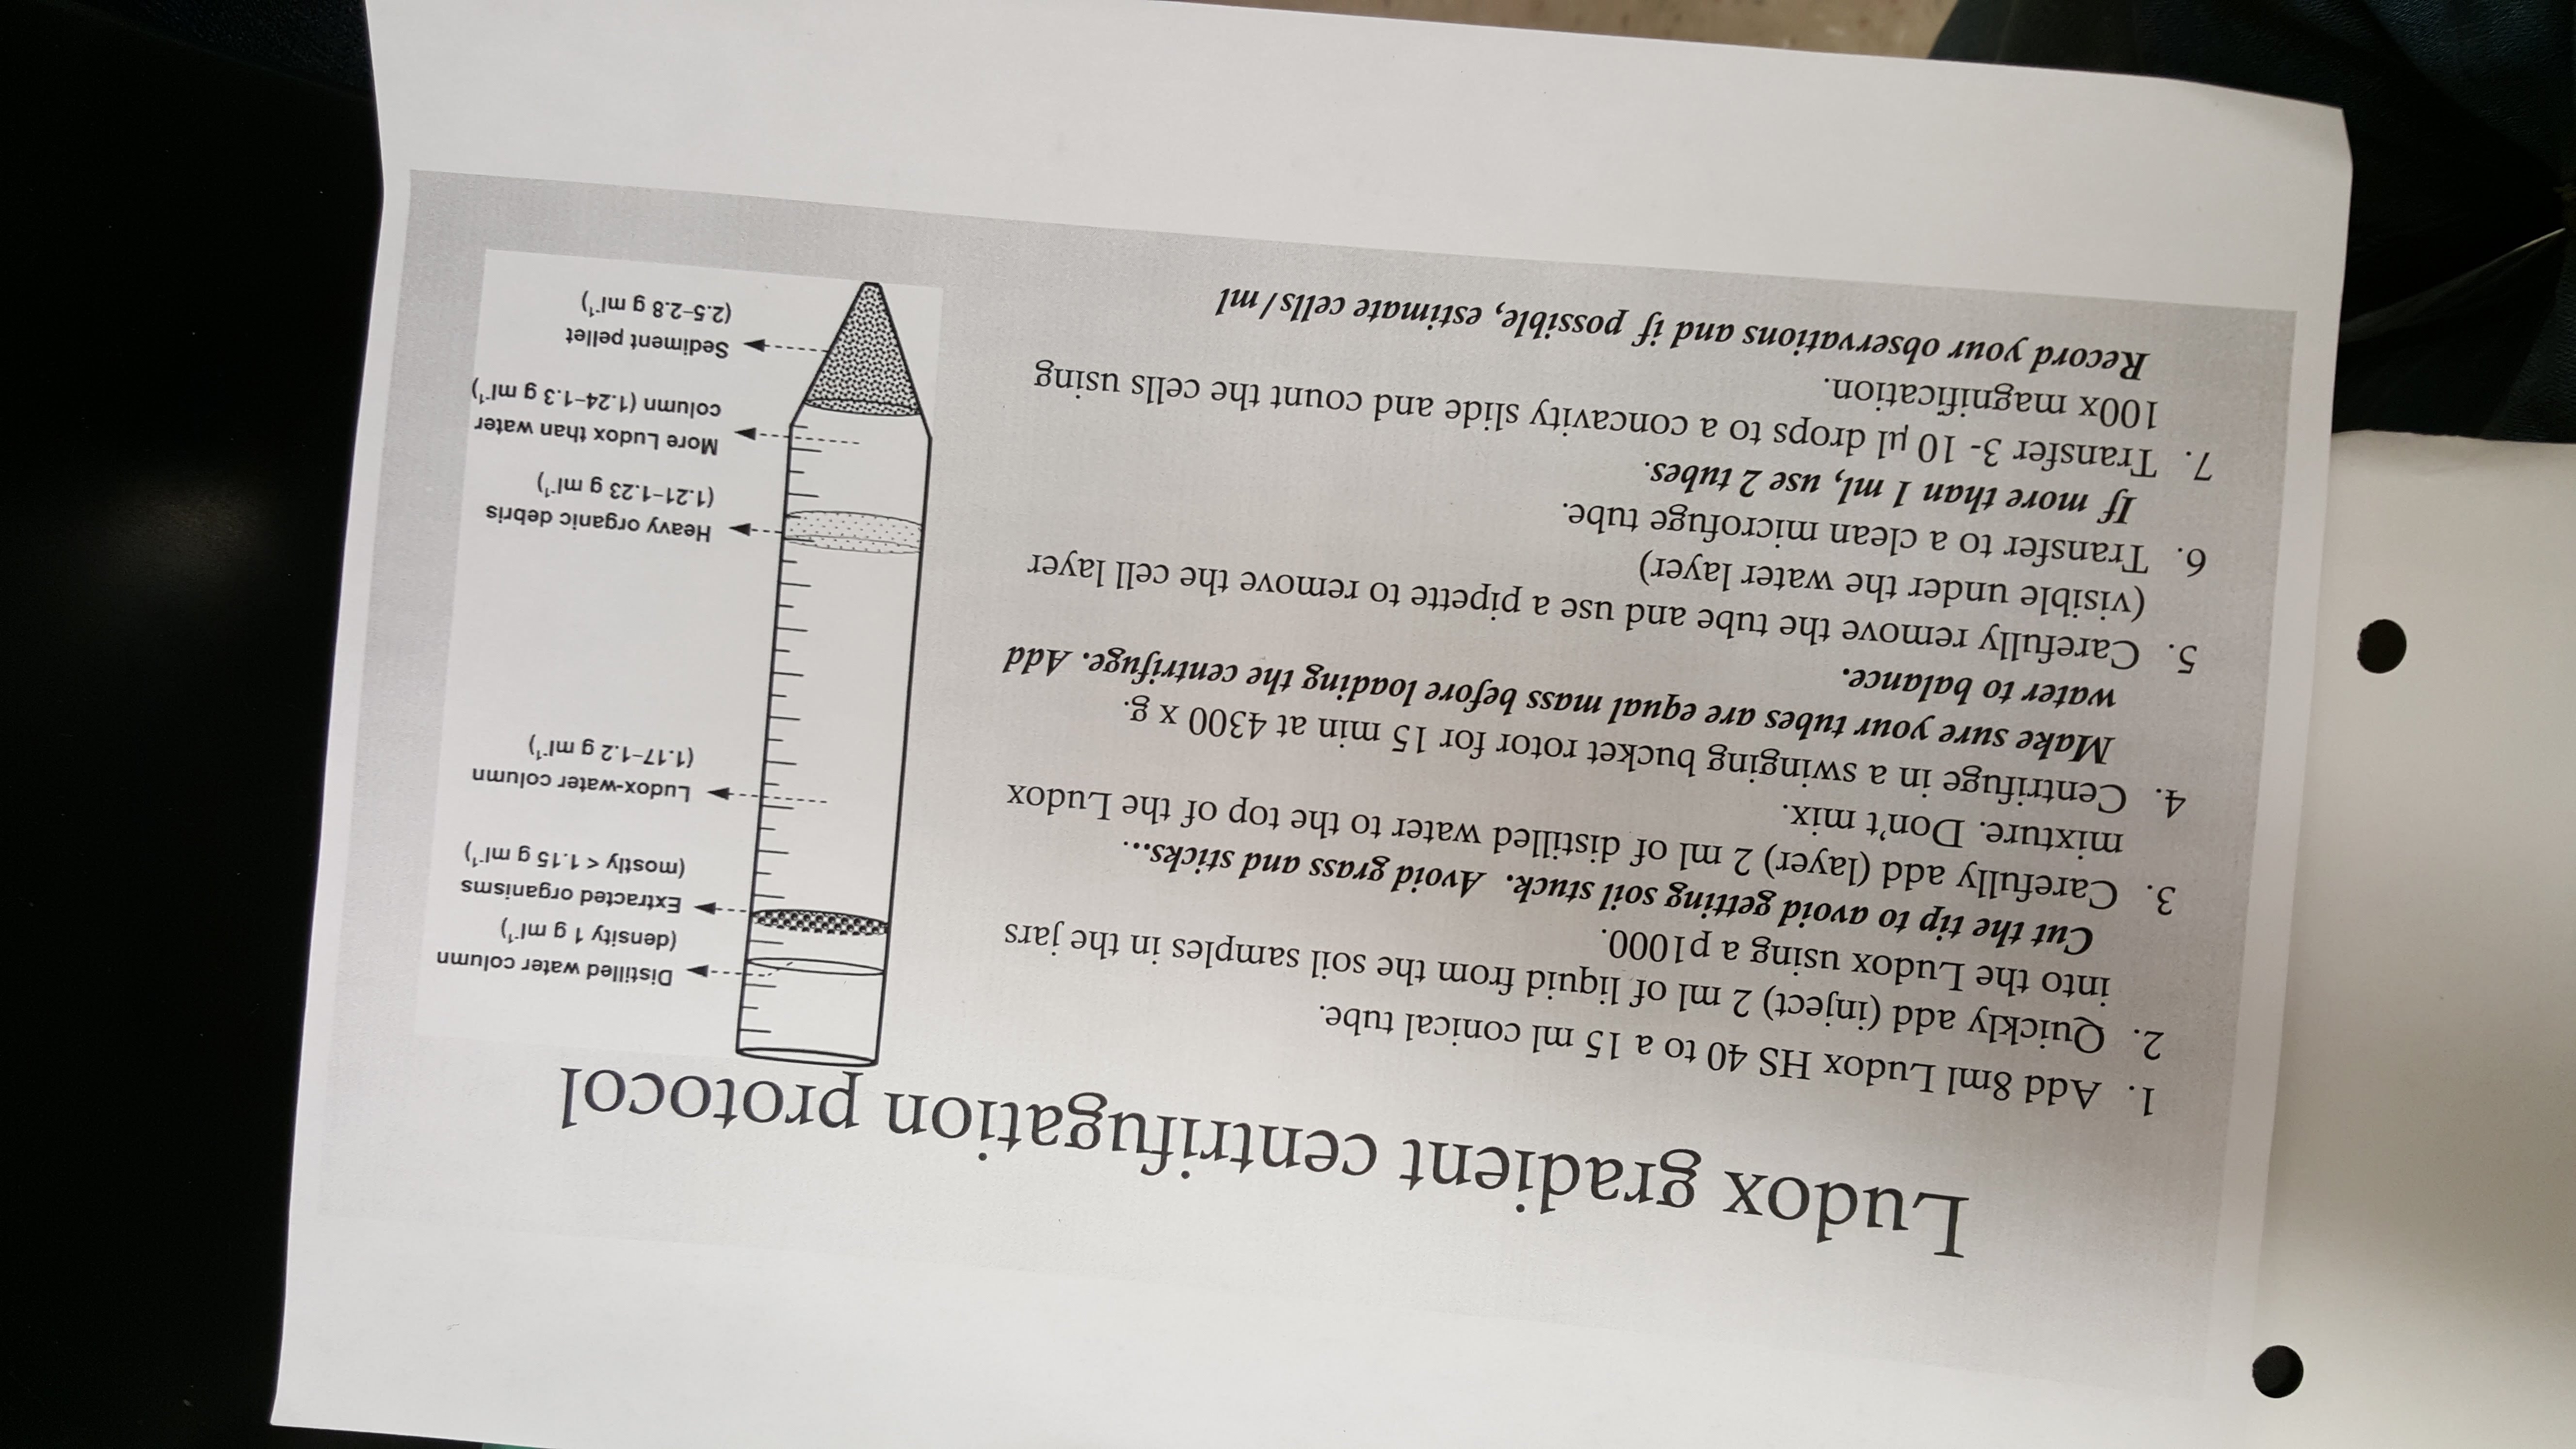
  1. Add 8 mL of Ludox HS 40 to a 15 mL conical tube
  2. Quickly add 2 mL of liquid from the soil samples with a pipette into Ludox solution
  3. Add 2 mL of water on top of solution
  4. Weigh tube and label it
  5. Match up tube weights with another group to place into centrifuge balanced
  6. Spin cells in centrifuge at speed 4,300 for 15 minutes
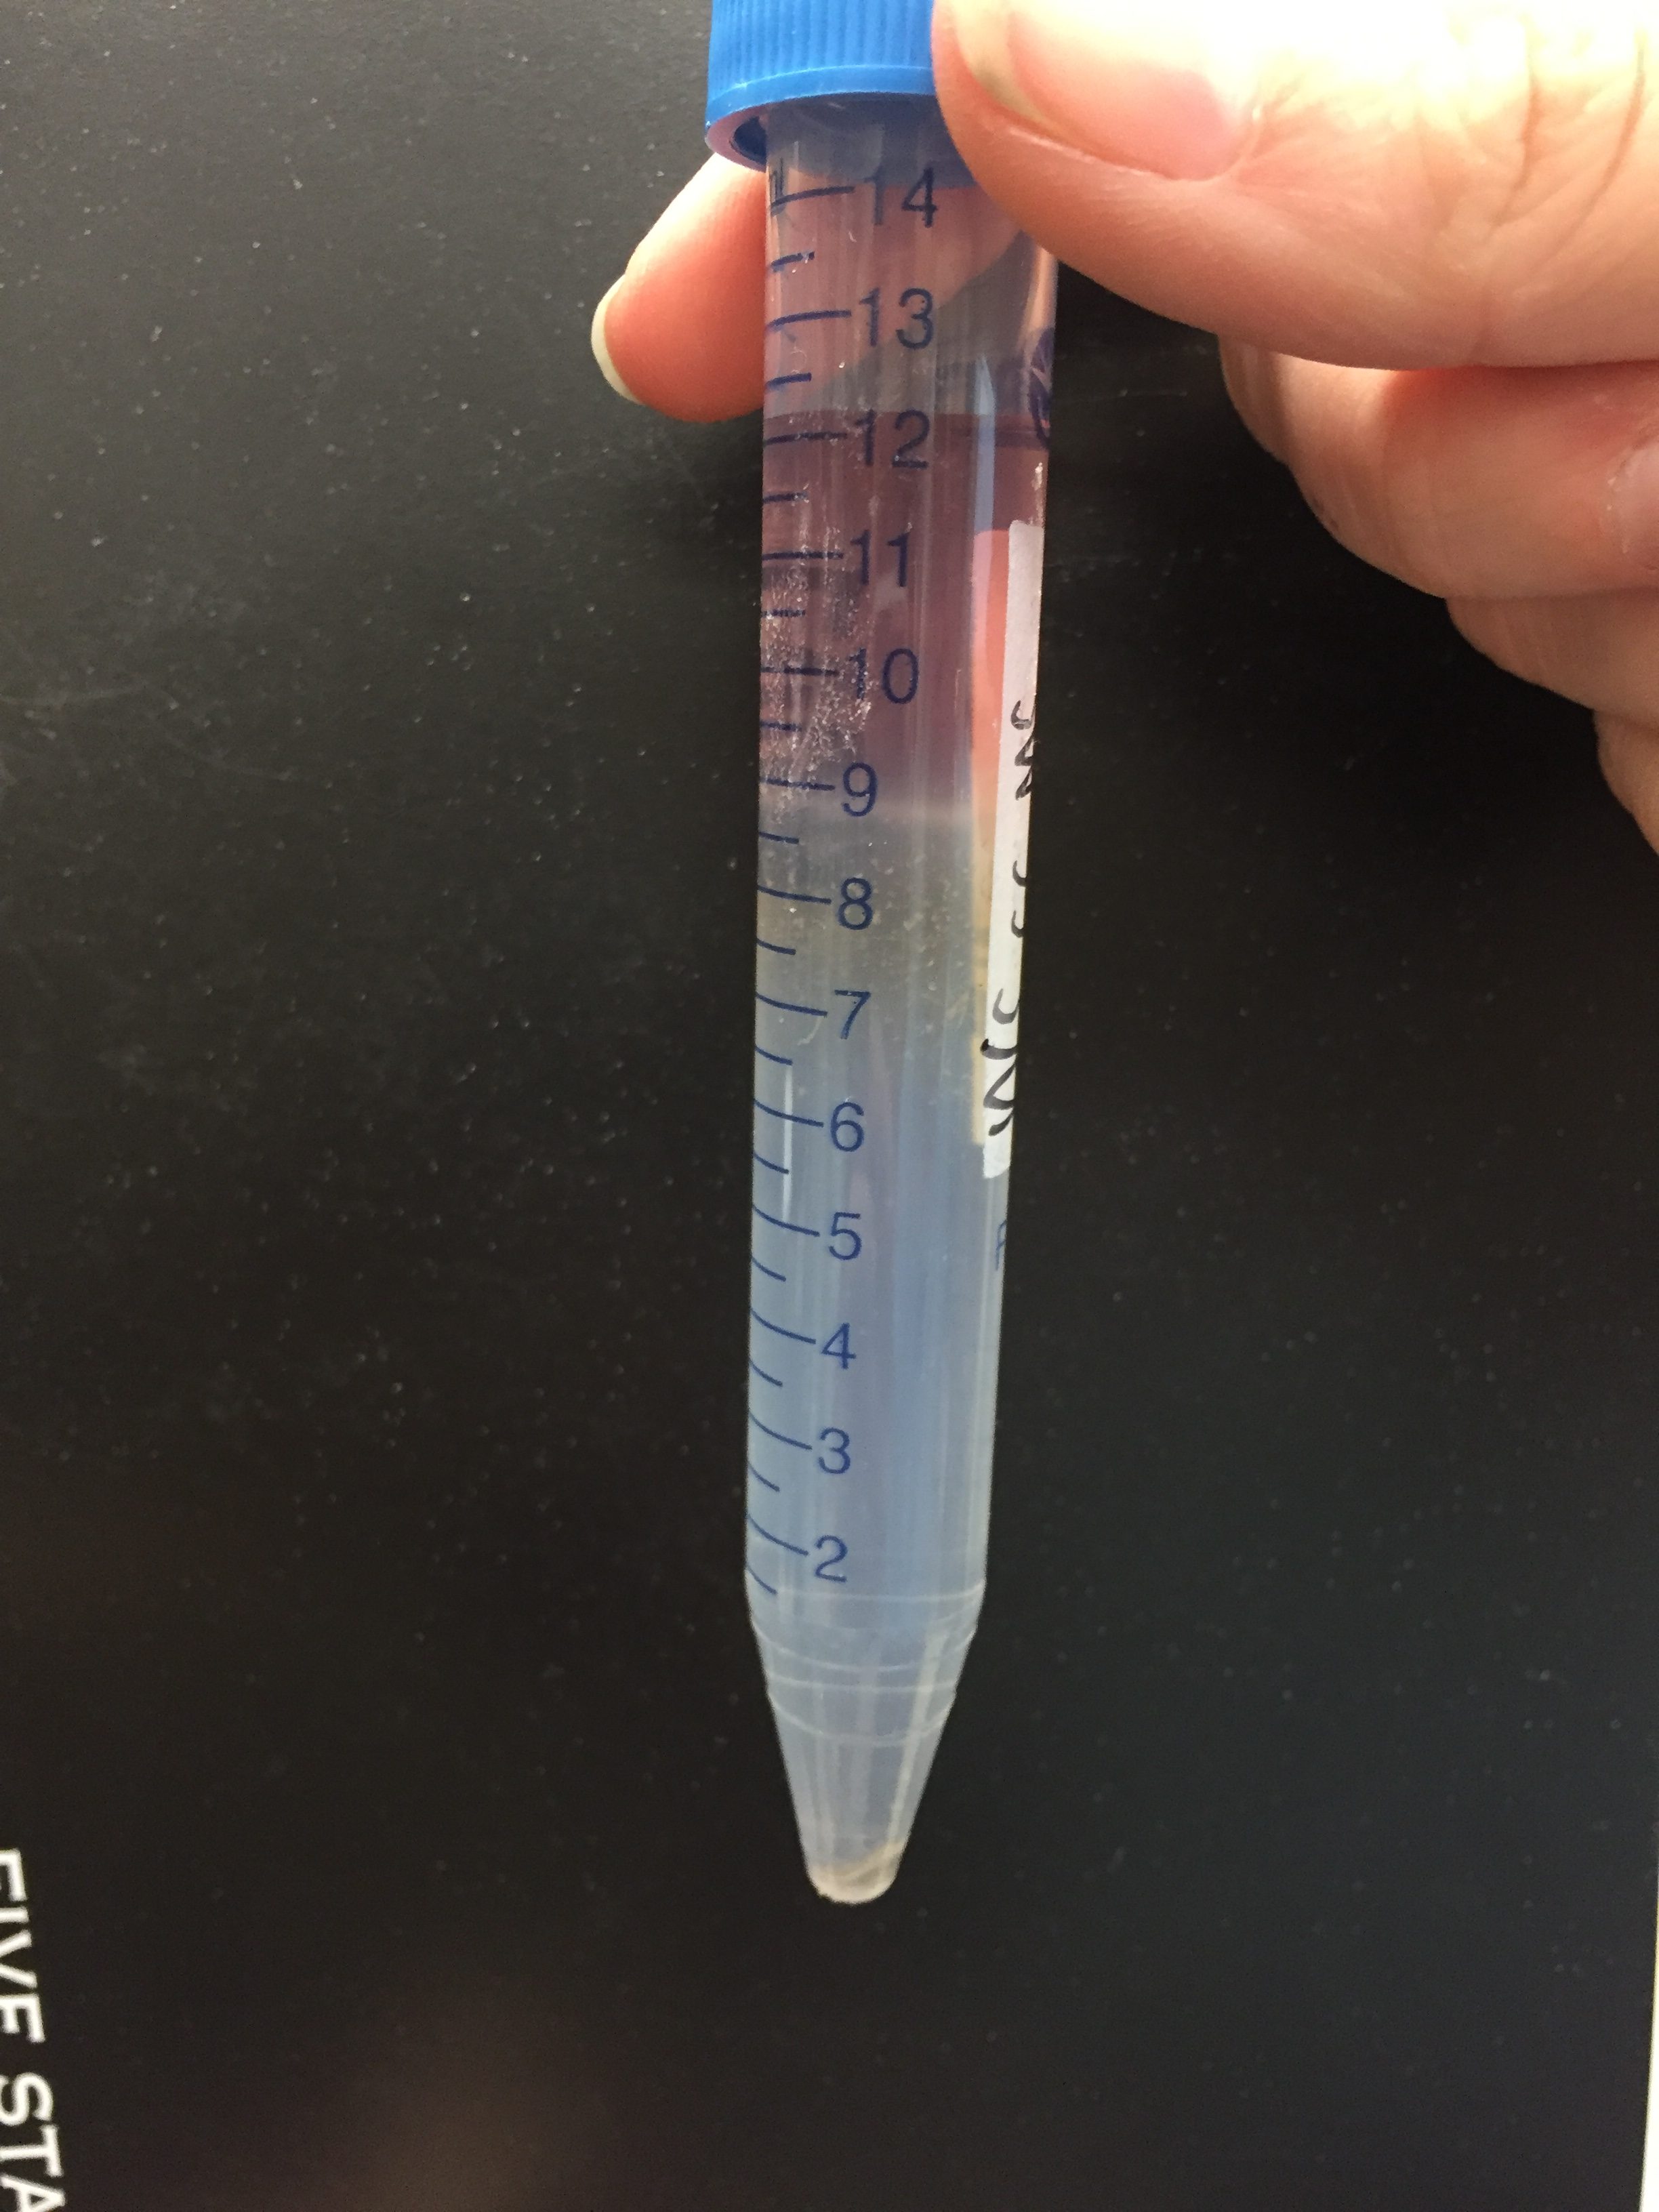
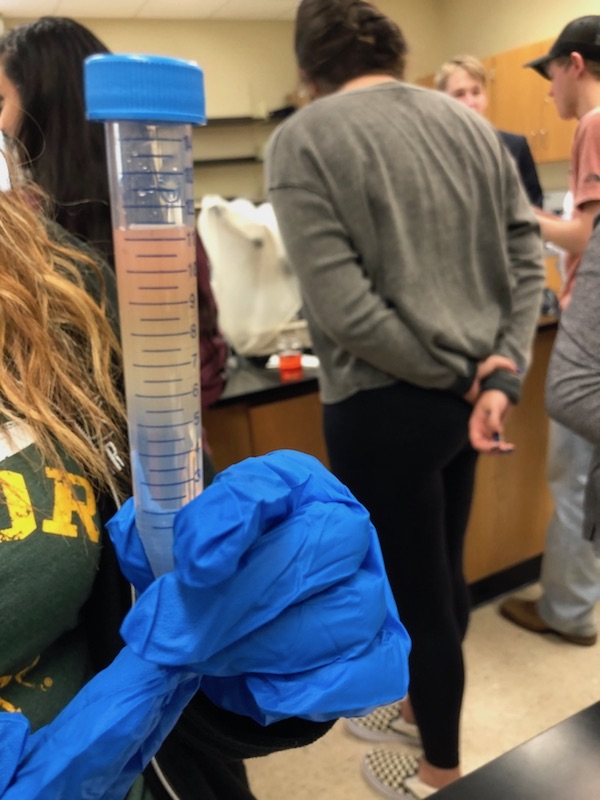
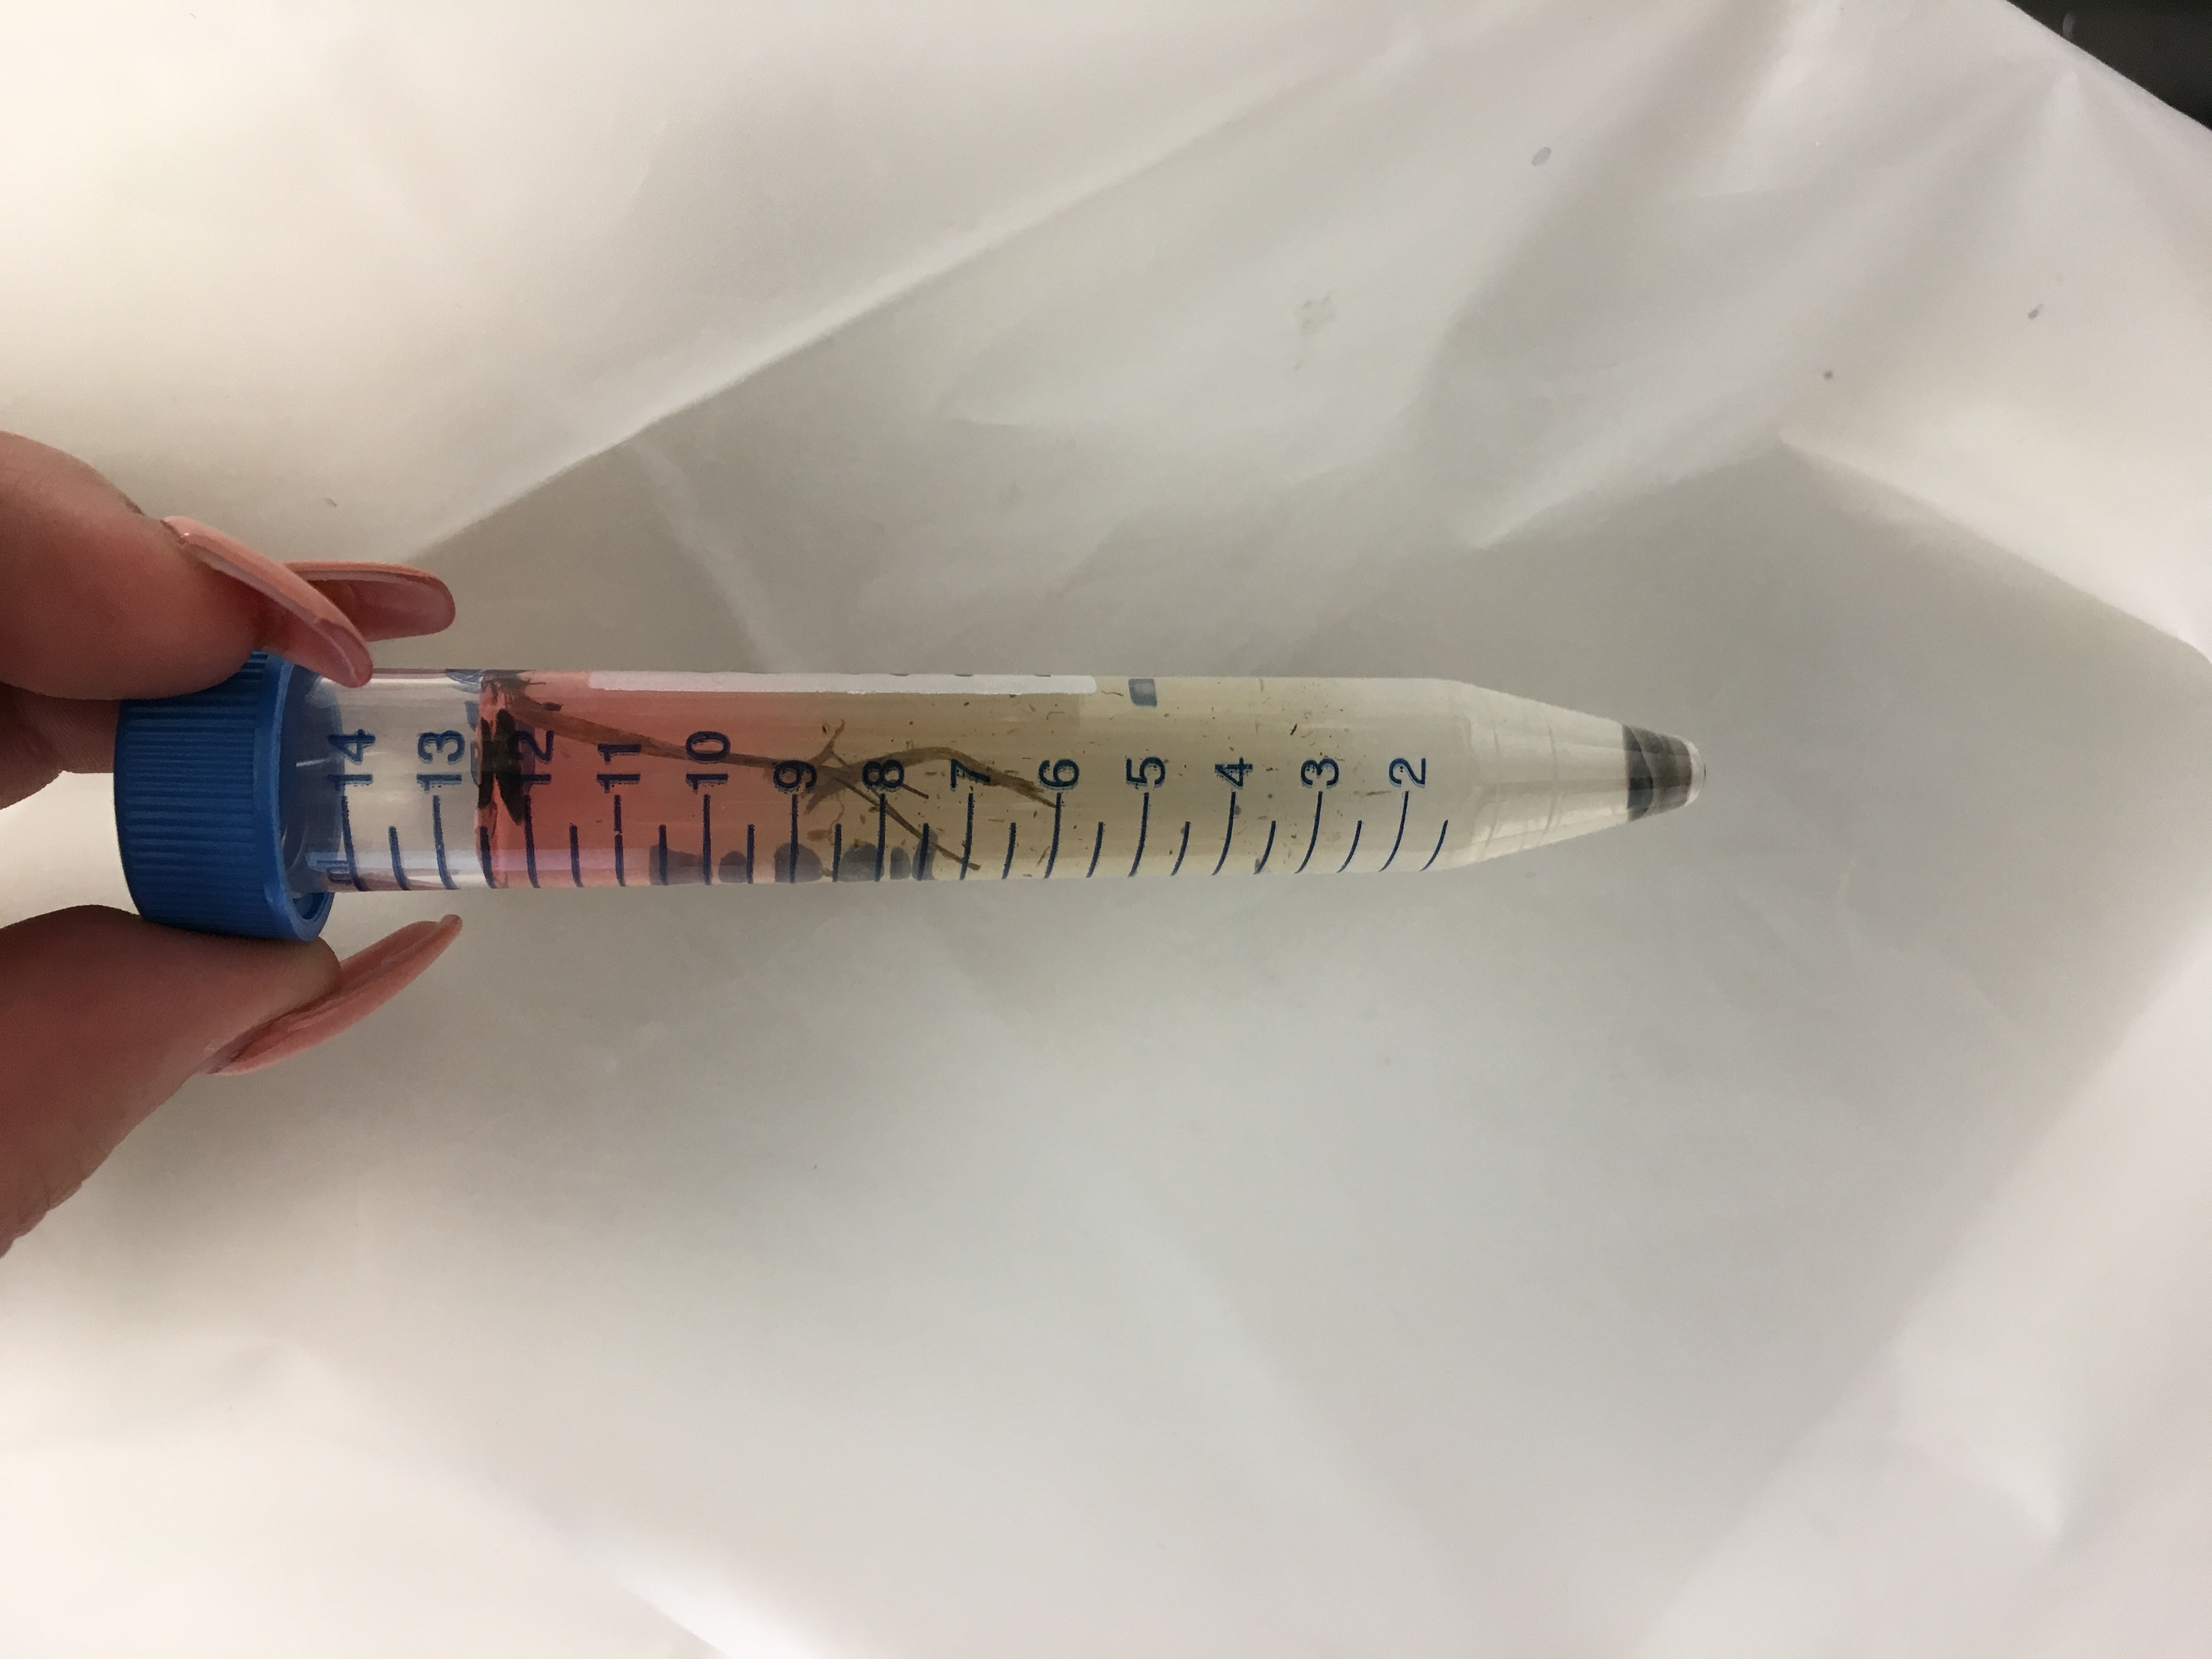
  7. Observe separate levels of substances in tube
  8. Using a plastic pipette to remove and isolate ciliate DNA and put in microfuge tube
  9.  Label tube and place in microfuge at speed 12,000 for 1 minute
  10. Once DNA and dirt pellet have been separated in tube use pipette to put 2 micro liters of DNA on a concavity slide
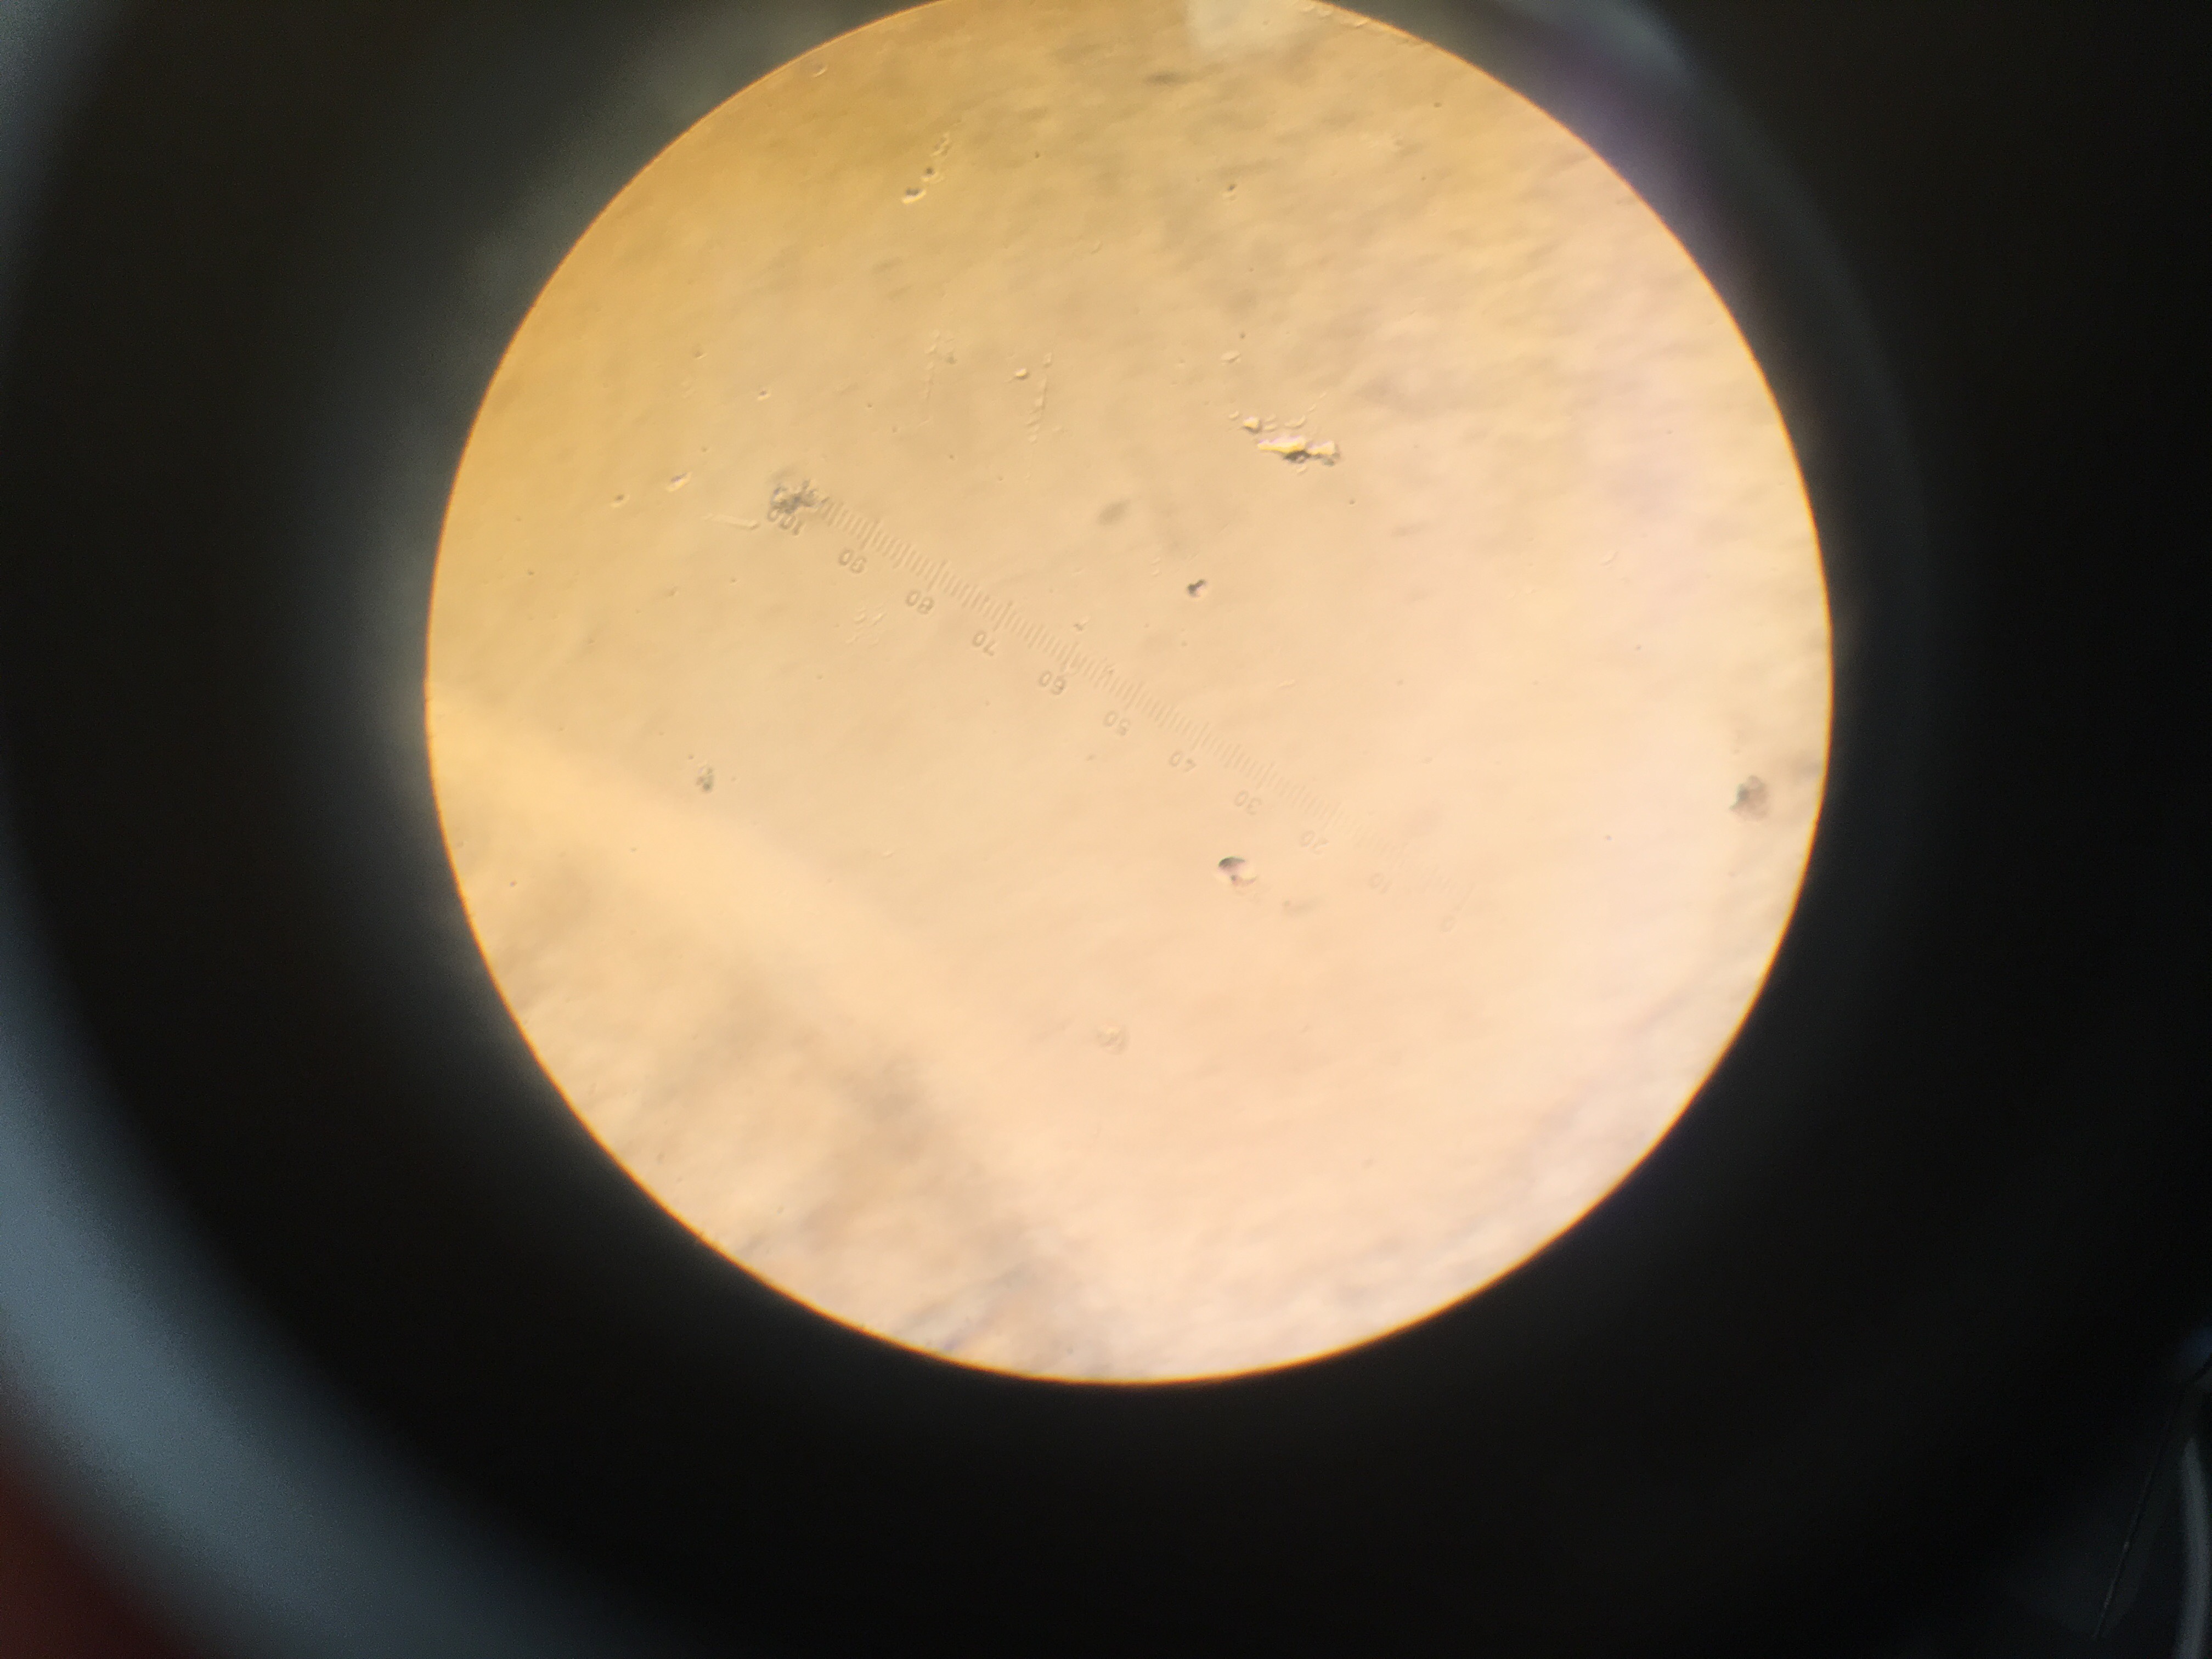
  11. Observe slide under compound microscope
  12. Freeze microfuge tube with pellet and clean off slide and return materials to appropriate location

Observations: 

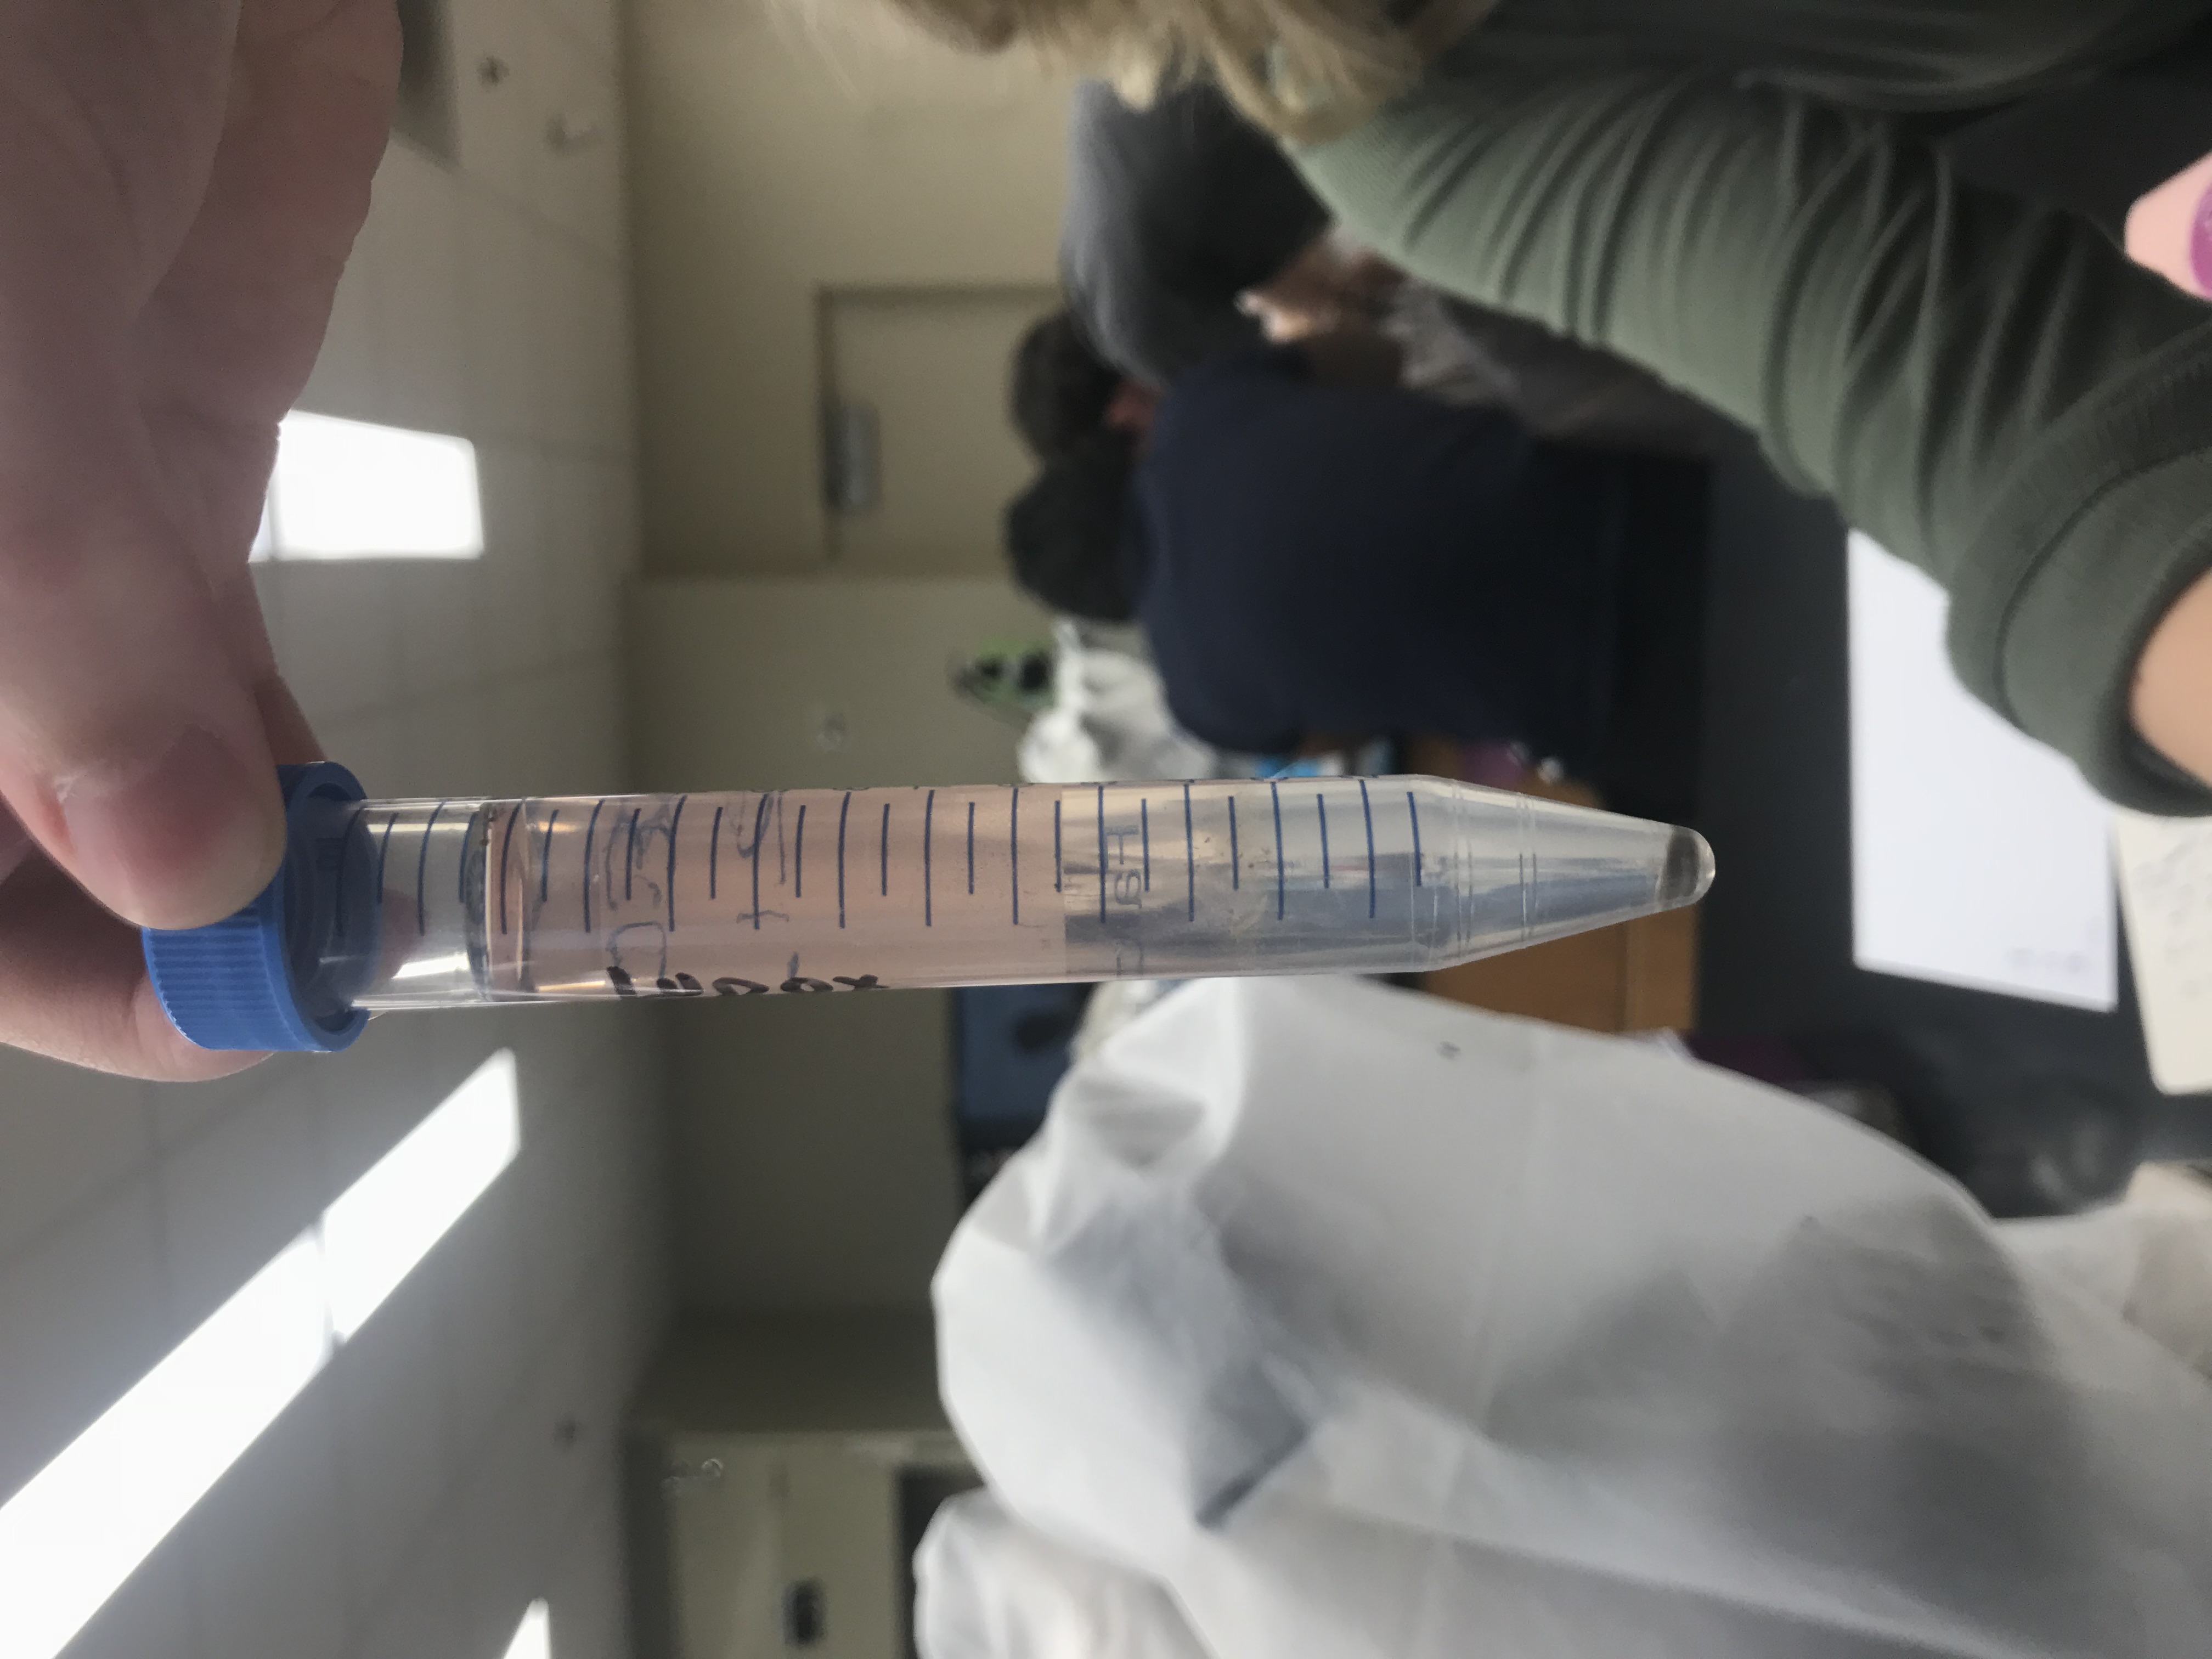
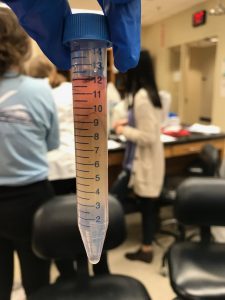
This is a drawing of the separated layers in our falcon tube. This is also a description of the work flow protocol we worked on throughout the lab

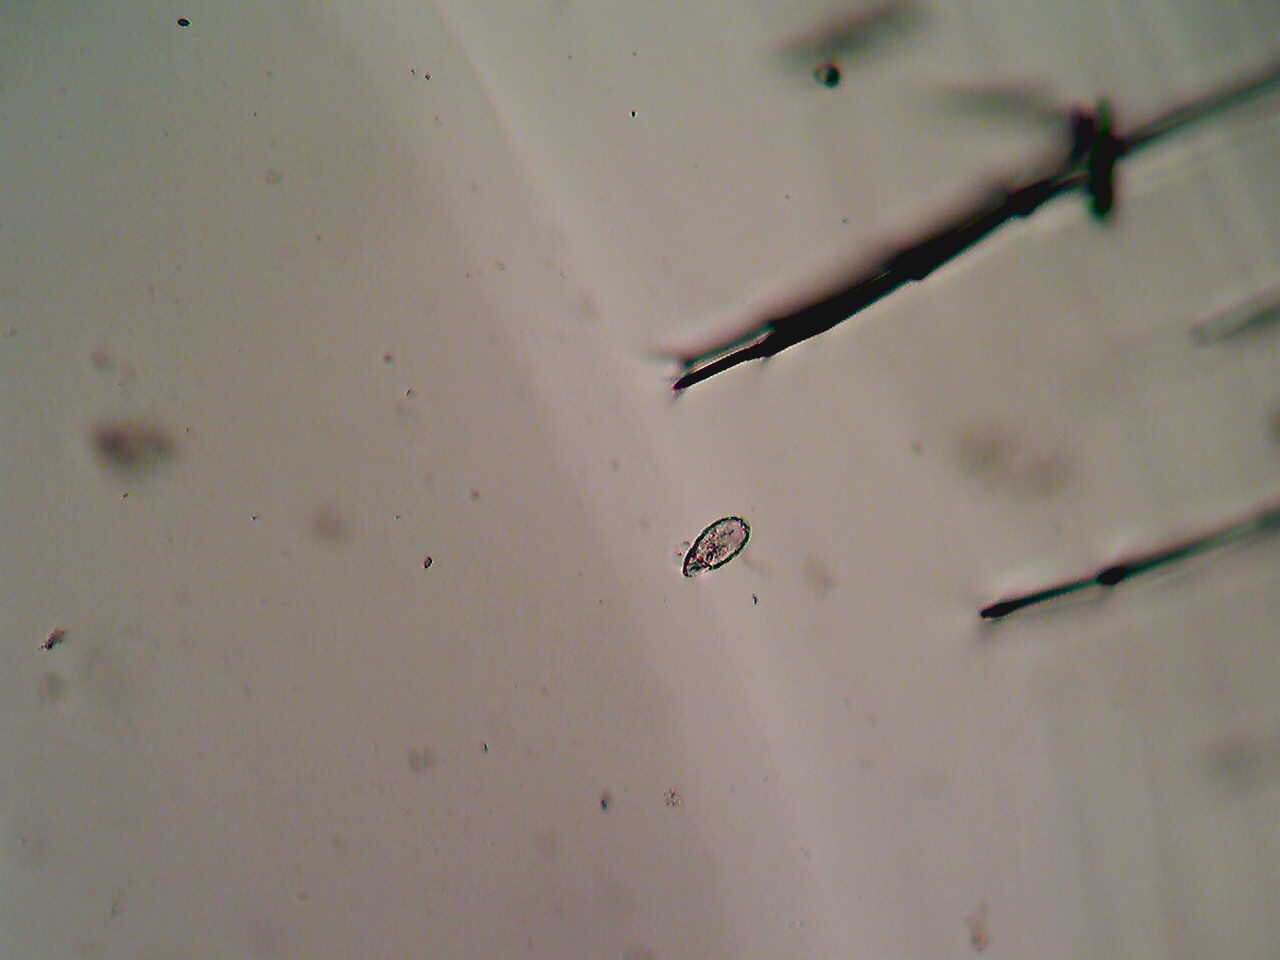
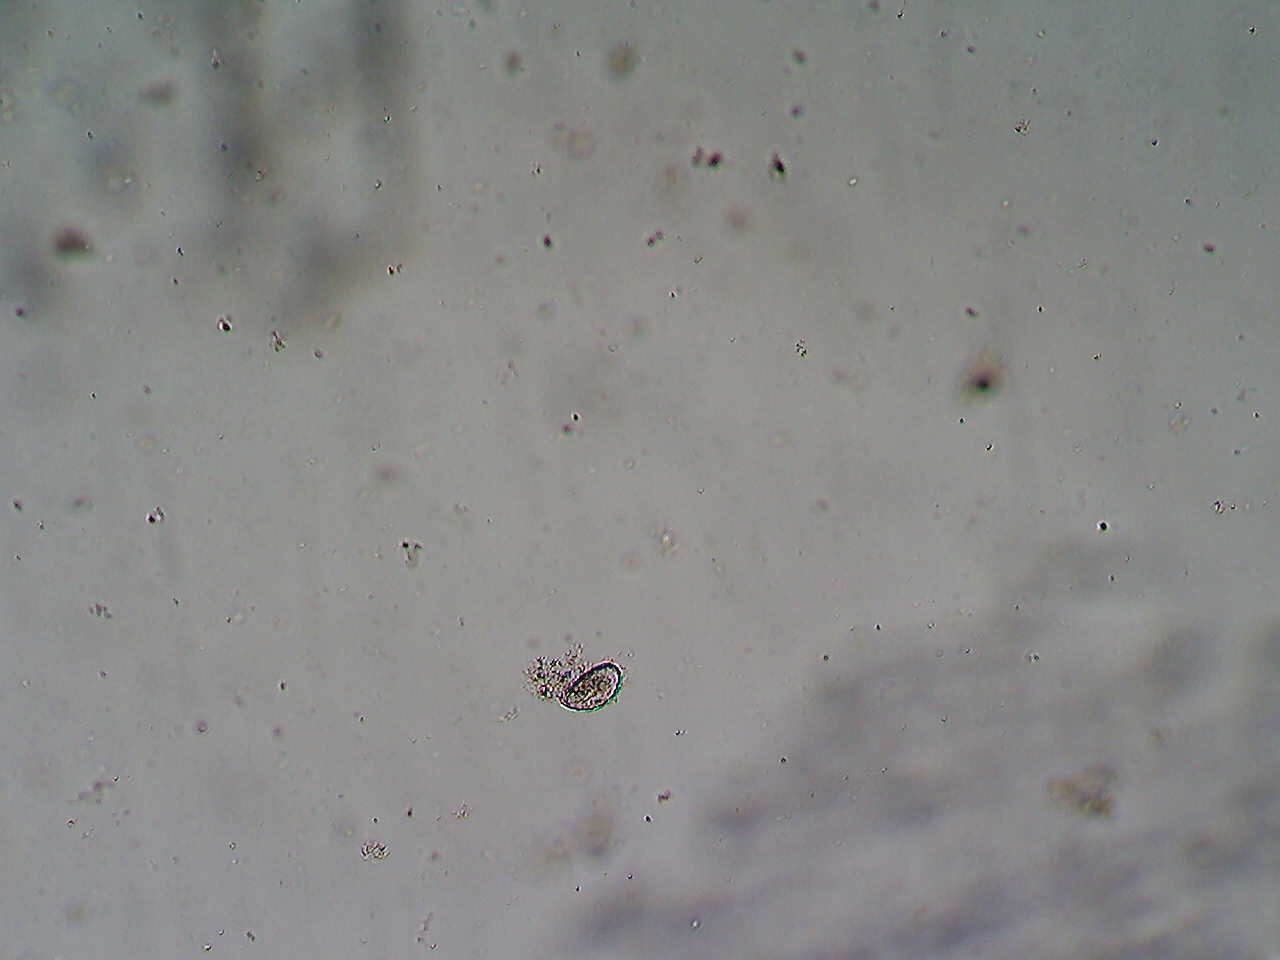
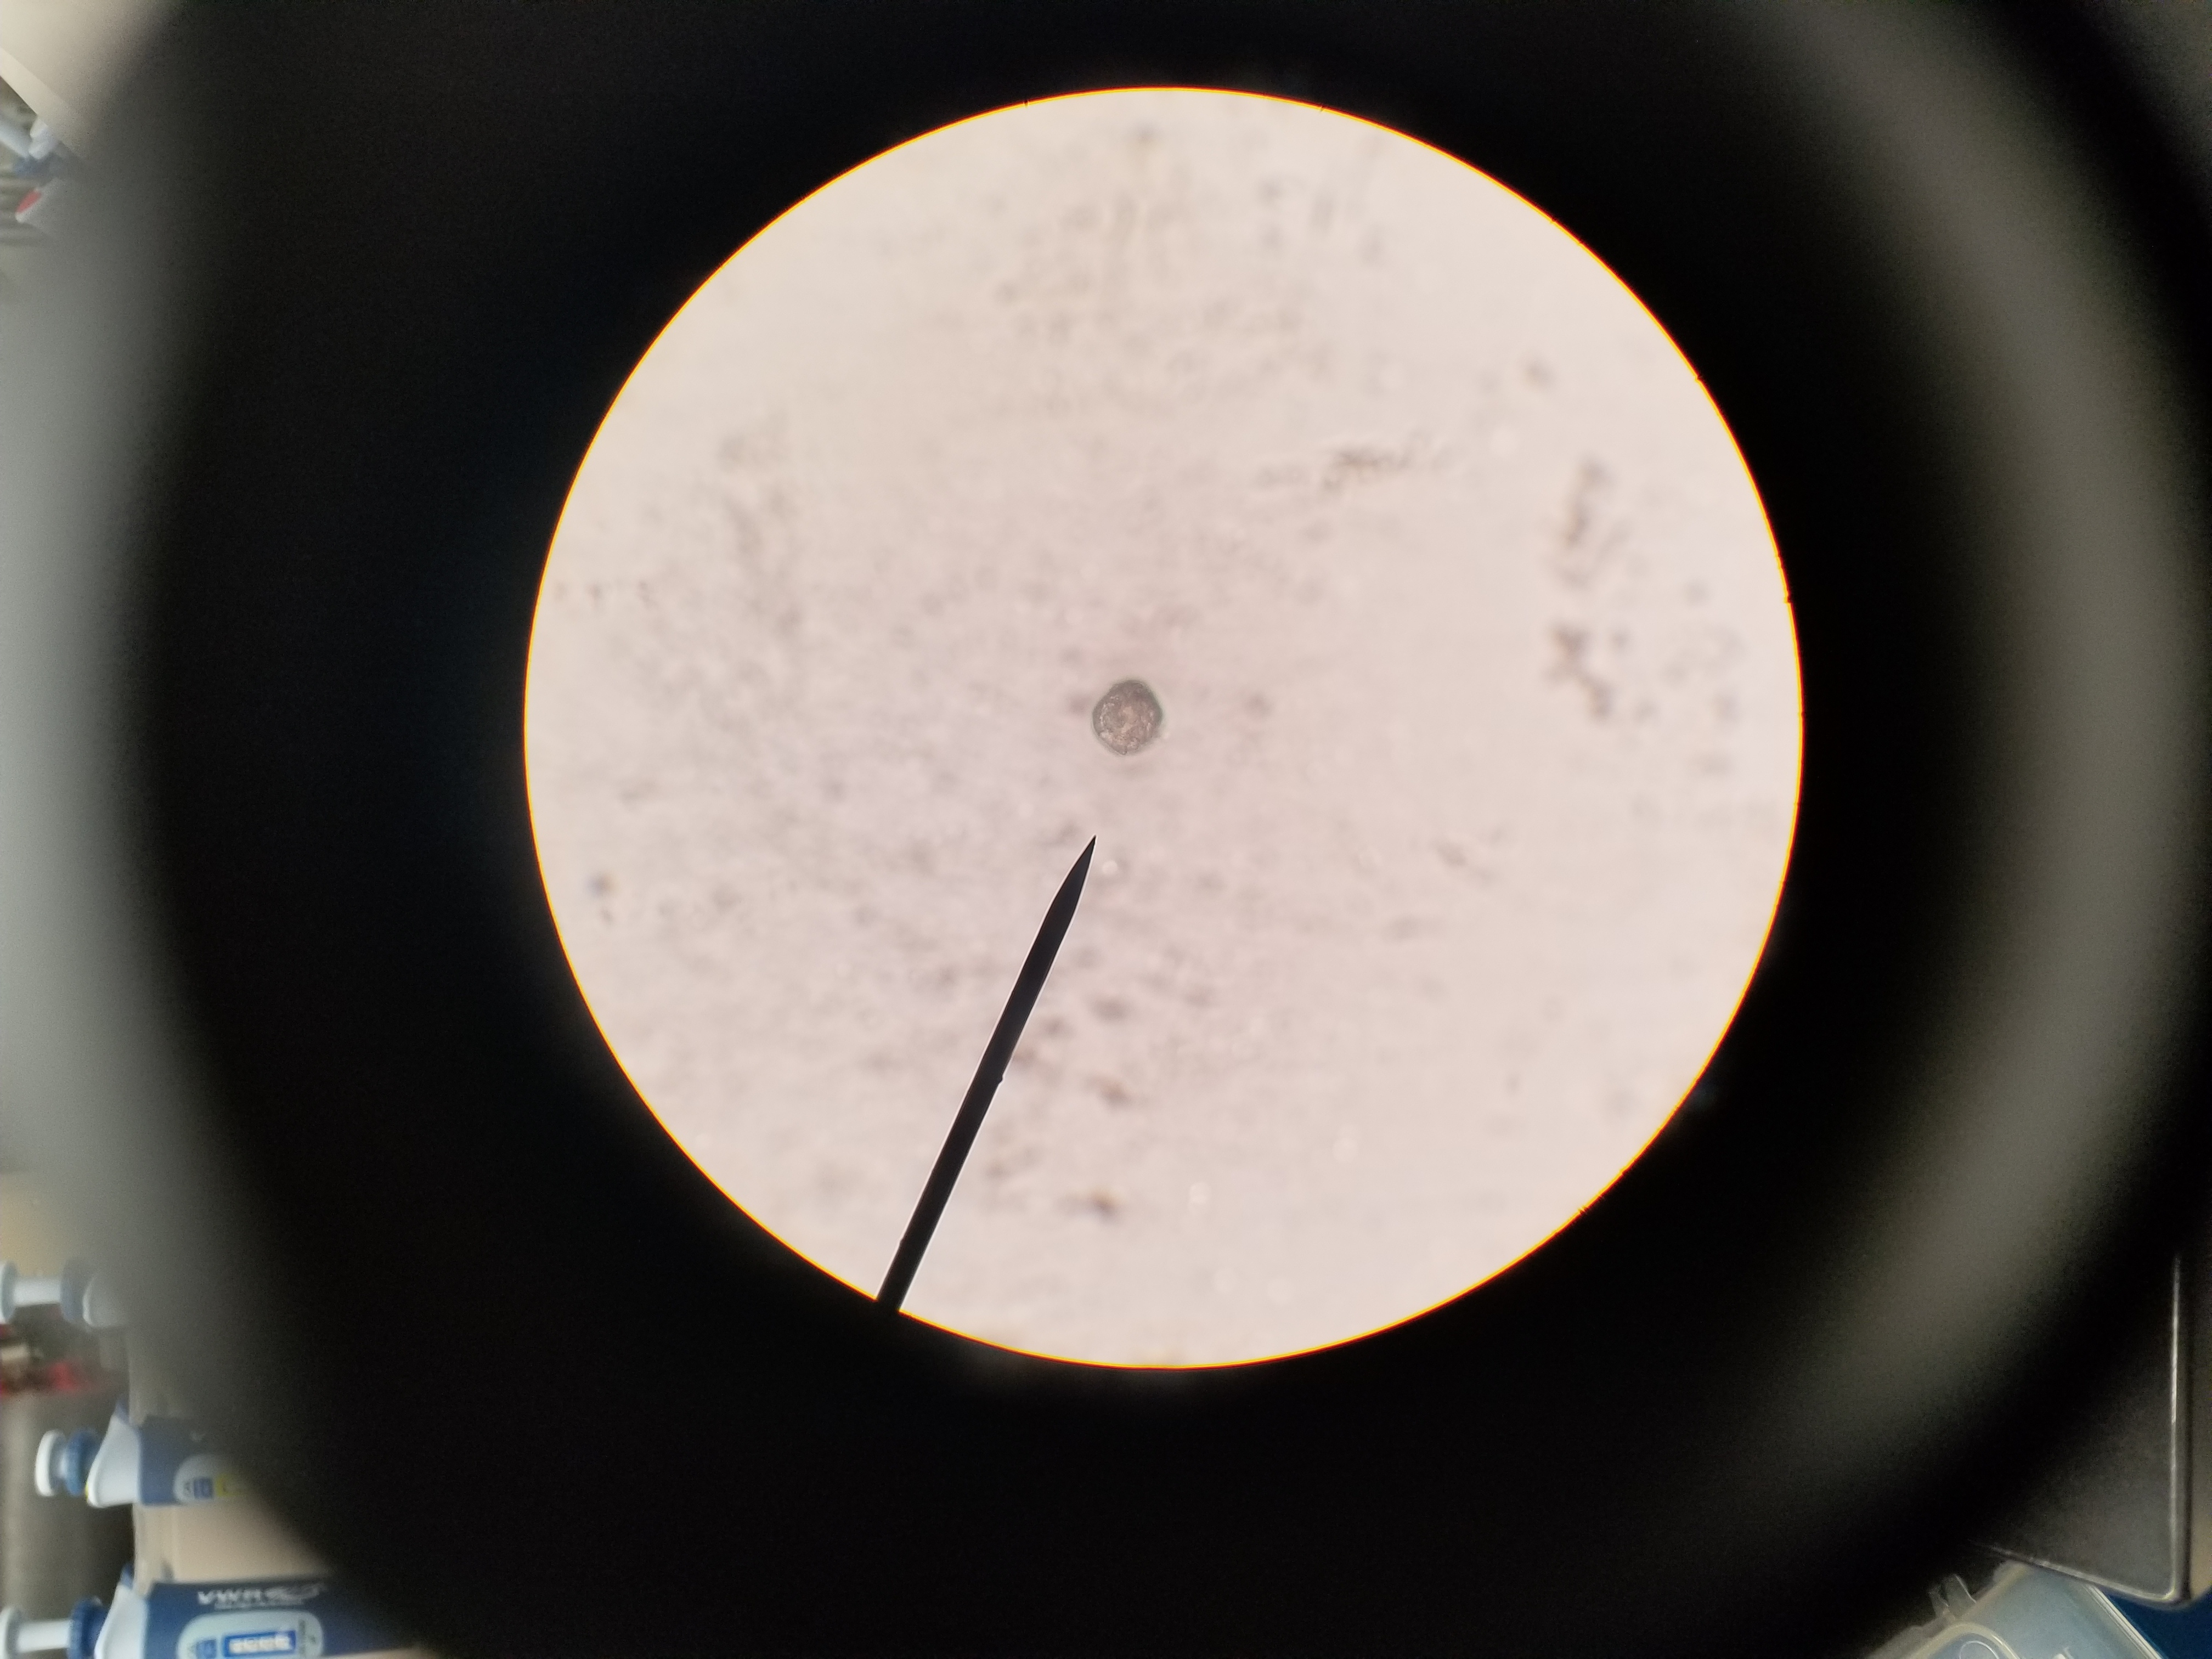
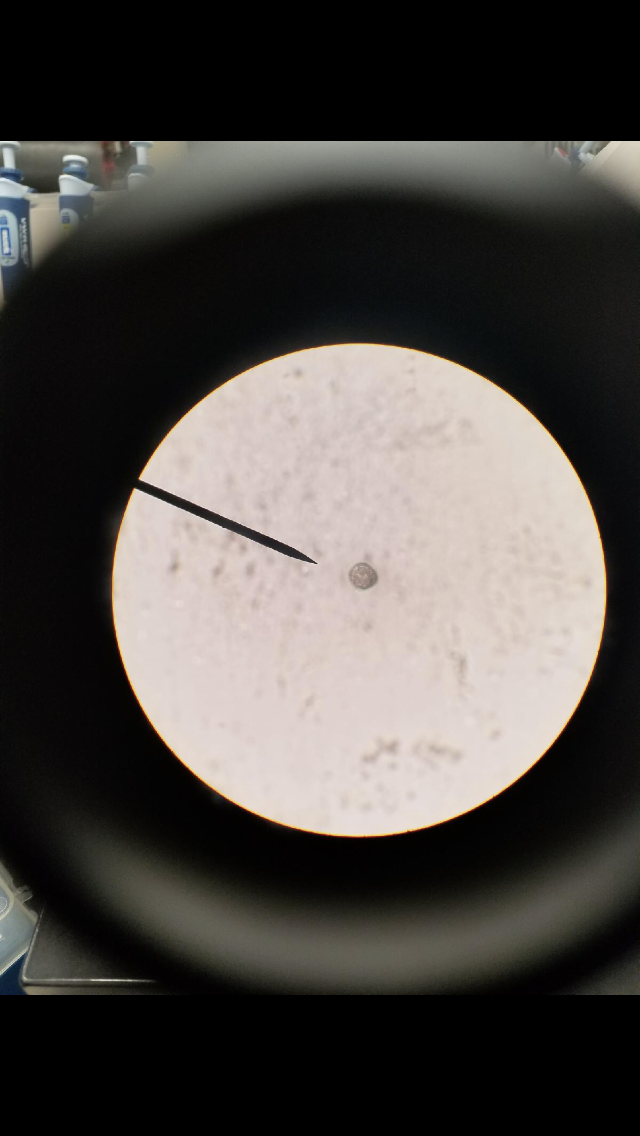
We had plenty of particles that were evidently DNA from ciliates that were broken up into pieces. Some looked more like membrane.

Conclusion: the Ludox solution was a successful method for separating and isolating the ciliate DNA from extraneous particles. I’m excited to see how the primers end up working and being able to look at the DNA to identify different species of ciliates. One source of error for today could have been adding the water to the top layer of the Ludox because it was difficult to control the rate at which the water came out of the pipette so it may have mixed with the Ludox more than it was supposed to. Additionally, maybe if we had sucked up more of the dirt and soil from the Bermuda grass instead of mostly water we would have more DNA particles from ciliates.

Next time: begin using the gel and primers to replicate the DNA that we captured and isolated? Still confused on how thee gel process works but I’m excited to learn about it.


January 26

Lab 3: Ludox Gradient Centrifugation 1/25/18

Purpose:

The purpose of this lab was to learn how to do Ludox Centrifugation and ultimately isolate cells from our soil sample. We did this in order to prepare for DNA isolation that we will be preforming next class.


The protocol we came up with for the day was:

Soil Sample- collected soil sample

Ludox Centrifugation- we created our centrifugation with the ludox

Cell Isolation- we took the one layer of cells and isolated it in its own tube to store for later


Procedure:

1.Add 8ml Ludox HS 40 to a 15 ml conical tube.

2.Quickly add (inject) 2 ml of liquid from the soil samples in the jars into the Ludox using a p1000. Avoid grass and sticks…that are low density.

3.Carefully add (layer) 2 ml of distilled water to the top of the Ludox mixture. Don’t mix.

4.Centrifuge in a swinging bucket rotor for 15 min at 4300 x g.

5.Carefully remove the tube and use a pipette to remove 3-5 ml layer of cells (under the water layer)

6.Transfer to a clean 15 ml comical tube.

7.Dilute with buffer to 10 ml and spin at 4300 x g for 10 minutes to wash and pellet the cells.

8.Remove (decant) the supernatant and store the pellet in the freezer.


Data:

This is the ciliate I found in the drops I looked at. My tube weighed 21.3g.

Conclusion:

This lab helped us to prepare for DNA extraction which we will perform in the next lab. We will later use PCR and Metabarcoding in order to figure out the species we have found. We were successful in isolating cells and hopefully will be able to analyze the DNA next class.

Storage:

Put our centrifuge tube in the freezer labeled ams.

January 26

Ciliate Isolation and DNA Extraction 1/25/18

Purpose: Design protocol for metabarcoding of oil ciliates to explore ciliate diversity.

Procedure:

  1. Add 8 ml of Ludox HS 40 to a 15 ml conical tube
  2. Quickly add 2 ml of liquid from the soil samples in the jars into the Ludox using a p1000
  3. Carefully layer 2 ml of distilled water to the top of the Ludox mixture; do not mix
  4. Centrifuge in a swinging bucket rotor for 15 min at 4300 x g
  5. Carefully remove the rube and use a pipette to remove the cell layer from underneath the water layer
  6. Transfer to a clean microfuge tube and label with your group’s number
  7. Transfer 3-10 ul drops to a concavity slide and count the cells under 100x magnification; do this three times and record results
  8. Centrifuge the remainder of the contents in your microfuge tube at 12,000xg for 1 minute
  9. Remove the supernatant using a p1000 and store the pellet in the freezer

Results:

This is how our Ludox tube looked prior to centrifuging it in the swinging bucket rotor:

After, when we counted how many cells were present in three drops of the cell layer under the microscope, I counted that there were 12, 16, and 21 in my samples. The cells were very small, translucent, and had a circle/oval shape.

Conclusion:

We successfully created a Ludox gradient and were able to remove and observe the cells from the cell layer.

Next Steps:

The next step would be to try extracting DNA from the cells that are in our sample in order to begin the rest of the metabarcoding process.

January 26

Lab 3: Ludox Centrifugation 1/25/28

Purpose: The purpose is to extract ciliates from a soil/water sample

Procedure: 

  1. Add 8ml Ludox HS 40 to a 15ml conical tube
  2. Quickly add (inject) 2ml of liquid from the soil samples in the jars into the Ludox using a p1000.
    1. Cut the tip to avoid getting soil stuck and avoid picking up grass and sticks from the sample
  3. Carefully add (layer) 2ml of distilled water to the top of the mixture. Don’t mix.
  4. Centrifuge in a swinging bucket rotor for 15 min at 4300 x g
    1. Make sure your tubes are equal mass before loading the centrifuge. Add water to balance.
  5. Carefully remove the tube and use a pipette to remove the cell layer (visible under the water layer)
  6. Transfer to a clean microfuge tube.
  7. Transfer 10 microliter drips to a concavity slide using a micropipetter and count the cells using a microscope and record observations.
  8. Label your tubes
  9. Spin the cells in a microfuge at 12000xg for 1min
  10. Remove the supernatant and leave the pellet and store.

Data:

ludox tube mas: 21.3g

Conclusion:

In conclusion, there was 1 cell found in my slide sample and the tubes were labeled SAM.

January 26

Lab 3: Ciliate Isolation and DNA Extraction Protocols 01/25/18

Purpose/Objective

The purpose of today’s lab was to design a protocol for metabarcoding of soil ciliates to explore ciliate biodiversity. We also learned how to isolate ciliates using Ludox gradient centrifugation

Procedure

  • Overall Workflow
    • Cell Isolation: Ciliates (and other cells) are separated from soil
    • DNA Extraction: Use methods that results in “clean” DNA
    • PCR/Gel Electrophoresis Validation: Use of primers for sequencing
    • Metabarcoding (High Throughput Amplicon Sequencing)
    • Analysis of Sequencing Data

Today we performed the following Ludox gradient centrifugation protocol to isolate the ciliates, and begin extracting the DNA

  1. Add 8-mL of Ludox HS 40 to a 15-mL conical tube
  2. Quickly add (inject) 2-mL of liquid from the soil samples in the jars into the Ludox using a p100. (Cut the tip to avoid getting soil stuck. Avoid grass and sticks)
  3. Carefully add (layer) 2-mL of distilled water to the top of the Ludox mixture. Don’t mix.
  4. Centrifuge in a swinging bucket rotor for 15 min at 4300 x g. (Make sure your tubes are equal mass before loading the centrifuge. Add water to balance)
  5. Carefully remove the tube and use a pipette to remove the cell layer (visible uder the water layer)
  6. Transfer to a clean microfuge tube. (If more than 1-mL, use 2 tubes.
  7. Transfer 3 10-mL drops to a concavity slide and count the cells using 100x magnification. (Record your observations and if possible, estimate cells/mL)

Results

Our centrifuge tube ended up weighing approximately 21.4 grams. The image below is a picture I took with my phone, of my partner Ben’s slide.

Conclusion

I heard from a friend that this lab was going to be fun, and he was right! The only bummer was that my microscope’s rheostat was broken so the light was far too bright for my eyes to see my slide, but I was still able to look at my lab partners samples under their microscopes! This lab was really interesting because not only did I get more hands on experience with ciliates, I also got to know my classmates from groups 5 and 6 better, along with my TA Will.

January 26

Lab 3: Ciliate Isolation and DNA Extraction Protocols

Purpose

  • Describe the main points from the review of literature
  • Explain how ciliates may be isolated from a soil sample using Ludox centrifugation
  • Describe the polymerase chain reaction and how it is important in metabarcoding
  • Cell separation
  • DNA amplification

Materials

  • Ludox HS 40
  • Conical tube
  • Soil sample
  • Swinging bucket rotor
  • Distilled water
  • Microscope

Procedure

1.Add 8ml Ludox HS 40 to a 15 ml conical tube.

2.Quickly add (inject) 2 ml of liquid from the soil samples in the jars into the Ludox using a p1000. Avoid grass and sticks…that are low density.

3.Carefully add (layer) 2 ml of distilled water to the top of the Ludox mixture. Don’t mix.

4.Centrifuge in a swinging bucket rotor for 15 min at 4300 x g.

5.Carefully remove the tube and use a pipette to remove 3-5 ml layer of cells (under the water layer)

6.Transfer to a clean 15 ml comical tube.

7.Dilute with buffer to 10 ml and spin at 4300 x g for 10 minutes to wash and pellet the cells.

8.Remove (decant) the supernatant and store the pellet in the freezer.

Results

We were able to extract the organisms by Ludox centrifugation with a pipette. Ciliates were visible under a compound microscope however, none were mobile.

Conclusion

Our ciliate extractions will sit in the freezer for about a week and then we will proceed with our protocol.

January 26

Lab 3 Ludox Gradient Density Centrifugion 1/25/18

Purpose:

The purpose of todays experiment was to isolate ciliates from a soil sample with centrifuges.

Procedure:

  1. Use a p1000 micropipette to transfer 2 ml of the given soil sample into one of the tubes with 8mL of Ludox in it.
  2. Then pipette 2mL of dyed water into the tube.
  3. Take the weight of your groups tube and compare it to your adjacent group (if one groups weighs less than the other than the group with less should add water until the weights are matched).
  4. After Centrifuge the tubes at x4300g for 15 min.
  5. Next we carefully pipetted the cell laye that was in between the two layers in the tube.
  6. After we pipetted 3-10 microliter drops to concavity slides so that we could check them under microscopes for ciliates.
  7. After centrifuge the microcentrifuge for 10 minutes.
  8. Then carefully remove the liquid from the tube leaving the pellet.
  9. Store the Pellet for next lab.

Results: 

Our conical tube weighed 21.1g originally so we added .3 g of water to balance out with our adjacent group 21.4g. We were able to find a small ciliate layer in our tube and extracted it to view. My partner was able to find this.

Conclusion: 

Our group was able to find something in our tube. We had a rather small cell layer in our sample so our pellet was a little smaller. Overall this lab went well, it was enjoyable to follow the process of Ludox centrifuging and examining our samples. I feel I have a greater understanding of Ludox centrifugation now.

January 26

Lab 3: Ludox Centrifugation and Ciliate Extraction (01/25/18)

Purpose/Objective of the Lab:

  • The purpose of today’s lab was to design a protocol for the metabarcoding of soil  ciliates to explore the ciliate biodiversity.

General Work flow:

  • Ciliate Isolation 
  • DNA Extraction
  • PCR/Gel Electrophoresis 
  • Metabarcoding
  • Analysis of Sequencing Data 

Procedure:

  1. We added 8 mL Ludox HS 40 to a 15 mL conical tube (falcon tube was used in this procedure
  2. We quickly injected 2 mL of distilled water to the top of the Ludox mixture.
  3. The whole class gave their falcon tubes with the components to the instructor and we went upstairs to centrifuge them in a swinging bucket for 15 minuts at 4300 x g(earth’s gravitaional pull)
  4. We carefully removed the tube and used a pippette to remove the cell layer under the water layer.
  5. We then trandferred 3-10 microliter drops to a concavity slide and counted the cells using a 100x magnification.
  6. After we  observed these drops under the microscope, we then prepared the cells for DNA extraction by first labelling our tubes and spining them in the microfuge for about 1 minute.
  7. We then stored the microfuge tube with the pellet on the bottom in the freezer.

Results:

  • The mass of the falcon tube before centrifufing it was approximately 21.1 grams.
  • Unfortunately, we were not able to locate any ciliates under the microscope.

Conclusion:

  • Our falcon tube did not look the same compared to other groups because we quickly added the water into the tube making it mix with the ludox and soil sample that was already in the falcon tube. Even though there was not a very distinct line in our tube, we were still able to locate some organic material after it was centrifuged.
January 26

01/25/18 Lab 3- Ludox Centrifugation

Purpose: 

Begin the first stages of designing a protocol for the metabarcoding of soil ciliates to explore the ciliate biodiversity

Procedure:

  1. Add 8 mL Ludox HS 40 to a 15 mL conical tube.
  2. Quickly add (inject) 2 mL of liquid from the soil samples in the jars into the Ludox using a p1000.
  3. Carefully add (layer) 2 mL of distilled water to the top of the Ludox mixture, not mixing it together.
  4. Centrifuge in a swinging bucket rotor for 15 minutes at 4300 g.
  5. Carefully remove the tube and use a pipette to remove the cell layer.
  6. Transfer to a clean microfuge tube.
  7. Transfer 3-10 microliter drops to a concavity slide and count the cells using 100 magnification.
  8. Centrifuge the microfuge tubes for 1 minute.
  9. Pipette the liquid out of the microfuge tube, carefully not touching the pellet.
  10. Freeze the pellet in order to preserve the sample.

Data Collection:

  • our sample, before extraction,with the Ludox and distilled water weighed 21.4 grams
  • Above is our sample before centrifugation.
  • Sorry I don’t know how to turn the photo, but above is our sample after centrifugation.
  • Our sample did not have a distinct layer of organisms, so we had to pipette a larger amount of the sample to observe.
  • We ended up extracting about 3 mL of the sample.
  • Our sample had a good amount of debris
  • We looked at 3 different drops of the sample and found about 3 or 4 ciliates

Conclusion:

The lab was successful, which is great because it means that our protocol is adequate as of right now. It was a little challenging trying to identify whether some of the organisms were ciliates, protists, or debris. But with help from my TAs, I was able to distinguish each of the organisms. The net step of the protocol is to completely isolate the ciliates and denaturation.

January 26

1/25/18

What organisms make up healthy soil?

DNA Barcoding – one single species

Meta Barcoding – all species in a category

PCR was inspired by thermophile bacteria


Process:

One Cell found after the first round of centrifugation: