April 20

Lab 14: Poster Design

Print Friendly, PDF & Email

Purpose: To agree on a design for the poster that will be presented at the Biology Symposium, create and complete a layout for the poster

Conclusion/Results:

It wasn’t terribly difficult to agree on a design because there were only a few that weren’t distracting to the reader and were appealing to the eye. We had to agree on which group member was doing what. It took a while to determine what actually needed to be included on the poster and in what format. We ended up putting a bulleted introduction, a flowchart showing our methods throughout the whole semester, methods and materials for the Chelex protocol, results (including the images of our gels), and a conclusion/discussion section. The next step will be to modify our poster design based on the feedback we receive.

April 13

Lab 13: Gel Analysis

Print Friendly, PDF & Email

Purpose: To run our gel through the UV light machine to potentially find DNA

Procedure:

  1. Place the gel holder into the gel electrophoresis chamber. Add 10 ul of ladder (G bioscience 100pb DNA Mark) in the first well. In the next 6 wells, micropipette 5 ul of the negative control, 5 ul of the positive control, and 5 ul of the eDNA and repeat for the second group.
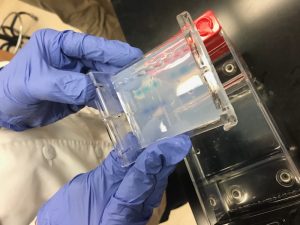
  2. Once the PCR solutions are inserted into the gel, place the top on the chamber and connect the red and black wires accordingly. Turn on the box and set it at 100V for 30 minutes.
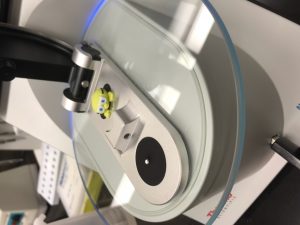
  3. Carefully remove the gel from the chamber and place on a plate to be put into the UV light machine. The BioRad Gel Doc EZ System was used to scan the DNA in our gels

Results/Conclusion:

Due to our concentration of DNA, it was not necessary to dilute our sample by any means. Many groups had a problem with the dispersal of ethidium bromide throughout gel making it more difficult to locate the bands. Our gel turned out very successful. There is a band located next to the V4 region (about 400-500bp) in our DNA and positive control, which is what we wanted. In our negative control, however, there seemed to have been an excess of primer added to the sample, which explains bright band located towards the bottom of the gel. Our soil sample was collected at 31.3157N 96.5144W.


April 6

Lab 12: Figures and Results

Print Friendly, PDF & Email

Purpose: To perform the Chelex protocol as it had the best results from the last round of DNA extraction and obtain results

Procedure:

Control Organisms

  1. Transfer 400 ul of dense ciliate culture to a microcentrifuge tube.
  2. Centrifuge @6000xg for 5 minutes, discard supernatant

Environmental DNA

  1. Isolate cells from the soil liquid by removing 1.5ml of liquid from the non-flooded plate. Spin at 6000xg for 5 minutes and remove the supernatant. Repeat this procedure until 3ml of soil slurry has been used and is in a pellet. Avoid pipetting the soil when removing the supernatant.
  2. Make the Chelex solution. Weigh 0.5g Chelex and transfer to a 15ml conical tube. Add 10 ml DI water. This can be made ahead of time as this is a stable solution.
  3. Add 200ul 5% Chelex to the cell pellet, and vortex for 1 minute. For this step, use large0bore micropipette tips.
  4. Add 15ul of proteinase K. (Proteinase K, produced by the fungus Tritirachium album Limber, is a serine protease that exhibits a a very broad cleavage specificity. It cleaves peptide bonds adjacent to the carboxylic group of aliphatic and aromatic amino acids and is useful for general digestion of protein in biological samples.)
  5. Incubae for 30 minutes in 56C water bath or heat block: This will break open the cells and denature some proteins.
  6. Boil for 8 minutes in 100C water bath or heat block. This will destroy most enzymes, but not DNA
  7. Vortex for 1 minute
  8. Centrifuge @ 16000xg for 3 minutes to pellet cellular debris and Chelex beads
  9. Transfer 100 ul of supernatant to a clean microcentrifuge tube, being careful not to transfer Chelex beads. The chelex will interfere with PCR.
  10. Label tube. (CLK-22:2)

V4 PCR Protocol

  1. Use the nanodrop to determine the concentration of the DNA in your sample. Observe the absorption ratios and record 260/280 and 230/280 in order to determine how much of the absorbance may be due to contaminants
  2. Set up the PCR reaction using the pre-aliquoted Master Mix tubes.
  3. To 3 separate small centrifuge tubes (these will be the negative and positive control, and eDNA sample), add 12.5 ul of 2X Master mix.
  4. To the negative control, add 1.25ul of 10uM stock V4 primers and 11.25 ul of water to make a total of 25 ul reaction volume
  5. To the positive control, add 1 ul of DNA template (49.4 ng/ul) from Paramecium, 1.25 ul of 10uM stock V4 primers, and 10.25 ul of water to make a total of 25 ul of reaction volume.
  6. To the environmental DNA sample (eDNA), add 1 ul of the DNA sample run through the nanodrop (this may need to be diluted, ours was not), 1.25 ul of 10 uM stock V4 primers, and 10.25 ul of water to make a total of 25 ul reaction volume.

Making the Gel

  1. Make 1xTAE in 1L Erlenmeyer flask. Add 10mL of 10xTAE and 90mL of D.I. water
  2. To make a 1.8% agarose gel, add 35mL of the 1xTAE to 0.63g of agarose in small Erlenmeyer flask
  3. Cover flask lightly with weighing paper and loose-fitting cap
  4. Heat until solution is clear and small bubbles come off the bottom when gently swirled
  5. Allow to cool until the flask is comfortable to hold (5-6 minutes)
  6. Add 2ul of ethidium bromide, swirl gently
  7. Set up gel electrophoresis box, making sure the ends are sealed. Pour agarose gel smoothly into prepared mold, with as few bubbles as possible.
  8. Insert the comb with its back towards the nearest edge. Allow to solidify for at least 25-30 minutes. Cover gel with 1xTAE stock so that it will not dry out. Carefully remove comb and store in the refrigerator.

Thermocycling

  1. Place the tube in a Thermocycler set to these conditions:
    1. (95C for 5 minutes) x1
    2. (94C for 30 sec, 57C for 45 sec, and 72C for 60 sec) x10
    3. (94C for 30 sec, 48C for 45 sec, 72C for 60 sec) x25
    4. 72C for 2 minutes

Results/Conclusion:

My group each individually made their own Chelex tubes to extract DNA from the soil in order to obtain a sufficient amount of DNA for the rest of the experiment. After the DNA extraction, we combined our DNA samples into one tube and extracted DNA a sample from that solution. Afterwards, we ran a 100 ul sample of this solution through the nanodrop and our concentration was 58.3 ng/ul, which is a good concentration because it means we didn’t have to dilute our solution. The A260/A280 ratio= 0.82 and A260/A230 ratio= 0.19. We would expect to obtain ratios closer to 2, however this has been an ongoing issue we’ve been having in the Chelex protocol. Next week we will see how our PCR reaction turned out.

April 2

Lab 11: Gel Analysis of PCR 2 (COX1 and V4)

Print Friendly, PDF & Email

Purpose: To run our controls and experimental DNA through the gel (gel electrophoresis) and analyze the success of COX1 and V4 primers using PowerSoil and Chelex.

Procedure:

  1. Remove rubber stoppers from gel mold and carefully put gel in gel electrophoresis chamber. Be sure the wells are closest to the black (negative) side of the chamber as DNA will run towards the positive end.
  2. Using the pre-made 10X TAE buffer solution, cover and fill the gel chamber until gel is fully covered.
  3. Add 5 ul of loading buffer to the positive/negative control samples as well as the experimental sample for both V4 and COX1.
  4. In the first well, carefully micropipette 5 ul of ladder. Add 10 ul of each PCR sample into individual wells (there should be 7 wells total).
  5. Put the lid on top of the gel chamber. Plug in the positive wire to the red side of the chamber and the negative to the black side of the chamber.
  6. Turn on the electrophoresis machine and set it at 95 volts for 30 minutes. Turn off the machine and carefully remove the gel wearing gloves.
  7. Slide gel off holder into UV light machine in order to take a picture of the DNA in the samples. We used a BioRad Gel Doc EZ System. Compare the results of the V4 and COX1 primers in the experimental DNA sample.

Results

There ended up being a good amount of visible DNA under the UV light for the COX1 primers for the groups who used the PowerSoil protocol. The Chelex protocol ended up giving good V4 product to be sequenced. For my group, we followed the PowerSoil MOBIO protocol and our results contained DNA, however there were signs of nonspecific binding. The bar where the V4 primer should have been was not visible indicating the primer did not bind very well with our DNA. However, the bar where the COX1 primer should have been was visible, but was located further away from the expected position. The COX1 primer binds to a larger region of the DNA and therefore, the bar should have been located closer towards the well because the DNA would be heavier than what the V4 primer would have binded to.


March 23

Lab 10: PowerSoil V4 and COX1 PCR

Print Friendly, PDF & Email

Purpose: To make a positive/negative control and DNA sample using V4 primers and COX1 primers

Materials

  • TAE stock
  • D.I. water
  • Gel chamber
  • Microwave
  • COX1 primer
  • V4 primer
  • Environmental DNA sample
  • Paramecium control sample
  • Ethidium bromide

Procedure:

A. Primer solutions

  1. Make 25ul reaction volume with PCR COX1 primers. In 6 separate centrifuge tubes, add 12.5 ul of 2X Master mix. To the negative control, add 11.88ul of H2O. To the positive control add 1 ul of the Paramecium control sample and 10.88ul of H2O. To the eDNA tube, add 1ul of the eDNA soil sample and 10.88ul of H2O.
  2. To 3 tubes, add 0.63ul of COX1 primers and to the other 3 tubes, add 0.63ul of V4 primers. Each tube should be a 20uM stock.

B. Gel Electrophoresis

  1. Make 1xTAE in 1L Erlenmeyer flask. Add 10mL of 10xTAE and 90mL of D.I. water
  2. To make a 1.8% agarose gel, add 35mL of the 1xTAE to 0.63g of agarose in small Erlenmeyer flask
  3. Cover flask lightly with weighing paper and loose-fitting cap
  4. Heat until solution is clear and small bubbles come off the bottom when gently swirled
  5. Allow to cool until the flask is comfortable to hold (5-6 minutes)
  6. Add 2ul of ethidium bromide, swirl gently
  7. Set up gel electrophoresis box, making sure the ends are sealed. Pour agarose gel smoothly into prepared mold, with as few bubbles as possible.
  8. Insert the comb with its back towards the nearest edge. Allow to solidify for at least 25-30 minutes. Cover gel with 1xTAE stock so that it will not dry out. Carefully remove comb and store in the refrigerator.

Results:

Making the solutions for the PCR reactions and setting up our gel electrophoresis chamber went smoothly. Next week we will be adding our PCR solutions to the gel in order to perform gel electrophoresis. We are hoping this time there will be DNA present in our gels. There was significantly more pure DNA present in the groups that used the PowerSoil protocol rather than the Chelex protocol, but both produced sufficient DNA to proceed with our protocol.


March 16

Lab 9: Troubleshooting Methods for DNA extraction/PCR

Print Friendly, PDF & Email

Purpose: To begin the protocols for MOBIO and Chelex for extracting DNA and to make the control for the MOBIO protocol

Materials:

  • D.I. water
  • paramecium
  • soil sample
  • PowerBead Tubes
  • Solution C1, C2, C3, C4, C5, C6

Procedure:

  1. To the PowerBead Tubes provided, add 0.25 g of soil sample (For the control, add 500 ul of the Paramecium culture and continue with the same protocol)
  2. Gently vortex to mix
  3. Check Solution C1. If Solution C1 is precipitated, heat solution to 60C until the precipitate has dissolved before use
  4. Add 60 ul of Solution C1 and invert several times or vortex briefly
  5. Secure PowerBead Tubes horizontally using the MO BIO Vortex Adapter tube holder for the vortex. Vortex at maximum speed for 10 minutes
  6. Make sure the PowerBead Tubes rotate freely in your centrifuge without rubbing. Centrifuge tubes at 10,000 x g for 30 seconds at room temperature.
  7. Transfer the supernatant to a clean 2 ml Collection Tube
  8. Add 250 ul of Solution C2 and vortex for 5 seconds. Incubate at 4C for 5 minutes
  9. Centrifuge the tubes at room temperature for 1 minute at 10,000 x g
  10. Avoiding the pellet, transfer up to 600 ul of supernatant to a clean 2 ml Collection Tube
  11. Add 200 ul of Solution C3 and vortex briefly. Incubate at 4C for 5 minutes
  12. Centrifuge the tubes at room temperature for 1 minute at 10,000 x g
  13. Transfer up to 750 ul of supernatant to a clean 2 ml Collection Tube
  14. Shake to mix Solution C4 before use. Add 1.2 ml of Solution C4 to the supernatant and vortex for 5 seconds
  15. Load approximately 675 ul onto a Spin Filter and centrifuge at 10,000 x g for 1 minute at room temperature. Discard the filtrate and add an additional 675 ul of supernatant to the Spin Filter and centrifuge at 10,000 x g for 1 minute at room temperature. Load the remaining supernatant onto the Spin Filter and centrifuge at 10,000 x g for 1 minute at room temperature
  16. Add 500 ul of Solution C5 and centrifuge at room temperature for 30 seconds at 10,000 x g
  17. Discard the flow through from the 2 ml Collection Tube
  18. Centrifuge at room temperature for 1 minute at 10,000 x g
  19. Carefully place Spin Filter in a clean 2 ml Collection Tube. Avoid splashing any Solution C5 onto the Spin Filter
  20. Add 100 ul of Solution C6 to the center of the white filter membrane
  21. Centrifuge at room temperature for 30 seconds at 10,000 x g
  22. Discard the Spin Filter. The DNA in the tube is now ready for any downstream application.

Results

The protocols went smoothly. We are trying to find alternate ways of extracting DNA from ciliates since the last protocol turned out to have negative results. The next step in this protocol is extracting DNA with PCR. Each Chelex group made a control sample but only one control sample was made for the MO BIO.

March 2

Lab 8: Introduction, Methods, and Results

Print Friendly, PDF & Email

Purpose: To write a rough draft of the introduction to our protocol article and to review the methods for running an electrophoresis gel

Materials:

  • Ladder solution
  • Gel electrophoresis chamber
  • PCR product
  • Positive/negative control
  • UV imager
  • TAE
  • D.I. water
  • Power supply
  • DNA loading buffer (dye)
  • Centrifuge tubes
  • Micropipette

Procedure:

  1. Add 30 mL of 10X TAE to 270 mL DI water in order to make the buffer
  2. Take the gel created last week and place it in between the positive and negative yield in the gel electrophoresis chamber. Pour buffer over the gel and into the chamber.
  3. Add 5 ul of ladder into a well using a micropipette. This will be the comparison sample for the controls and the experiment sample.
  4. The PCR products will be the positive and negative control as well as the experiment sample. These should be in 3 separate centrifuge tubes to which 5 ul of dye will be added.
  5. Take 10 ul of each PCR product and insert into 3 separate wells in the gel using a micropipette.
  6. Place the lid on the chamber with the positive and negative electrical wires connected. Set power supply to 110 volts for 30 minutes.
  7. Carefully remove the gel from the chamber and place on a UV imager to observe DNA strands.

Conclusion/Results:

Unfortunately, there were not any PCR products visible in our gels, even for the positive control, therefore we obtained negative results. When we meet next, we will need to decide what went wrong in our protocol and what needs to be adjusted. Perhaps this means discovering other ways of amplifying ciliate DNA and thus researching their diversity in soil. Research on obtaining a good DNA sample from ciliates and methods of sequencing this obtained DNA needs to be researched more thoroughly.


February 23

Lab 7: PCR Amplification and Ludox Extracted DNA

Print Friendly, PDF & Email

Purpose: To learn how to quantify DNA using the “nanodrop”, how to set up and run a PCR reaction, and how to make an agarose gel

Materials:

  • agarose
  • gel electrophoresis tub
  • TAE
  • microwave
  • cool bath
  • bromophenol blue
  • flask
  • bleach
  • Nanodrop

PCR workspace set up

  • Clean your desk with 10% bleach.
  • Wear gloves.
  • Clean/wipe down your pipettes before use.
  • Use autoclaved tubes and filter tips.
  • Keep all pipette tip boxes closed when not in use.
  • Keep all tubes closed when not in use.
  • Minimize the movement/ air flow around your desk.

PCR Reaction Set Up

Perform PCR assay in a total of 25 µL:

1. Add 12.5 µL  2X Master Mix to a flask. Add 0.6 grams of agarose to the solution and dissolve the substance at 45C for annealing.

2. Add 0.6 grams of agarose to the solution and dissolve the substance at 45C for annealing. (the mixture needs to be 1.5% agarose)

3. Allow the solution to cool before inserting 5ul of bromphenol blue in the agarose solution

4. Pour the agarose solution into the electrophoresis tub and allow it to sit still in order to solidify. The next step will be to insert the DNA into the gel.

Conclusion

The lab went smoothly however, I am still a little worried about the amount of DNA that will be present in our sample due to the mishap in the previous lab. After the DNA is placed in the gel, it will move towards the positive side of the tub since DNA is negatively charged. The strands will have to be observed under a UV light, this was the point in adding the bromothenol blue so the DNA will be clearly visible.


February 16

Lab 6: DNA Extraction

Print Friendly, PDF & Email

Purpose: To extract DNA from our ciliates by Ludox extraction

Materials:

  • Tabletop microcentrifuge capable of 13,000 x g
  • Nuclease-free 1.5 mL microcentrifuge tubes
  • Heat block capable of 70C
  • Vortexer
  • 100% ethanol
  • 100% isopropanol
  • PBS (or other wash buffer)

Before Starting

  • Set heat block to 70C
  • Prepare DNA wash buffer and HBC buffer
  • Heat elution buffer to 70C in heat block
  • Chill PBS to 4C (fridge temperature)

Prepare Cell Suspension

  1. Wash the cells with cold PBS. (This means add 200ul PBS, resuspend the cells using the vortex or flicking, and then spin and remove the supernatant carefully without disturbing the pellet)
  2. Resuspend cells in 200 ul of fresh PBS
  3. Add 25 ul OB Protease solution. Vortex to mix thoroughly

Lysis

  1. Add 220 ul BL Buffer. (BL Buffer has an important role in nucleic acid extraction by destabilizing molecular bonds which leads to destabilization of proteins)
  2. Incubate at 70C for 10 minutes in the heat block. Briefly vortex the tube once during incubation

Binding

  1. Add 200 ul 100% ethanol. Vortex to mix thoroughly.
  2. Insert a HiBind. DNA Mini Column into a 2 mL collection tube
  3. Transfer the entire sample from step 2 of the ‘Lysis’ to the HiBind. DNA Mini COlumn including any precipitates that may have formed
  4. Centrifuge at maximum speed (>10,000 x g) for 1 minute
  5. Discard the filtrate (liquid that went into collection tube) and reuse the collection tube. Some proteins and polysaccharides will flow through, but some will remain on the column

Wash and Dry

  1. Add 500 ul HBC Buffer to the column. This will remove the impurities from the column while leaving DNA bound to silica. (Note: HBC buffer diluted with 100% isopropanol)
  2. Centrifuge at maximum speed for 30 seconds
  3. After the HBC Buffer wash, discard the filtrate and collection tube
  4. Insert the HiBind DNA Mini Column into a new 2 mL collection tube
  5. Add 700 ul DNA wash buffer (Note: DNA wash buffer is diluted with 100% ethanol; this removes salts from DNA sample)
  6. Centrifuge at maximum speed for 30 seconds
  7. Discard the filtrate and reuse the collection tube
  8. Repeat steps for a second DNA wash buffer wash step. (this removes last bit of salt impurities)
  9. Centrifuge the empty HiBind DNA Mini Column at maximum speed for 2 minutes to dry the column

Elute

  1. Transfer the HiBind DNA Mini Column into a nuclease-free 1.5 mL microcentrifuge tube
  2. Add 100 ul elution buffer heated to 70C. (for DINA extraction, 10 mM Tris at pH 8-9 is typically used which makes DNA more stable which will dissolve faster)
  3. Let sit at room temperature for 2 minutes
  4. Centrifuge at maximum speed for 1 minute. DNA is now in the liquid flow through and column may be discarded
  5. Store eluted DNA at -20C.

Results/Conclusion:

Our protocol ended up going very smoothly. When we finished the first cell suspension step, we found that our solution ended up being fairly pure with only a little soil and a little clay found in our solution. We encountered a problem in the last step of our protocol. The DNA was, unforunately, accidentally thrown out into the trashcan instead of being kept in the tube. Instead of repeating our Ludox centrifugation and DNA extraction protocol, we repeated the last step with the hopes that there was still some DNA left on top of the filter in the HiBind DNA Mini Column. Next lab, we are hoping even though it may not be as much, there is DNA in the solution we collected.


February 9

Lab 5: DNA Extraction and PCR Part 2

Print Friendly, PDF & Email

Purpose:

  • To create our control for the Ludox protocol and adjust protocol for clarity purposes

Materials:

  • Ludox tube
  • Fresh top soil
  • Distilled water
  • Plastic vials
  • Serological pipette
  • Glass tube
  • Vortex centrifuge
  • Glutaraldehyde
  • P1000 micropipette
  • Colored water
  • Bulb pipette
  • Swinging bucket rotor
  • Compound microscope

Procedure:

  1. Collect 5 g of fresh top soil (screened of debris) and add 10 mL of distilled water into plastic vial
  2. Mix soil mixture for 5-10 minutes on vortex centrifuge
  3. Allow vial to sit for 1-2 minutes so clay and sand may settle on the bottom
  4. After mixture has settled, transfer 3.68 mL of soil water to clean glass tube and add 368 ul of 25% glutaraldehyde to the soil mixture by using a serological pipette and P1000 micropipette
  5. Vortex this new mixture on the vortex centrifuge for about 1 minute. Note: glutaraldehyde is added to prevent disintegration of the cells in the Ludox
  6. Add 16 mL of Ludox to a 50 mL conical tube.
  7. Inject 4 mL of the fixed sample into the Ludox tube by placing the P1000 about 2 mL below the surface of the Ludox solution. Note: Be sure to inject carefully to avoid disturbing the solution components
  8. Carefully layer 2 mL of colored water on top of Ludox layer by using a bulb pipette
  9. Centrifuge the conical tube at 4300xg for 15 minutes in a swinging bucket rotor
  10. Remove the liquid from the organic matter layer below the water:Ludox interface
  11. Remove a total of 4 mL from this layer and transfer to two labeled 2 mL microfuge tubes by using a P1000 micropipette.
  12. Centrifuge the 2 mL tubes at 3000xg for 5 minutes to completely pellet the cells in order to concentrate cells into a pellet without much damage
  13. Remove the supernatant with a P1000 without disturbing the pellet and dispose of the liquid in a waste container. Note: Be careful not to accidentally extract the pellet when removing the liquid from the tube
  14. Add 100 ul of PBS (a buffer) to each pellet and resuspend the pellet by flicking and pipetting up and down.
  15. Combine the cell suspension pellets together into 1 tube for a total of 200 ul.
  16. Place five 2 ul drops on a slide and count the cells using the 40X lens on the compound microscope. Record cells/ul then obtain a class average. Note: If cells are not visible, stain mixture with iodine

Results/Conclusion:

After counting the cells, we hoped to obtain a 100% efficiency, which we will calculate in the next lab. There were some difficulties in measuring out the filtered soil due to the large size of the screen relative to the tube it was going in. After centrifuging, our Ludox tube had a very distinct layer of organic matter, which is good. Extracting the liquid surrounding the pellet was also a difficult task as it was very small. For future, use a smaller tip on the micropipette.