4/6/2018

During this lab we conducted a modified version of Chelex DNA extraction, prepared agarose gel for gel electrophoresis, and began PCR reactions with our newly extracted environmental DNA, a positive control with DNA taken from a paramecium culture, and a negative control with the DNA replaced with D.I. water.
Procedure:
Chelex DNA Extraction
(Each member of the group performs all steps with their own sample.)
- Extract ciliates from a non flooded plate by taking a 1.5 ml sample.
- Centrifuging it at 6000xg for 5 minutes.
- Remove the supernatant.
- Add 1.5 ml more to the sample and repeat steps 2 and 3.
- Add 200 µL 5% Chelex to the sample (it is necessary to cut the end of of the pipette tip in order to extract Chelex).
- Vortex for 1 minute.
- Add 15 µl of proteinase K.
- Incubate for 30 minutes in a 56°C water bath or heat block.
- Boil for 8 minutes in 100°C heat block.
- Vortex for 1 minute.
- centrifuge at 16000xg for 3 minutes.
PCR
- Each member transfer 100 µl of their supernatant to one clean microcentrifuge tube
- In 3 small tubes transfer all of the following components excluding the DNA for the environmental sample, this will be done after step 3
Negative Control Positive Control eDNA DNA template/ µL 0 1 1 2X Master mix/ µL 12.5 12.5 12.5 Stock V4 Primers (final concentration 0.5 µM)/ µL 1.25 1.25 1.25 Water/ µL 11.25 10.25 10.25 (in our experiment an error was made, and 11.25 µL of water was added to each tube)
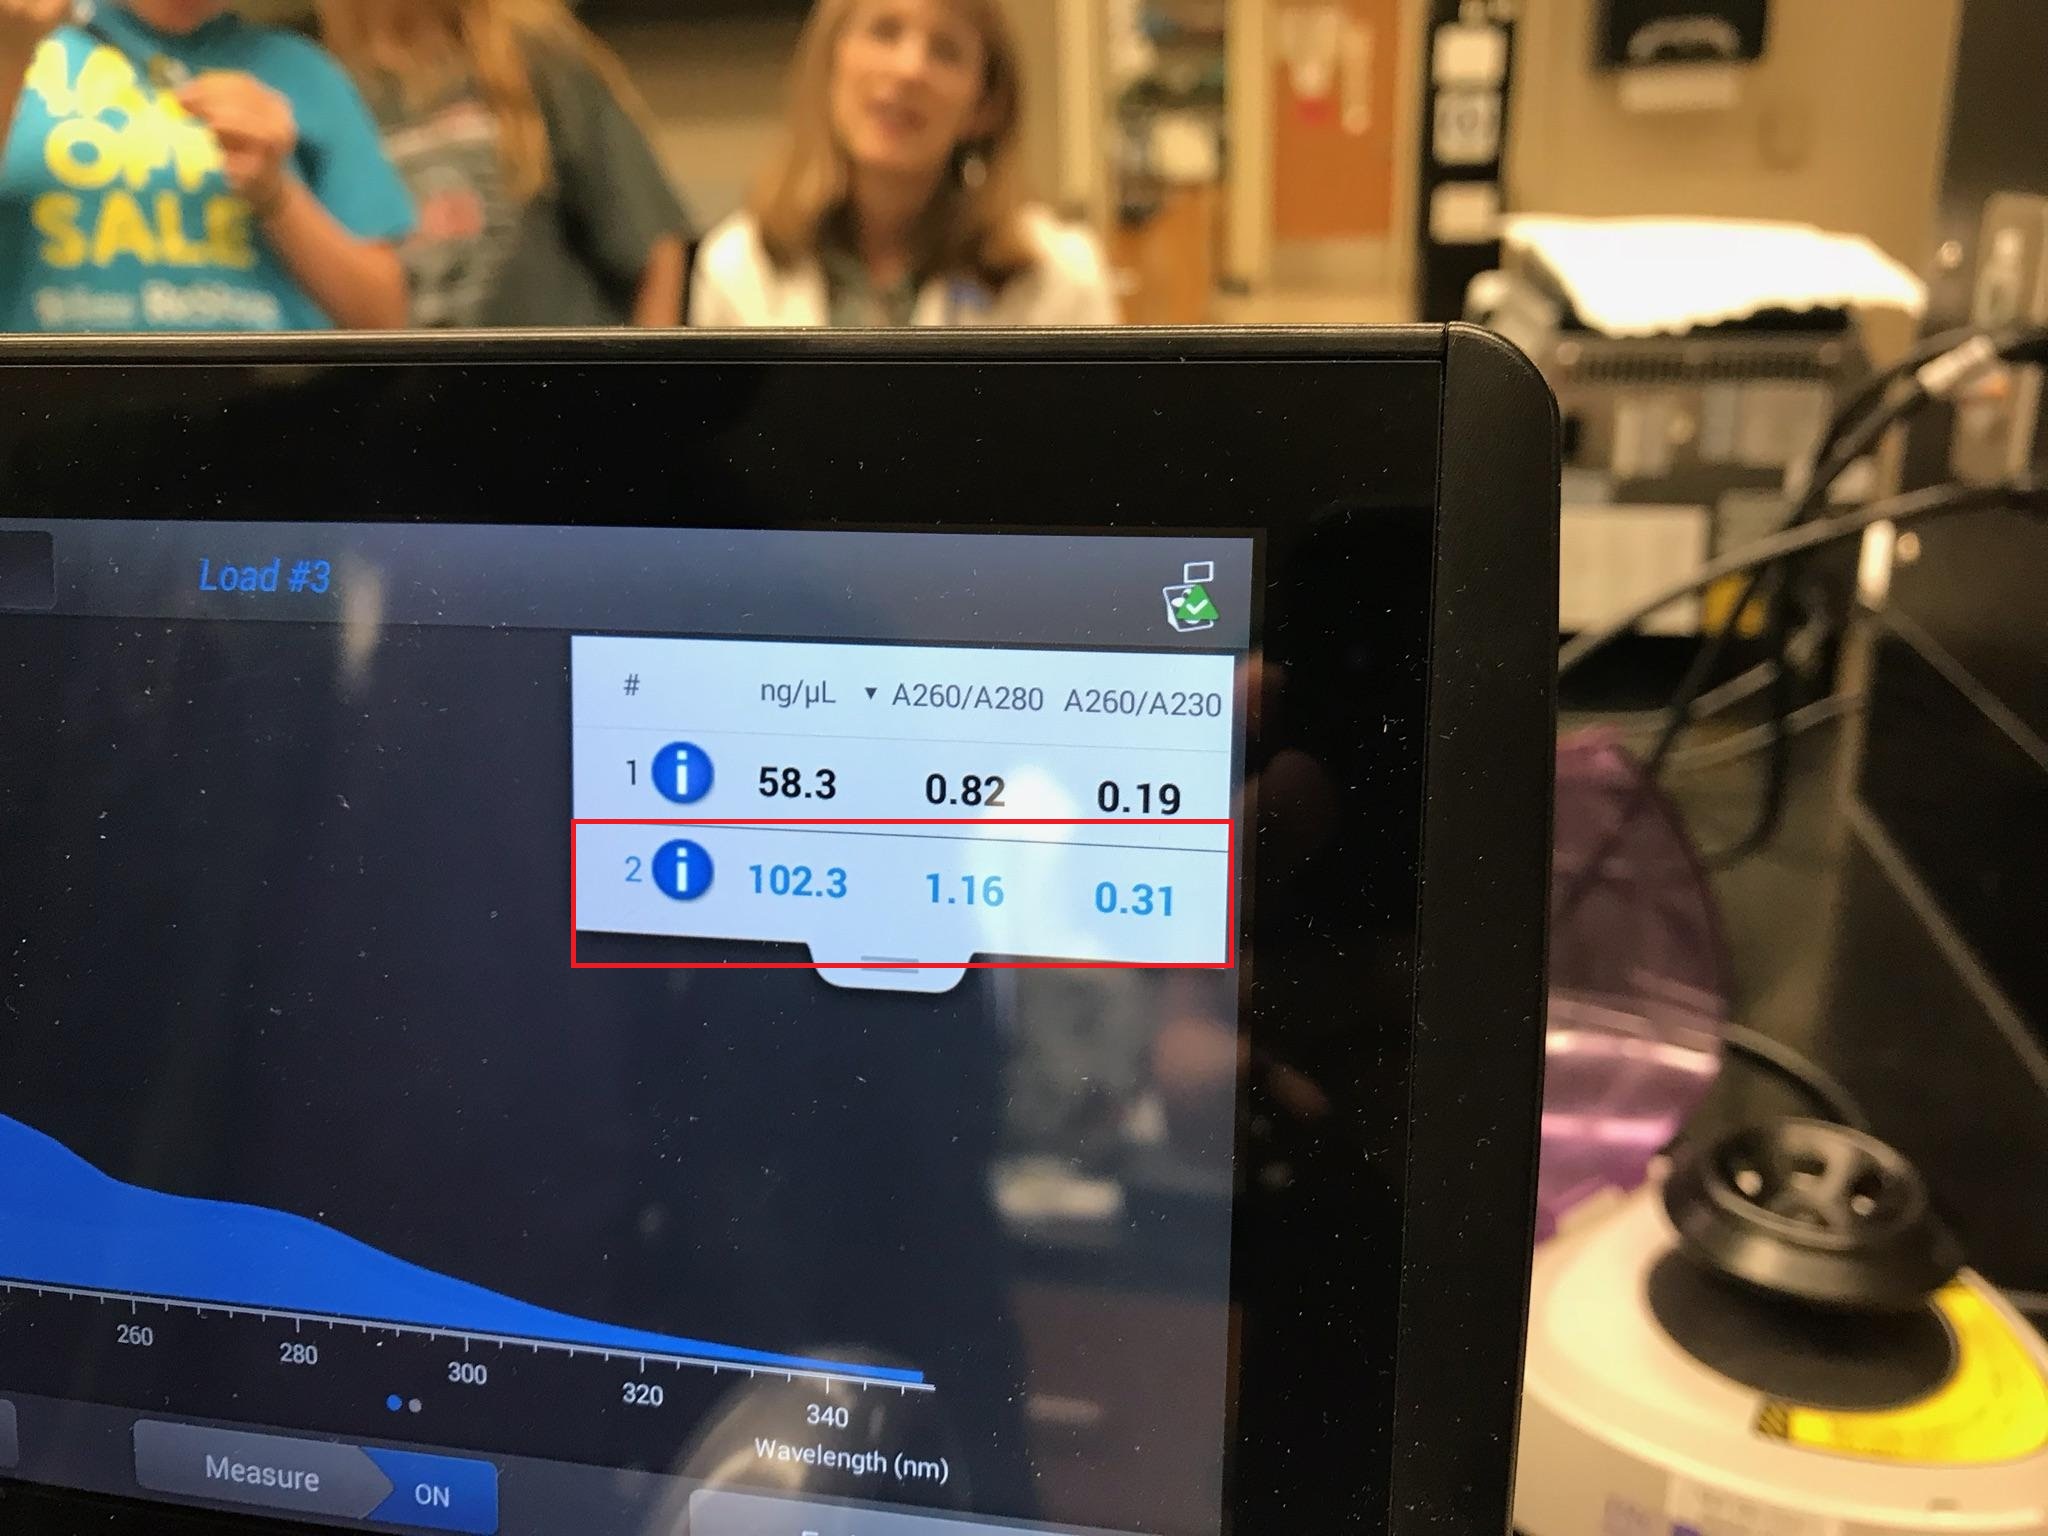
- Run a Nanodrop analysis of the environmental DNA sample.

The indicated reading was from my groups Nanodrop analysis
- Either concentrate, or dilute your DNA sample until it is approximately 50 ng/µL.
- Transfer 1µL of your environmental DNA sample into the environmental DNA tube.
- Place all three tubes in a thermocycler.
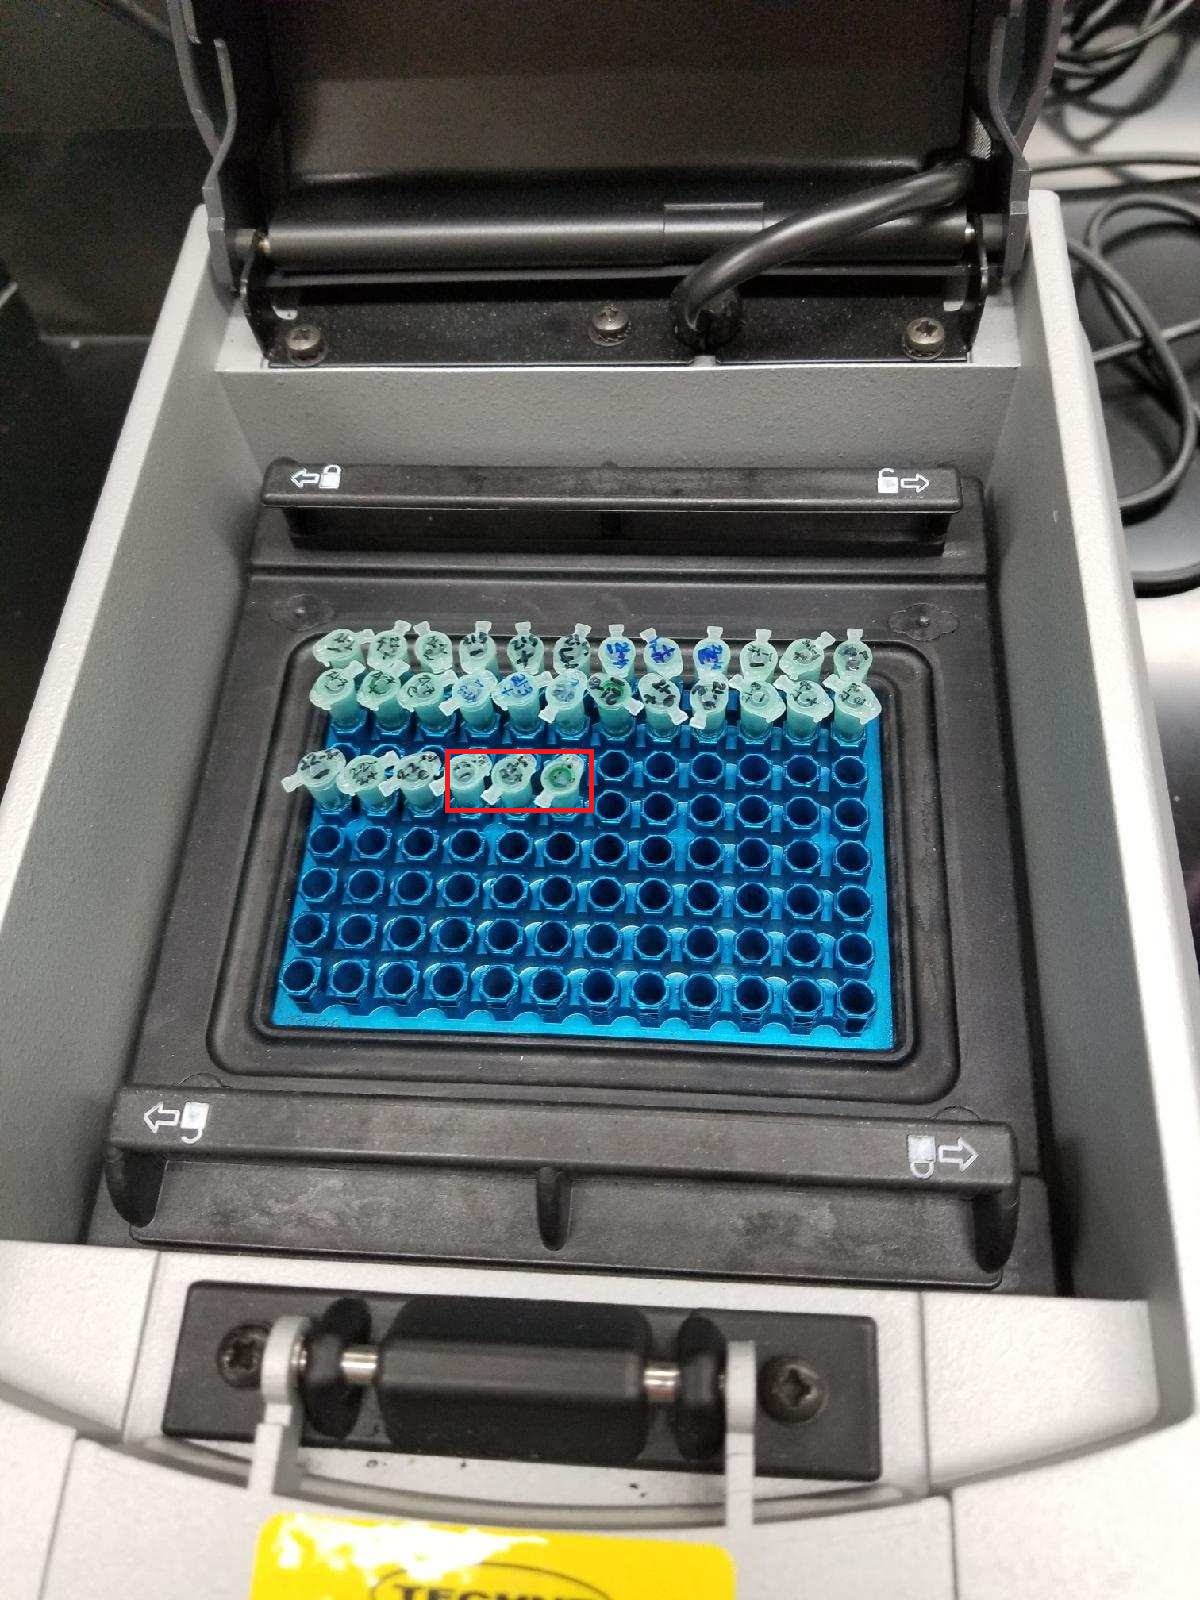
The indicated tubes are my groups samples
Agarose Gel Preparation
- Add 0.6g of agarose to an Erlenmeyer flask.
- Dilute with 40 mL of 1xTAE, in order to make a 1.8% agarose solution.
- Cover the flask with weighing paper and a loose fitting lid.
- Swirl the solution to mix
- Heat the erlenmeyer flask in a microwave for 1 minute and 20 seconds on power 7
- Cool the gel for 5 minutes in a water bath
- Add 2 uL of ethidium bromide
- Swirl the solution to mix
- Assemble gel mold
- Pour the gel into the mold, allow it to set
- Label the mold and store
Conclusion:
All this was a lot to do with our time constraints, and my group felt like we rushed it a bit. However, we were able to finish with minimal extra time. I did enjoy getting to go back and do some of the things we have done before. That way all the procedures are more firmly cemented in my mind, so that I should be able to perform them even more efficiently in the future if its required.