March
2
Lab Day 8: Gel Electrophoresis (March 1st, 2018)

Purpose/Objectives:
- This lab, students were expected to carry out the gel electrophoresis of the soil DNA sample that had been prepared since the past week.
- Students were also to test their positive and negative control using the agarose gel that was also prepared the past week.
- After this, students were asked to read one another’s drafts of their Introduction to their upcoming final papers.
Procedure:
- Prepare 300ml of 1X buffer solution using 10 TAE stock solution and water. To do so, 30ml of 10X TAE stock solution has to be mixed with 270ml of water.
- Measure 270ml of water using a measuring cylinder and transfer the water into a conical flask. Then, transfer 30ml of 10X TAE stock solution into the same conical flask using a serological pipette. Note that it requires 3 separate transfers of 10ml volume of water since the serological pipette cannot hold 30ml of water.
- Prepare 30µl of 1X loading dye using 6X loading dye and water. To do so, 5µl of 6X loading dye and 25µl should be mixed together with the help of micropipettes.
- Carefully place the agarose gel into the gel box, ensuring that the gel is placed in such a way that the wells are nearer to the negative electrode.
- Connect the wires from the gel box to the power supply, ensuring that the same colored cord is plugged into the same colored plug.
- Carefully pour the buffer solution from step 2 onto the gel, so that the buffer solution covers the gel completely.
- Practice loading a well with 5µl of loading dye from step 3. Be sure to note down which wells are used for practice.
- Using a p10 micropipette, load a well with 5µl of the DNA ladder.
- Using a p10 micropipette, transfer 10µl of soil DNA sample into a microcentrifuge tube. Micropipette 5µl of ethidium bromide into the same tube. Ensure that gloves are worn in this step.
- Repeat step 9 using the postive control and the negative control in place of soil DNA sample.
- Using a p10 micropipette, load a well with 10µl of soil DNA sample.
- Using a p10 micropipette, load a well with 10µl of the positive control solution.
- Using a p10 micropipette, load a well with 10µl of the negative control solution.
- Secure the lid on top of the gel box and switch on the power.
- Adjust the settings on the power supply to run for 30 minutes at a voltage of 110V.
- Remove the gel after 30 mins for analysis of the gel under UV light, so as to examine the bands of DNA present in the sample DNA.
Critiquing Draft of Introduction
- Exchange your introduction draft with a group member.
- Read and write suggestions that could be used to better the draft.
Data/Observations:
Well 1,2,3: Trial wells from my group members
Well 4: unloaded
Well 5: Negative control
Well 6: DNA sample
Well 7:Positive control
Well 8: DNA Ladder
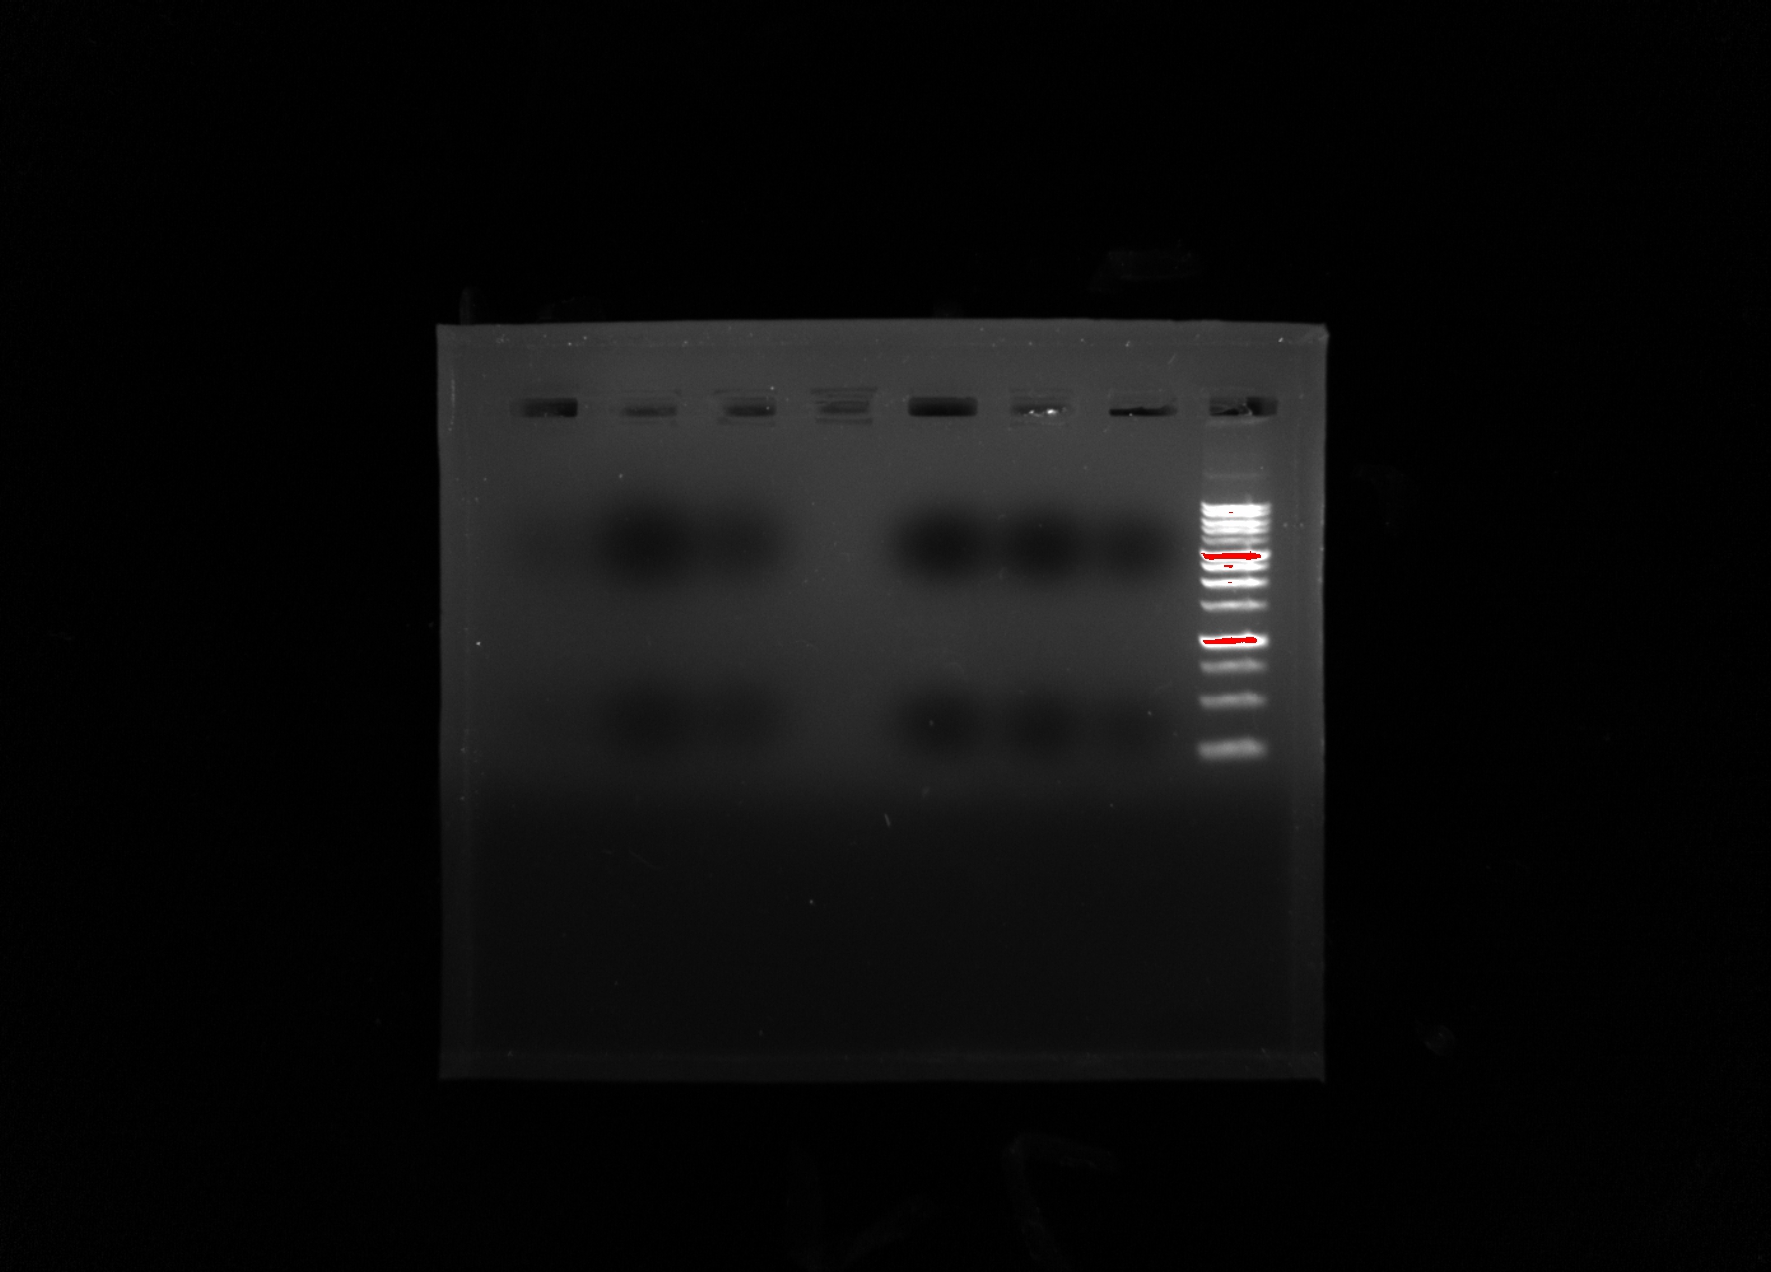
The photo above is the UV imaging of my group’s gel.
Conclusion:
- My group and I were not able to observe any bands for the DNA sample, and thus the only explanation would be an error from some point in the experiment, for example:
- Ludox Centrifugation,
- DNA extraction
- PCR.
- Whichever one of these is the cause for our this result, my group and I will meet together next lab and see where we could have gone wrong.
- Also, my group interchanged each other’s introductions and we each wrote suggestions down on each other’s papers.