February 23

Lab 7: PCR 2/22/18

Purpose:

The purpose of lab today to perform a PCR reaction to amplify the viable DNA from last week. We then set up to do electrophoresis next class.

Procedure:

A.) PCR Tubes

  1. begin by bleaching your work area, putting on gloves, and briefly vortexing all three of the taq mix PCR tubes and labeling them: one with a plus sign for the positive control, one with a negative sign for the negative control, and one with an S for the Soil extraction.
  2. For the positive control tube and the soil extraction tube, add 5 micro liters of DNA to the tube along with 1 microliter of Cox1 primer and 6.5 micro liters of water.
  3. To the negative control tube add 1 microliter of Cox1 primer and 11.5 micro liters of water to the tube.
  4. Place all three tubes in the class rack and make sure to record the location of your tubes so you know which ones are yours for the next lab of gel electrophoresis. Our tubes are labeled as #3 for group 3.

B.) Gel Frame for electrophoresis

  1. In a 1L Erlenmeyer flask add 40 mL of 1XTAE (tris acetate EDTA) stock solution.
  2. To the TAE add 0.6g of agarose to make a 1.5% agarose gel.
  3. Swirl the solution softly and cover the lip of the erlenmeyer flask with a thin piece of weigh paper and screw the flask lid onto the flask while the paper is over the flask.
  4. Place the flask in the microwave and heat the solution on power 7 for 1 minute and 20 seconds. Remove the flask from the microwave and swirl to mix the contents.
  5. Place the warmed flask in a cooling bath for 5-6 minutes to bring back down to a cool temperature.
  6. To the cooled flask, add 2 micro liters of ethidium bromide and swirl gently again.
  7. After having prepared your gel mold and checked the edges for cracks, pour the agarose gel solution into the mold evenly, and softly shake/tap the mold to remove any bubbles that may have gotten caught underneath the gel solution.
  8. Allow the poured gel to sit for about 30 minutes in order to set.
  9. Remove the comb from the set gel and cover the gel in 1x TAE buffer solution to prevent the gel from drying out until the next lab.
  10. Store the gel and buffer at 4 degrees celsius until its use. Clean up your work area and fill out QTM 7.

Results

Component Control Positive Tube Control Negative Tube Soil DNA Tube
2X Master Mix 12.5 μl 12.5 μl 12.5 μl
DNA template 0.0 μl 5.0 μl of [10 ng/ml] 5.0 μl
Primers 1.0 μl 1.0 μl 1.0 μl
Water 11.5 μl 6.5 μl 6.5 μl
Total volume 25.0 μl 25.0 μl 25.0 μl

We labeled our negative tube “-“, we labeled the positive tube “+” and the test tube we wrote “test” on the side. The top of the tubes had “2”. We placed our 3 tubes in A7(+) A8 (-)and A9(test).

Our gel tray is labeled 2/22/18 CC WS MS group 2.

Conclusion:
Todays lab went well and the next steps in the process will be performing electrophoresis to see the DNA band.

February 23

PCR/ Gel Electrophoresis 2/22/18

PCR/Gel Electrophoresis 2/22/2018

Materials:

  • 1xTAE
  • Erlenmeyer flask
  • Ethidium Bromide
  • PCR product
  • Loading Buffer

Procedure:

  1. Add 40 mL 1xTAE to 0.6g Agarose in small Erlenmeyer flask.
  2. Cover lightly with weighing paper and a loose-fitting cap.
  3. Heat until solution is clear and small bubbles come off the bottom when gently swirled.
  4. Allow to cool until the flask is comfortable to hold.
  5. Have your TA add 2 µL ethidium bromide, swirl gently.
  6. Set up gel electrophoresis box, making sure the open ends are sealed.
  7. Pour agarose gel smoothly into prepared mold, with as few bubbles as possible. Allow to solidify for at least 25-30 minutes.
  8. Cover gel with prepared 1xTAE buffer solution so that it will not dry out.
  9. Carefully remove the comb and turn gel so that the wells are furthest away from positive electrode.
  10. Using a micropipette, add 5 µl of the ladder and 10 µl of each PCR product + loading buffer. If the loading buffer is not included in the Taq polymerase used in the PCR, add 5µl loading buffer to the PCR product and mix thoroughly before transferring to the gel.
  11. After you have loaded your sample, place the lid on your box and turn on the power supply to approximately 100 volts. Allow to run for 30 minutes or more, allowing the loading dye to run approximately halfway across the gel before turning off the power.
  12. Image with UV light.

Data:

What did not work (Ludox and cell washing): There was not very much DNA found in any of our samples after the previous steps in this experiment.

There is no data to report since we were not able to finish this portion of the experiment.

Conclusion:

The next step would be to put our DNA into the cell wells containing the gel electrophoresis. We will also need to image with UV light. This will enable us to start the process of reading the DNA.

Storage:

Our sample is on the rack and it is labelled CKLMKC

February 23

Lab Day 7: PCR and Gel Electrophoresis (February 22nd, 2018)

Purpose/Objectives:

  • Today in lab students were expected to complete the Polymerase chain reaction (PCR) protocol using the Cox1 forward and reverse primers, as well as preparing the agragose gel for the Gel Electrophoresis Protocol for next week’s lab.

Procedure:

PCR Procedure

  • Determine the volumes of 2x Master Mix, DNA template, primers and water to add to our positive control, negative control and soil DNA tube for PCR as a class.
  • Clean the lab table with bleach and wear gloves as it is important to carry out the preparation of the tubes for PCR under an aseptic environment.
    • Also, ethidium bromide is dangerous to skin contact, so be extra careful when using the compound, and wear gloves!
  • Label the 3 tubes, each containing 12.5µl of 2x Master Mix, to differentiate the negative control tube, positive control tube, and the soil DNA tube.
    • In my group’s case: “Pos, Neg, DNA”
    • Our tubes were labeled: 7, SAM
  • Use a p10 micropipette to transfer 5µl of DNA template to the positive control tube.
  • Use a p10 micropipette to transfer 5µl of soil DNA to the soil DNA tube. Ensure that no DNA template is added to the negative control tube.
    • As stated in the tube’s name, this would ruin the entire procedure as this tube is meant to hold everything except DNA.
  • Using a p10 micropipette, transfer 1µl of Cox1 primers into all three tubes.
  • Micropipette 11.5µl of water into the negative control tube and 6.5µl of water each into the positive control tube and the soil DNA tube. Therefore, each of the 3 tubes should contain a total of 25µl of solution.

Gel Electrophoresis Protocol

  • On a piece of weighing paper on an electronic balance, weigh out 0.6g of agarose gel powder.
  • Transfer the weighed gel powder into an Erlenmeyer flask.
  • Measure out 40ml of 1xTAE using a measuring cylinder.
  • Add the measured 1xTAE to the Erlenmeyer flask containing agarose powder.
  • (GENTLY) Cap the Erlenmeyer flask and weighing paper.
    • Capping the flask loosely is imperative, as this will prevent explosion when the flask is heated in the following step.
  • Heat the flask in a microwave for 120s at power 7 so that the agarose gel powder dissolves completely in the solution.
    • Remove flask with hot pads to prevent burns.
  • Place the flask in a water bath for 5 minutes at 55 degrees Celsius.
  • In the meantime, assemble the gel plate and label the plate with the group number.
    • Room: A127, Name: SAM,Group 7, Dr: Adair 1106-22 in my group’s case.
  • Once 5 minutes is over, remove the flask from the water bath.
  • Add 2 ul ethidium bromide to the solution.
  • Place the gel comb inside the tray.
  • Carefully pour the gel into the assembled gel plate.
  • Leave the gel to cool and solidify for 25-30 minutes.
    • You will know the gel is set properly once it begins to turn foggy from its previously transparent color.
  • Give your gel plate to Will for safe keeping till the next lab.
    • ALWAYS CLEAN YOUR LAB AREA BEFORE LEAVING THE CLASS….
    • unless you WANT to lose points off your lab grade…

Data/Obeservations:

Component Volume (Negative Control) Volume (Positive Control) Volume (Soil DNA tube)
2x Master mix 12.5 µl 12.5 µl 12.5 µl
DNA Template 0 µl 5 µl 5 µl
Primers 1 µl 1 µl 1 µl
Water 11.5 µl 6.5 µl 6.5 µl
Total Volume 25 µl 25 µl 25 µl

This table details the specific measurements my group used to complete the PCR protocol.


A photo of my group’s gel plate with our identification details.

Conclusion:

  • This lab was very interesting. Aside from a good 5 minutes of Ahkan and my groupmate trying to explain to me the process of how to calculate the correct measurements, and despite the fact that only one of my groupmates was at the lab due to the other having a sickness, I feel proud that my groupmate and I were able to finish the lab and record all of our results.
  • Our favorite part was making the agarose gel because that was the part that was most exciting to us while completing the prelab and we couldn’t wait to do it ourselves today.
  • I am very eager to see if we will be able to amplify our DNA next class, although I am still concerned about the purity of our DNA sample, as well as the accuracy of its total content concentration.
  • Other than that, I enjoyed this lab, and I feel as if my groupmate and I did not commit any errors while following both protocols.
Category: Uncategorized | LEAVE A COMMENT
February 23

2-22-2018 Lab 7: PCR and Preparation of Agarose Gel

Purpose: the purpose of the lab time is to prepare a solution to undergo PCR. Additionally a positive and negative controls were created and run under PCR with the sample of soil DNA being studied. The purpose of PCr is to aid in identifying a classifying the ciliates based on their genetic barcode and if not, enough DNA is found mitochondria DNA may be used. The DNA that was extracted from the soil sample was most likely contaminated by other micro organisms` DNA and soil particles as the graph of the class data did not have a nice trough and peak as the sample that contained pure paramecium DNA. This may affect our soil DNA during PCR as all types of DNA will be replicated and not just the DNA of the ciliate.

Procedures:

  1. Make sure to wear gloves at all time in handling the buffer or any chemical used in the lab.
  2. . Obtain 3 separate tubes filled with 12.5 μl of the master mix containing the correct buffer, DNA nucleotide, and Taq polymerase.
  3. Label each tube with a symbol to tell them apart. We put a + and a star on the positive control of our study, a – and a star on the negative control on the study and a S and a star on the tube containing the soil DNA sample.
  4. To create the negative control, use a micropipette to place 1 μl of primers and 11.5 μl of water into the tube of negative control.
  5. To create the positive control micropipette 5 μl of a 10 mg/ μl concentration of the DNA template, 1 μl of primers and 6.5 of water into the tube containing the positive control.
  6. To make the soil DNA tube micropipette 5 μl of DNA template, 1 μl of primers and 6.5 μl of water into the correct tube.
  7. After all, three tubes are finished being related and correctly labeled, place them in the tube rack with the rest of the class`s tubes. Ours were placed in spots A1, A2, and A3 under group 3 with the initials LKA.
  8. PCR will start denaturization at 94 degrees C for 4 minutes
  9. Then 5 cycles of denaturalization at 94 degrees C for 30 seconds cycles by switching between denaturalization adn annealing at 45 degrees C for 1 minute and extension at 72 degrees C for 105 Seconds.
  10. 35 cycles of denaturation at 94 degrees C for 30 seconds and annealing at 55 degrees C for 1-minute and extension at 72 degrees C for 105 seconds.
  11. Hold a constant temperature of 72 degrees C for 10 minutes so that the DNA can reattach to form the regular double stranded form of DNA.


Procedures to make the Agarose gel:

  1. Make sure to wear gloves at all time in handling the buffer or any chemical used in the lab.
  2. Use a weighing paper to mass out 0.6 g of agarose gel powder.
  3. Place the 0.6 grams of powder in a small Erlenmeyer flask and place in 40 ml of 1X TAE solution
  4. Cover with a weighing paper and place the loose-fitting cap on top.
  5. Swirl gently to help dissolving.
  6. Then heat in a microwave for a few minutes until the solution begins to bubble and boil and all solutes are dissolved and solution is clear.
  7. Place the flask contain the solution in to a hot water bath to slowly cool the flask down to be handled for 5-6 minutes
  8. Add in 2 μl of ethidium bromide to the solution and swirl gently
  9. Set up the gel electrophoresis box and make sure that the open end is sealed with the rubber stoppers.
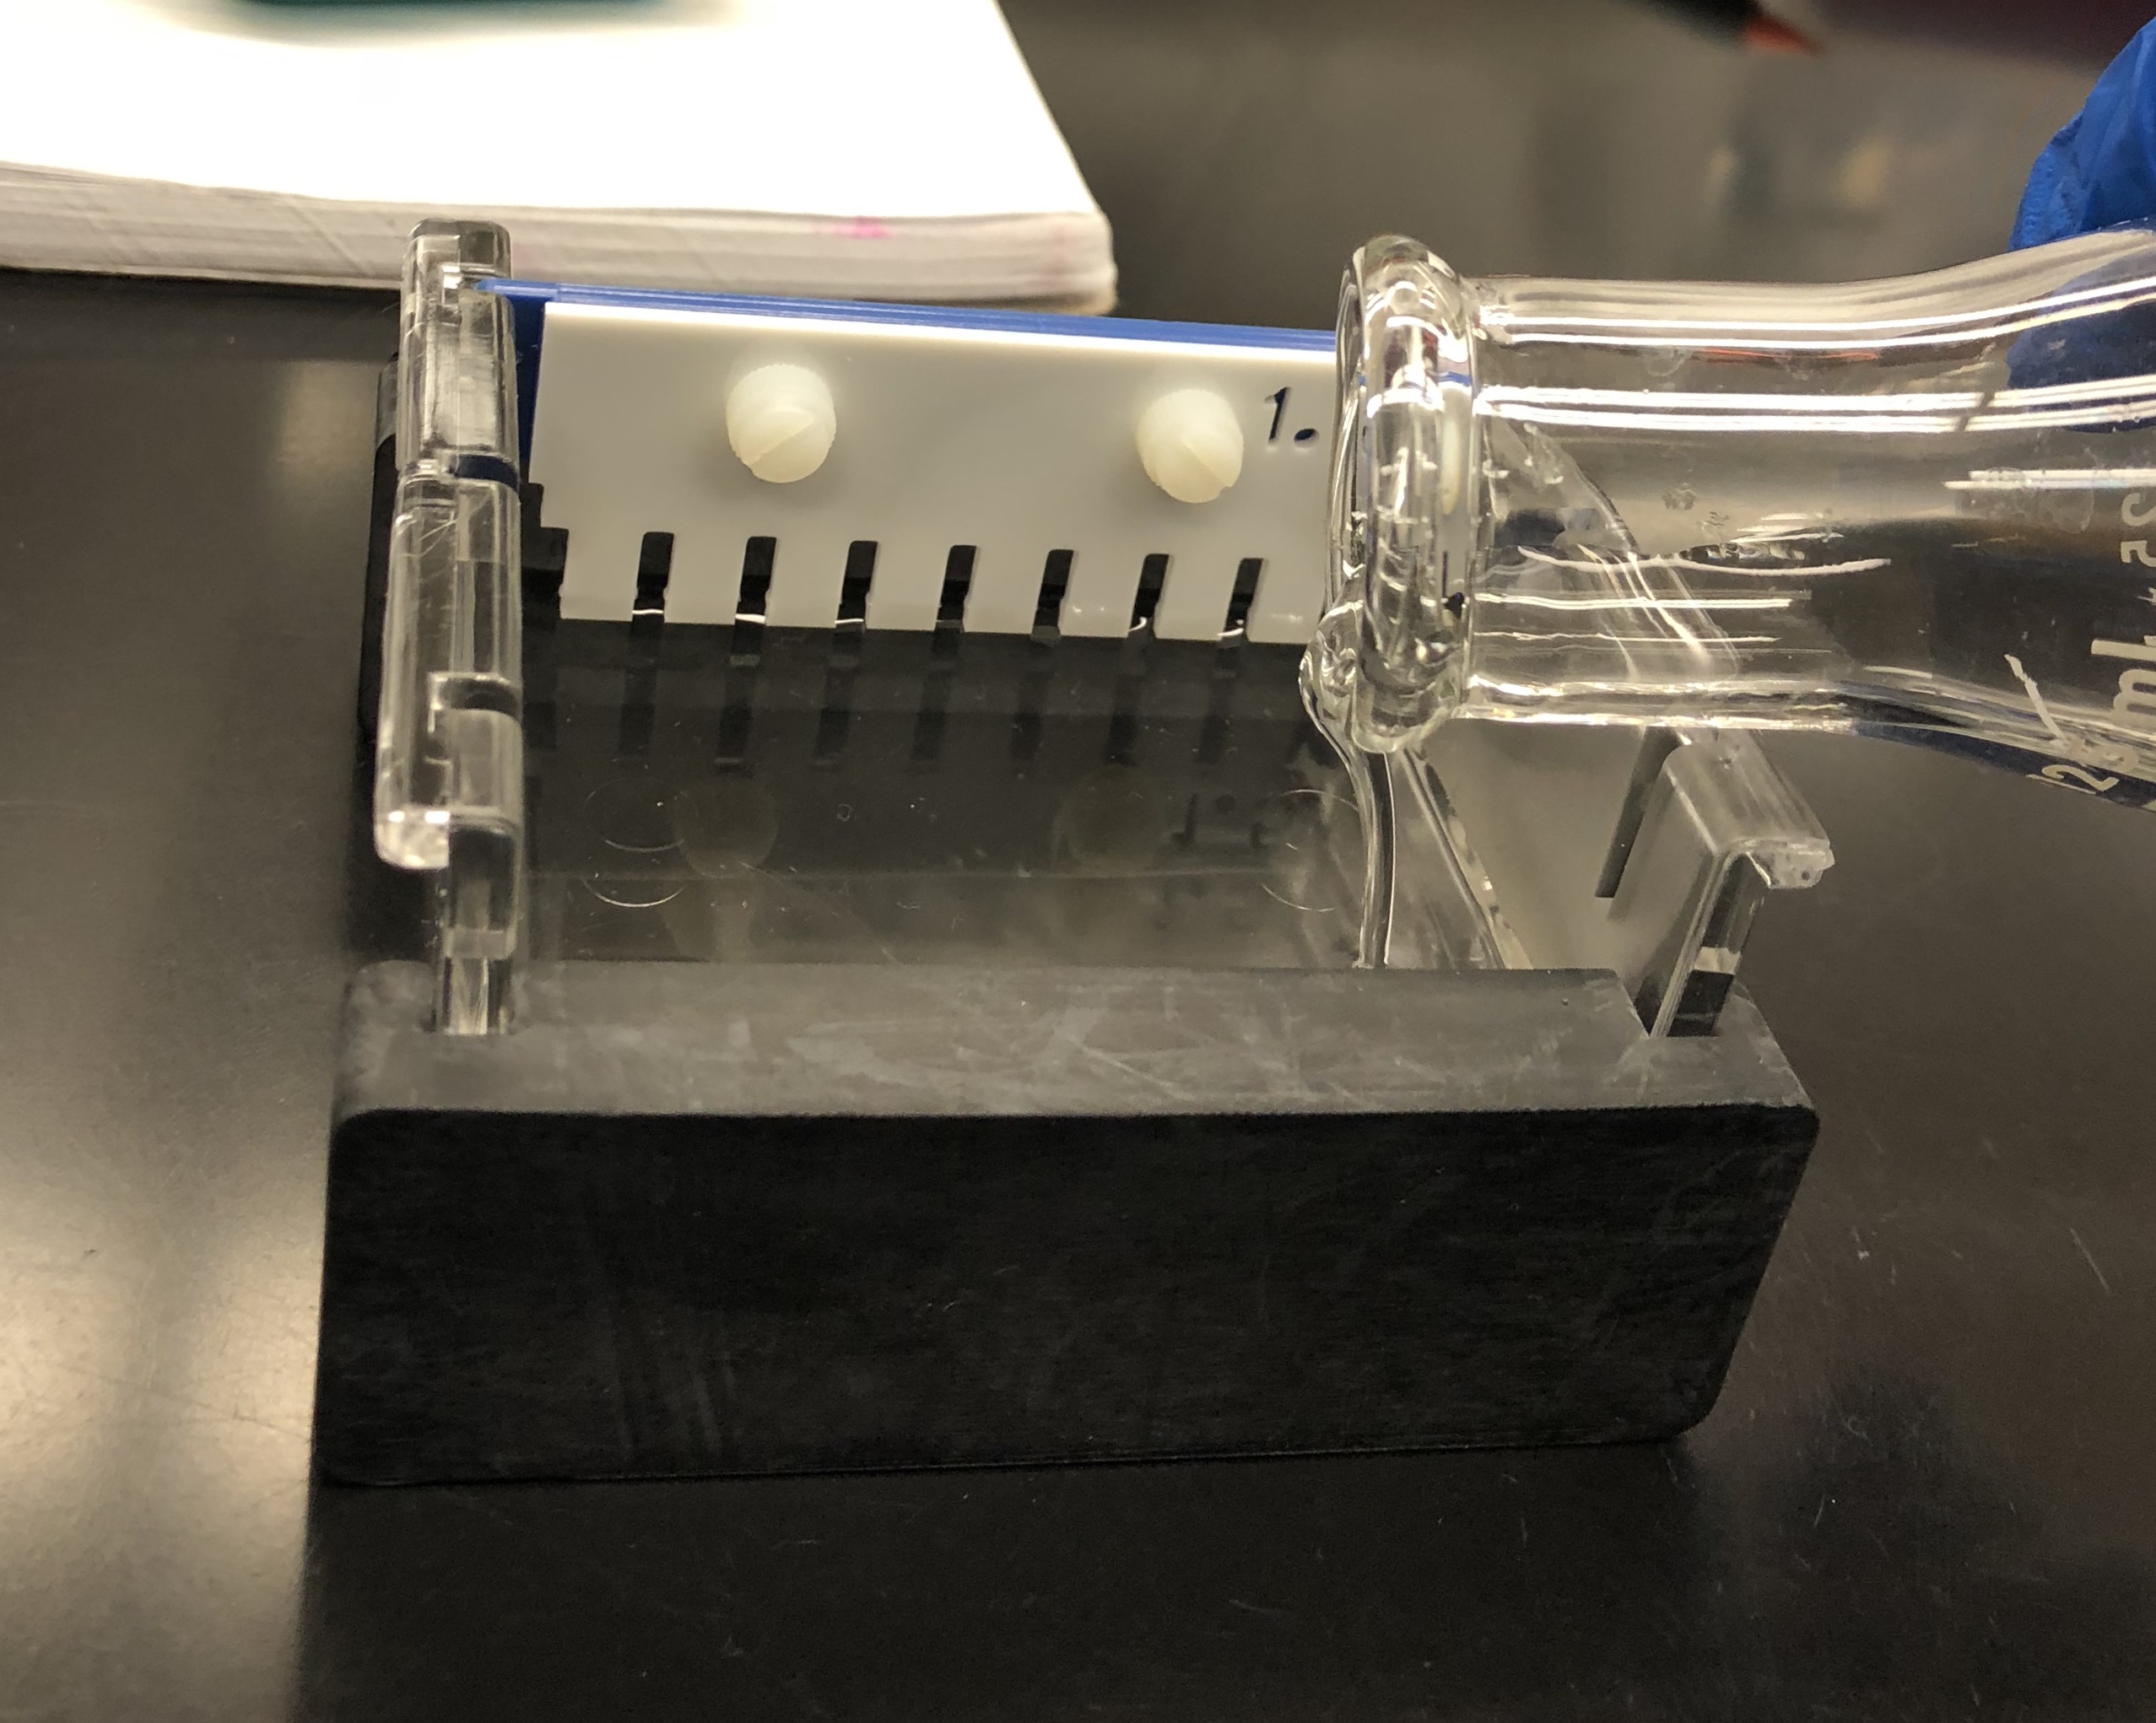
  10. Pour in the agarose solution with as few bubbles as possible and allow it to solidify for 20-30 minutes and place the comb in with tits back towards the nearest edge
  11. Cover the gel with 1x TAE buffer solution add 5 μl of loading buffer to the PCR product and mix thoroughly before transferring to the gel.
  12. Remove the comb and turn gel so that the wells are furthest away from the positive electrode.
  13. Using a micropipette add 5 μl of the ladder and 10 μl of each PCR product and loading buffer. If the loading buffer ins not included in the Taq polymerase add 5 μl of loading buffer to the PCR product and mix thoroughly before transferring to the gel.
  14.  After you have loaded the samples, place the lid on the box and turn on the power supply to 100 volts.
  15. Allow it to run for 30 minutes or more allowing the loading dye to run approximately halfway across the gel before turning the power off
  16. Image with UV light to match be genetic barcoding.


Results/Observations: 


Since there was still a lot of debris from the soil sample located in our extracted ciliates solution and the fact that our soil sample did not have a pure concentration of only one species of ciliates or microorganism in the soil DNA sample, our class date table looked like a negative linear graph instead of a more positive sloped graph that contains a trough and a peak. This may affect our ability to extract the DNA from the ciliates as the many different species of DNA will be replicated in PCR and may be hard to tell apart from each other.

The positive control tube had a + and a star, the negative control group had a – and a star and the tube containing the soil DNA had a S and a star on the lid. And each of the three tubes had the group initials on the side of LAK. This was to help identify and differentiate each sample from each other. Additionally, all three tubes were placed in the blue tube holding rack with the rest of the class three tubes in slop A4 A5 and A6 under group 3 of the initial s LKA.

Flask and lid weighed 90.g

The flask and lid and the weighted Agarose gel powder is 90.9 g

The agarose was 0.6 g

with the added solution added to the flask lid and agarose gel powder the mass was 94.2 g

all tubes containing the sample DNA, buffer, and water are left at the tables in the green rack

The agarose gel was labeled on the side in blue masking tape and a sharpie with the label LAK and was left on the group 3 tabletop counter to cool and set for 30 minutes. The flask and top was cleaned with bleach adn water and left to dry by the sink.

Component Control Positive Tube Control Negative Tube Soil DNA Tube
2X Master Mix 12.5 μl 12.5 μl 12.5 μl
DNA template 0.0 μl 5.0 μl of [10 ng/ml] 5.0 μl
Primers 1.0 μl 1.0 μl 1.0 μl
Water 11.5 μl 6.5 μl 6.5 μl
Total volume 25.0 μl 25.0 μl 25.0 μl


Conclusion: The first run through with the EXNA DNA extraction kit seemed to have gone successfully. However, our DNA sample seemed to be contaminated by other DNA from other microscopic organisms like other ciliates, or fungus. This was shown in our class data graph that was a linear graph with a negative slop instead of the ideal graph with a trough adn peal for pure DNA. Additionally, the PCR should go successfully as my group made sure that due to the very small amount of materials added to each of the positive, negative, and study tubes that we physically saw at least a small amount of the material enter the tube from the micropipette. There were several times when the micropipette got stuck adn could not pick up or let go of the material especially the 1 microliter amount of primers. My group expects the PCR to amplify any DNA that was found in each of the tubes including those that may not be ciliate


Future studies: I have found out that taking the time to correct and revise old protocols can help to fix experiment to become more accurate and uniform.  However, I have also learned that science can’t always be perfect and sometime there is a time to keep moving forward with the protocol even if it is not the most perfect or successful procedure. This is shown in our continuation onto the PCr amplification step. However, our efforts where not for nothing as some DNA was able to be extracted enough for PCr amplification. Next week, my group and I will continue with the experiment to complete gel electrophoresis to see the genetic barcodes specific to the organism`s DNA that was found in the soil and the positive and negative controls of today`s lab. We will then move on to take a picture of the Gel agarose after the gel electrophoresis to help in matching the Genetic barcode that was made with the genetic bar code database to help in identifying the ciliates that were found to be living in the soil sample that was collected.


Storage: All three tubes of the positive, negative control and the actual soil DNA tubes were stored in the blue tube rack along with the rest of the class`s positive, negative and soil DNA sample Tubes under the labels + and star, – and star, and S and star. The gel agarose was put to set on our table for 30 minutes after wards it will be stored in a freezer with the same buffer that was used to make it until my group will use it in next week’s lab.


February 23

Lab 7: CO1 PCR Part 1 (2/22/18)

Purpose:

The purpose of this lab was to begin the PCR process by preparing the agarose gel and DNA that we previously extracted for next week when we will actually begin to amplify the DNA.

Procedure:

  1. Review PCR: what are the steps and why is it important?
  2. Review the primers being used and discuss appropriate background information
  3. Calculate the amount of primers, DNA template, and water to add to each tube
  4. Begin preparing for PCR
    1. Clean the lab tables with bleach to detoxify the area and prevent any contamination of DNA/controls being used
    2. Using the calculations collected earlier, begin to set up the positive, negative, and experimental tubes with their respective amounts of primer, water and DNA template (be sure to wear gloves!!!)
      • For the negative control, pipette 1μl of CO1 primer and 11.5μl water into a tube containing 12.5μl 2X Master mix (note this tube will not contain DNA template); label the tube
      • For the positive control, pipette 1μl of CO1 primer, 5μl of DNA template and 6.5μl water into a tube containing 12.5μl 2X Master mix; label the tube
      • For the experimental variable, pipette 1μl CO1 primer, 5μl DNA template and 6.5μl water into a tube containing 12.5μl 2X Master mix; label the tube
    3. Store the tubes in a tube rack, noting the placement and labelling of each of your tubes
    4. Begin making the agarose gel by calculating the mass of agarose needed for a 40ml 1.5% TAE agarose gel; (40ml x 0.015= 0.6g)
    5. Weigh 0.6g of agarose, along with 40ml of TAE buffer and combine into an erlenmeyer flask
    6. Mix the flask and microwave for 1min and 30sec, or until boiling
    7. Place the flask into a heat bath to cool
    8. Remove the flask and gently pour the mixture into a PCR column and allow it to sit
    9. Label the column and store it into the fridge until later use

Results:

Some important data we collected in lab includes…

Component Volume (+) Control Volume (-) Control Volume (Soil DNA Tube)
2X Master mix 12.5ul 12.5ul 12.5ul
DNA Template 0ul 5ul 5ul
Primers 1ul 1ul 1ul
Water 11.5ul 6.5ul 6.5ul
Total Volume 25ul 25ul 25ul

  • The initial concentration of the stock primer is 10uM; the final concentration in our reaction is 0.4uM
  • The concentration of DNA in the (+) control tube is ~10ng/ul and the concentration in the soil DNA tube is ~164ng/ul, although both of these are questionable
  • The forward primer used is 5′ ATGTGAGTTGATTTTATAGAGCAGA 3′
  • The reverse primer is 5′ GGDATACCRTTCATTTT 3′
  • Our (+) control is labeled “P, 8”, our (-) control “N, 8” and our test “E, 8”; we stored these three tubes in to tube rack row A slots 10-12
  • Our gel tray is labeled “group 8, section 21” and was stored in the refrigerator

Although we did not perform PCR today, the conditions we will use for the CO1 primers are as follows:

  1. 94°C for 4min
  2. 5 cycles of denaturation at 94°C for 30sec, annealing at 45°C for 1min and extension at 72°C for 105sec
  3. 35 cycles of denaturation at 94°C for 30sec, annealing at 55°C for 1min and extension at 72°C for 105sec
  4. Hold at 72°C for 10min
    • Store products at 4°C or freeze until gel electrophoresis may be performed

Conclusion

From our extracted DNA we got unexpected results, including negative numbers and odd ratios that did not correspond to the correct curve. This means that our samples, while they do contain DNA, are just contaminated and so we are now taking extra precautions to prevent any further contamination. Since we didn’t actually perform PCR in lab today, we will be performing it next class and begin looking at the amplified sequences and comparing them to known ones. However, today’s lab was a good way to fully prepare for the PCR experiment and to analyze the data we collected last week to see where we may have made error, and therefore where we can improve.

February 23

Lab 7 PCR Amplification of Ludox Extracted DNA 2/22/18

Purpose:

The purpose of todays lab was to start the PCR amplification process using the Cox1 forward and reverse primers. We also set up our agarose gel to complete gel electrophoresis next week.

Procedure:

Start by bleaching your desk in order to make sure it is clean and be sure to wear gloves the whole time

  1. Label each of the tubes containing the  12.5 ul of DNA mastermix either positive, negative or test (soil DNA tube).
  2. In the negative tube use a micropipette to add 0 ul of DNA template, 1 ul of primer, and 11.5 ul of water.
  3. In the positive tube use a micropipette to add 5 ul of DNA template, 1 ul of primer, and 6.5 ul of water.
  4. In the test tube use a micropipette to add 5 ul of DNA template, 1 ul of primer, and 6.5 ul of water.
  5. The total volume of each tube should be 25 ul.
  6. After your solutions have been made, label them with your group number and place them in the thermocycler. Be sure to record which wells your solutions were placed.
  7. Measure out 0.6 g of agarose and add it to 40 ml 1x TAE in a small erlenmeyer flask.
  8. Cover the flask lightly with weighing paper and loose fitting cap.
  9. Heat solution in the microwave on high for one minute or until the solution is clear and boiling.
  10. Remove the flask from the microwave using hot pads and place in cooling bath for 5 minutes.
  11. While the solution is cooling, set up your gel tray and label it using blue tape on the side.
  12. Add 2 ul ethidium bromide to the solution
  13. Place the gel comb inside the tray and slowly poor the cooled solution into the tray
  14. Let it solidify for 25-30 minutes.

Results:

Our three “DNA mastermix” tubes are labeled “2” for group 2 and were placed in A7 (positive tube), A8 (negative tube), and A9 (test tube).

Our gel tray was left out on our table to solidify and a TA will store it for next lab.

Our gel tray is labeled 2/22/18 CC WS MS group 2

Cox1 forward primer 5′- ATGTGAGTTGATTTTATAGAGCAGA-3′

Cox1 reverse primer 5′- GGDATACCRTTCATTTT-3′

here is an organized chart to show the volumes added to each tube

40 mL of 1.5% of TAE is (40)(0.015)=0.6 grams agarose

Conclusion:

In conclusion todays lab was a great learning experience. My group and I were very careful to measure carefully and not contaminate the DNA with our DNA. No mistakes were made during the experiment I learned the difference between the forward and reverse primers. I am excited to process the DNA next week. Future steps include performing gel electrophoresis in order to determine DNA Sequences and identify the cells we found.


February 23

Lab 7 PCR/Cox 1 Primers and Gel setup 2/22/18

Objective:

In this lab we will set up and make our PCR and Cox1 primers and make our gel agarose apparatus which we will use in the next lab.

Procedures:

Primer setup

  1. Positive control
    1. Add 12.5 ul 2x Master mix
    2. Add 5 ul of DNA template, Paramecium for control group.
    3. Add 1 ul of primers
    4. Add 6.5 ul water
    5. Total should be 25 ul
  2. Negative control
    1. Add 12.5 ul 2x Master mix
    2. Add 0 ul of DNA template
    3. Add 1 ul of primers
    4. Add 11.5 ul water
    5. Total should be 25 ul
  3. Soil DNA
    1. Add 12.5 ul 2x Master mix
    2. Add 5 ul of DNA template, pulled out from soil.
    3. Add 1 ul of primers
    4. Add 6.5 ul water
    5. Total should be 25 ul

Gel Agarose

  1. Making 1.5% agarose gel
    1. Add 40 ml 1xTAE to .6 g agarose in small Erlenmeyer flask
    2. Cover lightly with weighing paper and loose fitting cap
    3. Heat until solution is clear and small bubbles come off the bottom
    4. Allow to col until flask is comfortable to hold.
    5. Have TA add 2 ul ethidium bromide, swirl gently.
  2. Set up gel electrophoresis box
  3. Pour agarose gel smoothly into prepared mold with fewest amount a bubbles. Allow to solidify for 20-30 minutes.

Data

Component Volume Positive Control Volume Negative Control Volume Soil DNA tube
2X Master Mix 12.5 ul 12.5 ul 12.5 ul
DNA Template 5ul 0 ul 5ul
Primers 1 ul 1 ul 1 ul
Water 6.5 ul 11.5 ul 6.5 ul
Total Volume 25 ul 25 ul 25 ul

We labeled our tubes with the initials PIN and on spots B4, B5, and B6.

The mass of our agarose is .6 g

Conclusion:

During this lab, we discussed the method of doing PCR amplification and Gel electrophoresis. We have thus far completed the gel and are prepared to do a run with it very soon. Setting up these important steps bring us closer to our goal of discovering a new species using the metabarcoding method.

Further Steps:

Next lab we will be running the lab and observe DNA under a UV light.

February 23

Lab 7: Beginning the PCR Process with Cox1 Primer and Starting Gel Electrophoresis 02/22/18

Lab #7

Beginning the PCR Process with Cox1 Primer and Starting Gel Electrophoresis

02/22/18


Pre-lab notes: 

  • remember that the primers we are using are Cox1 and 18Sv4
  • create a table in notebook to record the amount of primer, water, and DNA in each tube for the PCR process
  •  note the sequence of primers, denaturation temperature and time, annealing temperature and time, elongation temperature and time, and the number of cycles used in each of the articles we referenced for this portion of the experiment
  • In the PCR process a double strand results from each template strand that is replicated in each cycle. We are doing 30 cycles so knowing this 2^30 will result in 1,073,741,824 copies of our DNA

Purpose: Using the DNA that was captured from the last part of our protocol, prepare the DNA for the PCR by adding the appropriate primer, 2x taq mix, and water. Create a positive and negative control for the experiment to look at how the results differ and make changes and form hypotheses based off of these differences. Form your gel for the gel electrophoresis for next week’s lab.

Procedure: 

A.) PCR Tubes

  1. begin by bleaching your work area, putting on gloves, and briefly vortexing all three of the taq mix PCR tubes and labeling them: one with a plus sign for the positive control, one with a negative sign for the negative control, and one with an S for the Soil extraction.
  2. For the positive control tube and the soil extraction tube, add 5 micro liters of DNA to the tube along with 1 microliter of Cox1 primer and 6.5 micro liters of water.
  3. To the negative control tube add 1 microliter of Cox1 primer and 11.5 micro liters of water to the tube.
  4. Place all three tubes in the class rack and make sure to record the location of your tubes so you know which ones are yours for the next lab of gel electrophoresis. Our tubes are labeled as #3 for group 3.

B.) Gel Frame for electrophoresis

  1. In a 1L Erlenmeyer flask add 40 mL of 1XTAE (tris acetate EDTA) stock solution.
  2. To the TAE add 0.6g of agarose to make a 1.5% agarose gel.
  3. Swirl the solution softly and cover the lip of the erlenmeyer flask with a thin piece of weigh paper and screw the flask lid onto the flask while the paper is over the flask.
  4. Place the flask in the microwave and heat the solution on power 7 for 1 minute and 20 seconds. Remove the flask from the microwave and swirl to mix the contents.
  5. Place the warmed flask in a cooling bath for 5-6 minutes to bring back down to a cool temperature.
  6. To the cooled flask, add 2 micro liters of ethidium bromide and swirl gently again.
  7. After having prepared your gel mold and checked the edges for cracks, pour the agarose gel solution into the mold evenly, and softly shake/tap the mold to remove any bubbles that may have gotten caught underneath the gel solution.
  8. Allow the poured gel to sit for about 30 minutes in order to set.
  9. Remove the comb from the set gel and cover the gel in 1x TAE buffer solution to prevent the gel from drying out until the next lab.
  10. Store the gel and buffer at 4 degrees celsius until its use. Clean up your work area and fill out QTM 7.

Observations:


when the gel was setting, it turned from a completely clear solution to an almost pale blue solution until it turned a cloudy white as it became a full gel and was fully set.

Conclusion: I am excited to move on in the gel electrophoresis process and am hopeful that our results will yield information that we can use in classifying ciliates more closely. I think a big source of error for our experiment thus far is the amount of extraneous material in our samples like silt and sand and dirt, although we performed multiple steps to try to only extract DNA from the soil sample, the other materials seem to be muddying our results. Hopefully this issue won’t prevent us from being able to classify the ciliates in our sample.

February 23

Lab 7: PCR and Gel Electrophoresis (02/22/2018)

Lab 7: PCR and Gel Electrophoresis (22 February 2018)

Purpose

The objective of this lab was to introduce us to the two procedures of Polymer Chain Reaction (PCR) and Gel Electrophoresis. We also prepared our 2 controls and our soil sample DNA for PCR and also prepared the gel for gel electrophoresis.

Procedure

PCR

  1. Draw out an outline of PCR.
  2. Determine the volumes of 2x Master Mix, DNA template, primers and water to add to our positive control, negative control and soil DNA tube for PCR as a class.
  3. Clean the lab table with bleach and wear gloves as it is important to carry out the preparation of the tubes for PCR under an environment that is as clean as possible.
  4. Label the 3 tubes, each containing 12.5µl of 2x Master Mix, to differentiate the negative control tube, positive control tube, and the soil DNA tube.
  5. Use a p10 micropipette to transfer 5µl of DNA template to the positive control tube.
  6. Use a p10 micropipette to transfer 5µl of soil DNA to the soil DNA tube. Ensure that no DNA template is added to the negative control tube.
  7. Using a p10 micropipette, transfer 1µl of Cox1 primers into all three tubes.
  8. Micropipette 11.5µl of water into the negative control tube and 6.5µl of water each into the positive control tube and the soil DNA tube. Therefore, each of the 3 tubes should contain a total of 25µl of solution.

Gel Electrophoresis – Gel Preparation

  1. On a piece of weighing paper on an electronic balance, weigh out 0.6g of agarose gel powder.
  2. Transfer the weighed gel powder into an Erlenmeyer flask.
  3. Measure out 40ml of 1xTAE using a measuring cylinder.
  4. Add the measured 1xTAE to the Erlenmeyer flask containing agarose powder.
  5. Cap the Erlenmeyer flask.
  6. Heat the flask in a microwave for 120s at power 7 so that the agarose gel powder dissolves completely in the solution.
  7. Place the flask in a water bath for 5 minutes.
  8. In the meantime, assemble the gel plate and label the plate with the group number.
  9. Once 5 minutes is over, remove the flask from the water bath. Carefully pour the gel into the assembled gel plate.
  10. Leave the gel to cool and solidify.

Results

Component Volume (Negative Control) Volume (Positive Control) Volume (Soil DNA tube)
2x Master mix 12.5 µl 12.5 µl 12.5 µl
DNA Template 0 5 µl 5 µl
Primers 1 µl 1 µl 1 µl
Water 11.5 µl 6.5 µl 6.5 µl
Total Volume 25 µl 25 µl 25 µl

We labeled our negative control, positive control and soil DNA tubes as “5 -“, “5 +” and “5 DNA” respectively. The tubes were placed in wells B1, B2 and B3 together with the tubes belonging to our classmates.

Our gel plate was labeled as “LSKG#5”.

Conclusion

It was very exciting to have been able to try out PCR and Gel Electrophoresis for the first time in lab today. I look forward to analyzing our gel and hope that the PCR was successful.

February 23

PCR amplification

February 22, 2018

Purpose: The purpose of lab today was to set up the PCR reaction and to prepare the aragose gel for the electrophoresis. The PCR tubes will be made up of 2x mastermix, the DNA template, water, and the cox 1 forward and reverse primers. The aragose gel that was made up of 1xTAE and aragose.

Protocol

PCR preparation

  1. to prevent contaminating the DNA, we cleaned our lab bench with 10% bleach
  2. we then used gloves throughout the lab
  3. using the new pipette tips, we prepared three different tubes for PCR: a positive control, negative control, and our soil DNA tube
  4. we labeled our negative control tube with an N on the top and an 8 on both sides
  5. the tube had pre-measured 12.5 ul of the 2x master mix that includes the taq DNA polymerase, dNTPs, and other components needed for PCR. To this we pipetted 1 ul of primer, 11.5 ul of water for a total volume of 25 ul.
  6. we labeled our positive control tube with a P on top and an 8 on both sides
  7. to the tube that had pre measured 12.5 ul of 2x mastermix, we added 5 ul of the DNA template that was from the culture, 1 ul of primers, and 6.5 ul of water for a total of 25 ul.
  8. we labeled our soil DNA tube with an E on top and an 8 on both sides
  9. to the tube that had pre measured 12.5 ul of 2x master mix, we added 5 ul of the DNA that was extracted from the soil sample, 1 ul of primers, and 6.5 ul of water for a total volume of 25 ul.
  10. once the tubes were prepared with the correct proportions, we placed them in the rack in spots A10, A11, and A12.
  11. the rack of tubes will be placed in a thermocycler for annealing, denaturation, and extension

aragose gel preparation

  1. we weighed out 0.6g of aragose and added it to a small Erlenmeyer flask
  2. to the flask we added 40 ml of 1xTAE to make a 1.5% concentration of aragose gel
  3. we then covered the flask with a Kimwipe, placed the cap on lightly and swirled it to mix
  4. we then heated the Erlenmeyer flask for 1 minute and 30 seconds, when the microwaving was complete the solution was boiling
  5. we then cooled the aragose gel mix for about 5 minutes on ice
  6. after the cooling was complete, 2 ul of ethidium bromide was added to the flask and we swirled it to completely incorporate
  7. we then poured the aragose gel into the mold
  8. we labeled our mold with a piece of tape “group 8 sec. 21”
  9. the mold will be kept in a fridge to allow the gel to firm

Data & Observations

initial concentration of primer in the stock tube – 0.4 uM

final concentration of primer in the stock tube – 2ul

concentration of DNA

  • in negative control – 0
  • in positive control – 10 ng/ul
  • in soil DNA tube – 161 ng/ul (this value is questionable)

mass of aragose gel used – 0.6 g

tube labels

  • positive control- 8 on both sides and P on top
  • negative control- 8 on both sides and N on top
  • DNA sample- 8 on both sides and C on top
  • the tubes were stored in the rack that will go into the thermocycler

gel mold label- “group 8 sec. 21”

  • will bw stored in fridge to form


component negative control positive control Soil DNA tube
2x master mix 125 ul 12.5 ul 12.5 ul
DNA template 0 ul 5 ul 5 ul
primers 1 ul 1 ul 1 ul
water 11.5 ul 6.5 ul 6.5 ul
Total volume 25 ul 25 ul 25 ul

conclusion

Today’s lab was mainly about preparing for PCR and gel electrophoresis. The tubes that we prepared for PCR will be cycled in a thermocycler in 4 different stages to amplify the DNA. The gel that was prepared in the mold will harden and in the next lab we will remove the comb from the mold and inject our DNA into the slots, careful not to rip the slots. Then we will preform the gel electrophoresis by applying 100 volts to the sample and observing our DNA in comparison to the DNA ladder to determine the size of the DNA fragments.